Quick onboard
Deployment
Data Modeling
Connecting
Migration
Query
Operations and Maintenance
Common Maintenance
Partition
Backup and Restore
Expansion
Mirroring
Resource Management
Security
Monitoring
Performance Tuning
Troubleshooting
Reference Guide
Tool guide
Data type
Storage Engine
Executor
Stream
DR (Disaster Recovery)
Configuration
Index
Extension
SQL Reference
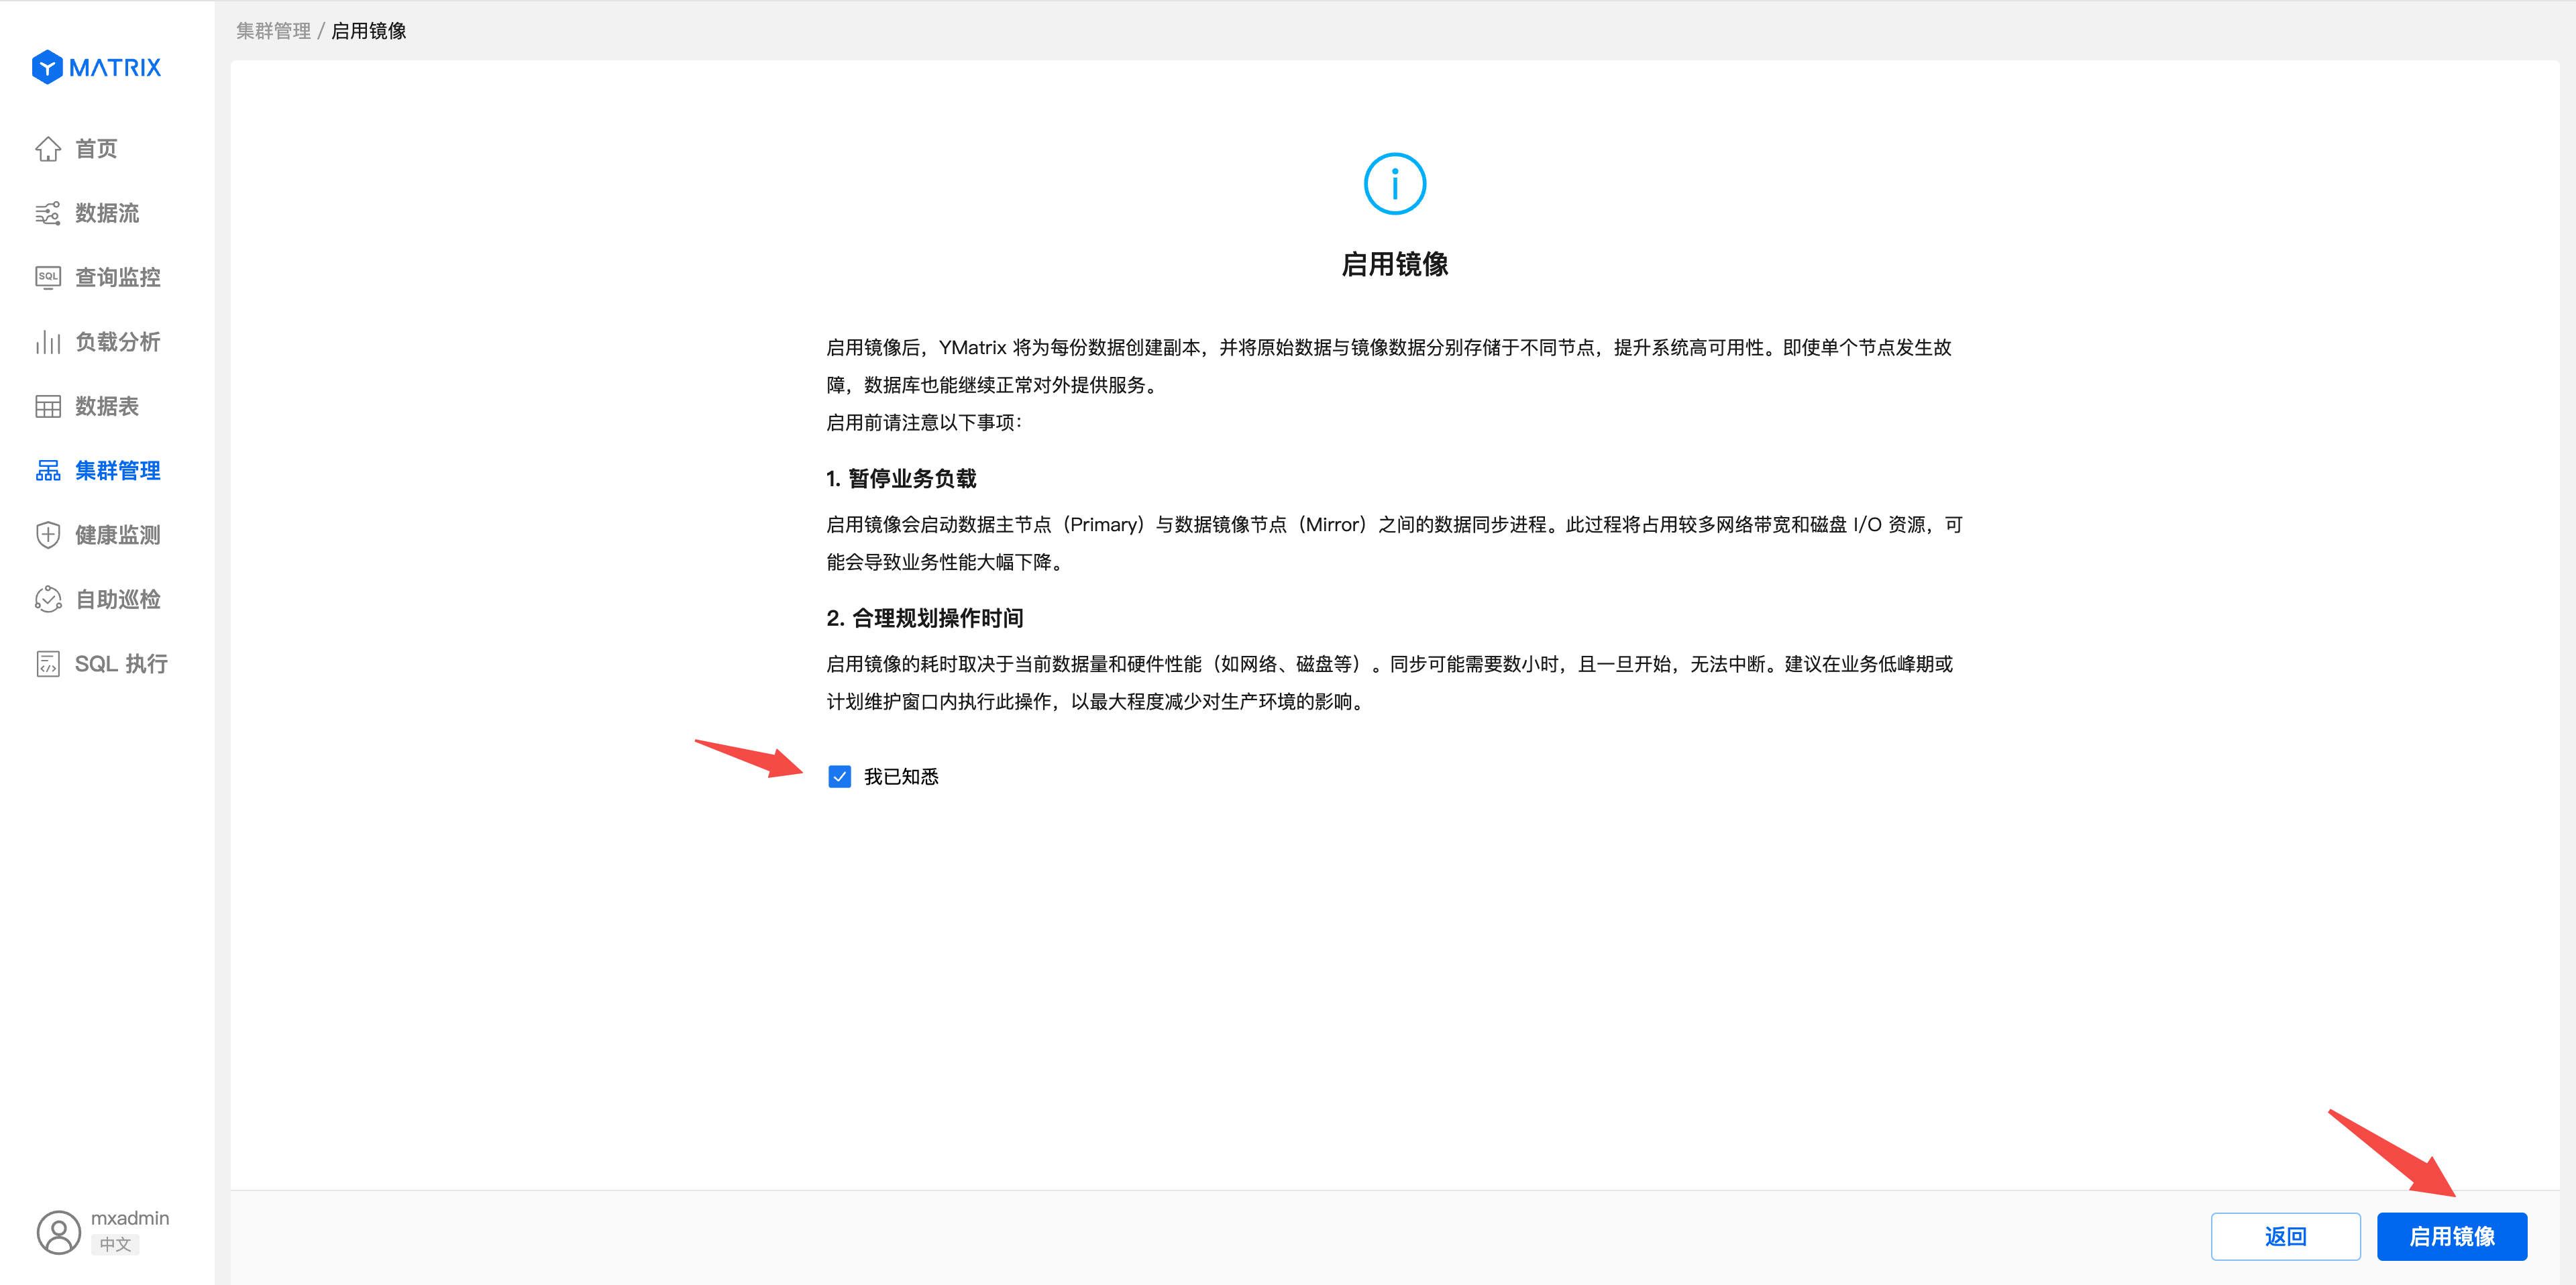
Notes!
It must be done on the premise that the database deployment is completed and the mirror is not enabled.
Log in to the UI and open the Cluster Management page. Click the "Operation" button in the upper right corner of the page, select "Enable Mirroring" to enter the homepage of Enable Mirroring.

Notes!
The Start Mirror button does not display when the cluster already has a mirror instance.
After carefully reading the text instructions, confirming that you want to continue to enable mirroring, click "I know", then click the "Enable Mirror" button to start entering the mirroring process.
Displays the topological information of the current physical machine cluster, including blank machines. A blank machine refers to a machine added when installing and deploying a database, but does not allocate a data node instance. After confirming that, click "Next".

Shows the mirror node topology graph of the default schedule distribution.

Click "Advanced Operations" to select the "Custom Mirror" distribution to display the mirror node configuration file of the current default distribution.
 The configuration file is in CSV format, with a total of four columns, namely the Content ID, host name, port number and data directory of the mirror node.
 Modify the configuration, click the "OK" button, regenerate the plan, and preview the mirror distribution topology map of the custom configuration.
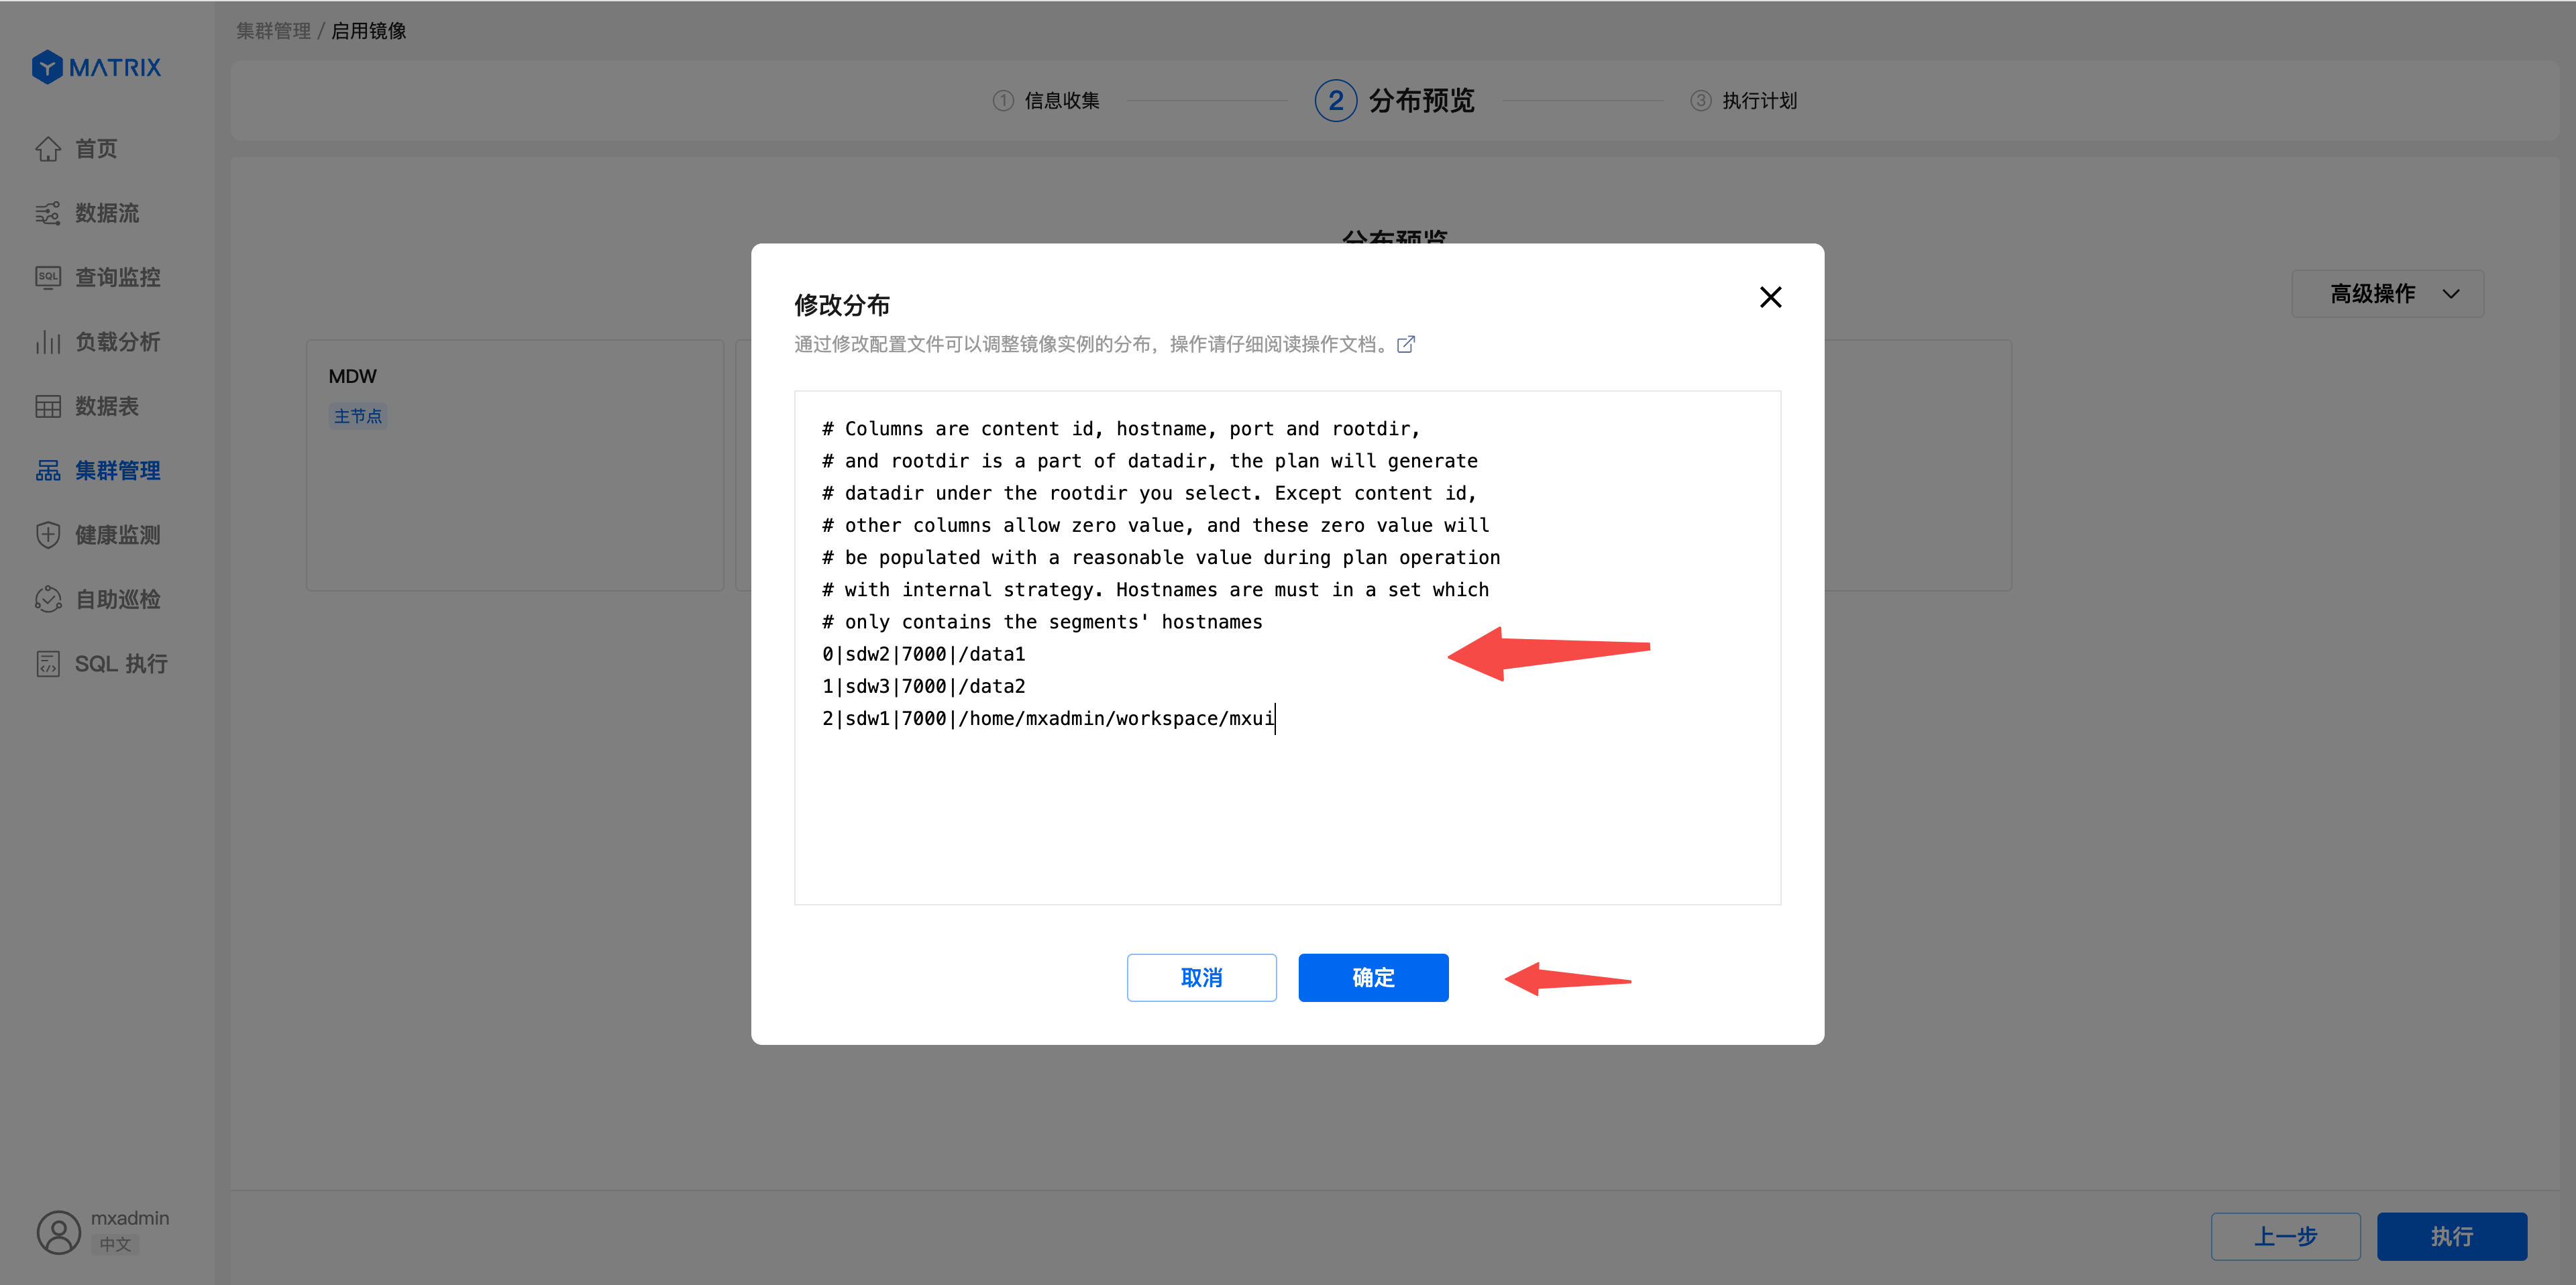

After adjusting the image distribution, click the "Execute" button to start executing the currently added image plan.

 Execution of the plan may take a long time, and you can leave the Add Mirror page to use other functions. During departure, an execution progress banner appears at the top of the page.
Click "Details" to return to the Add Mirror Execution page.
Execution of the plan may take a long time, and you can leave the Add Mirror page to use other functions. During departure, an execution progress banner appears at the top of the page.
Click "Details" to return to the Add Mirror Execution page.

 After the addition image is successfully executed, click the "Finish" button to end adding the image.
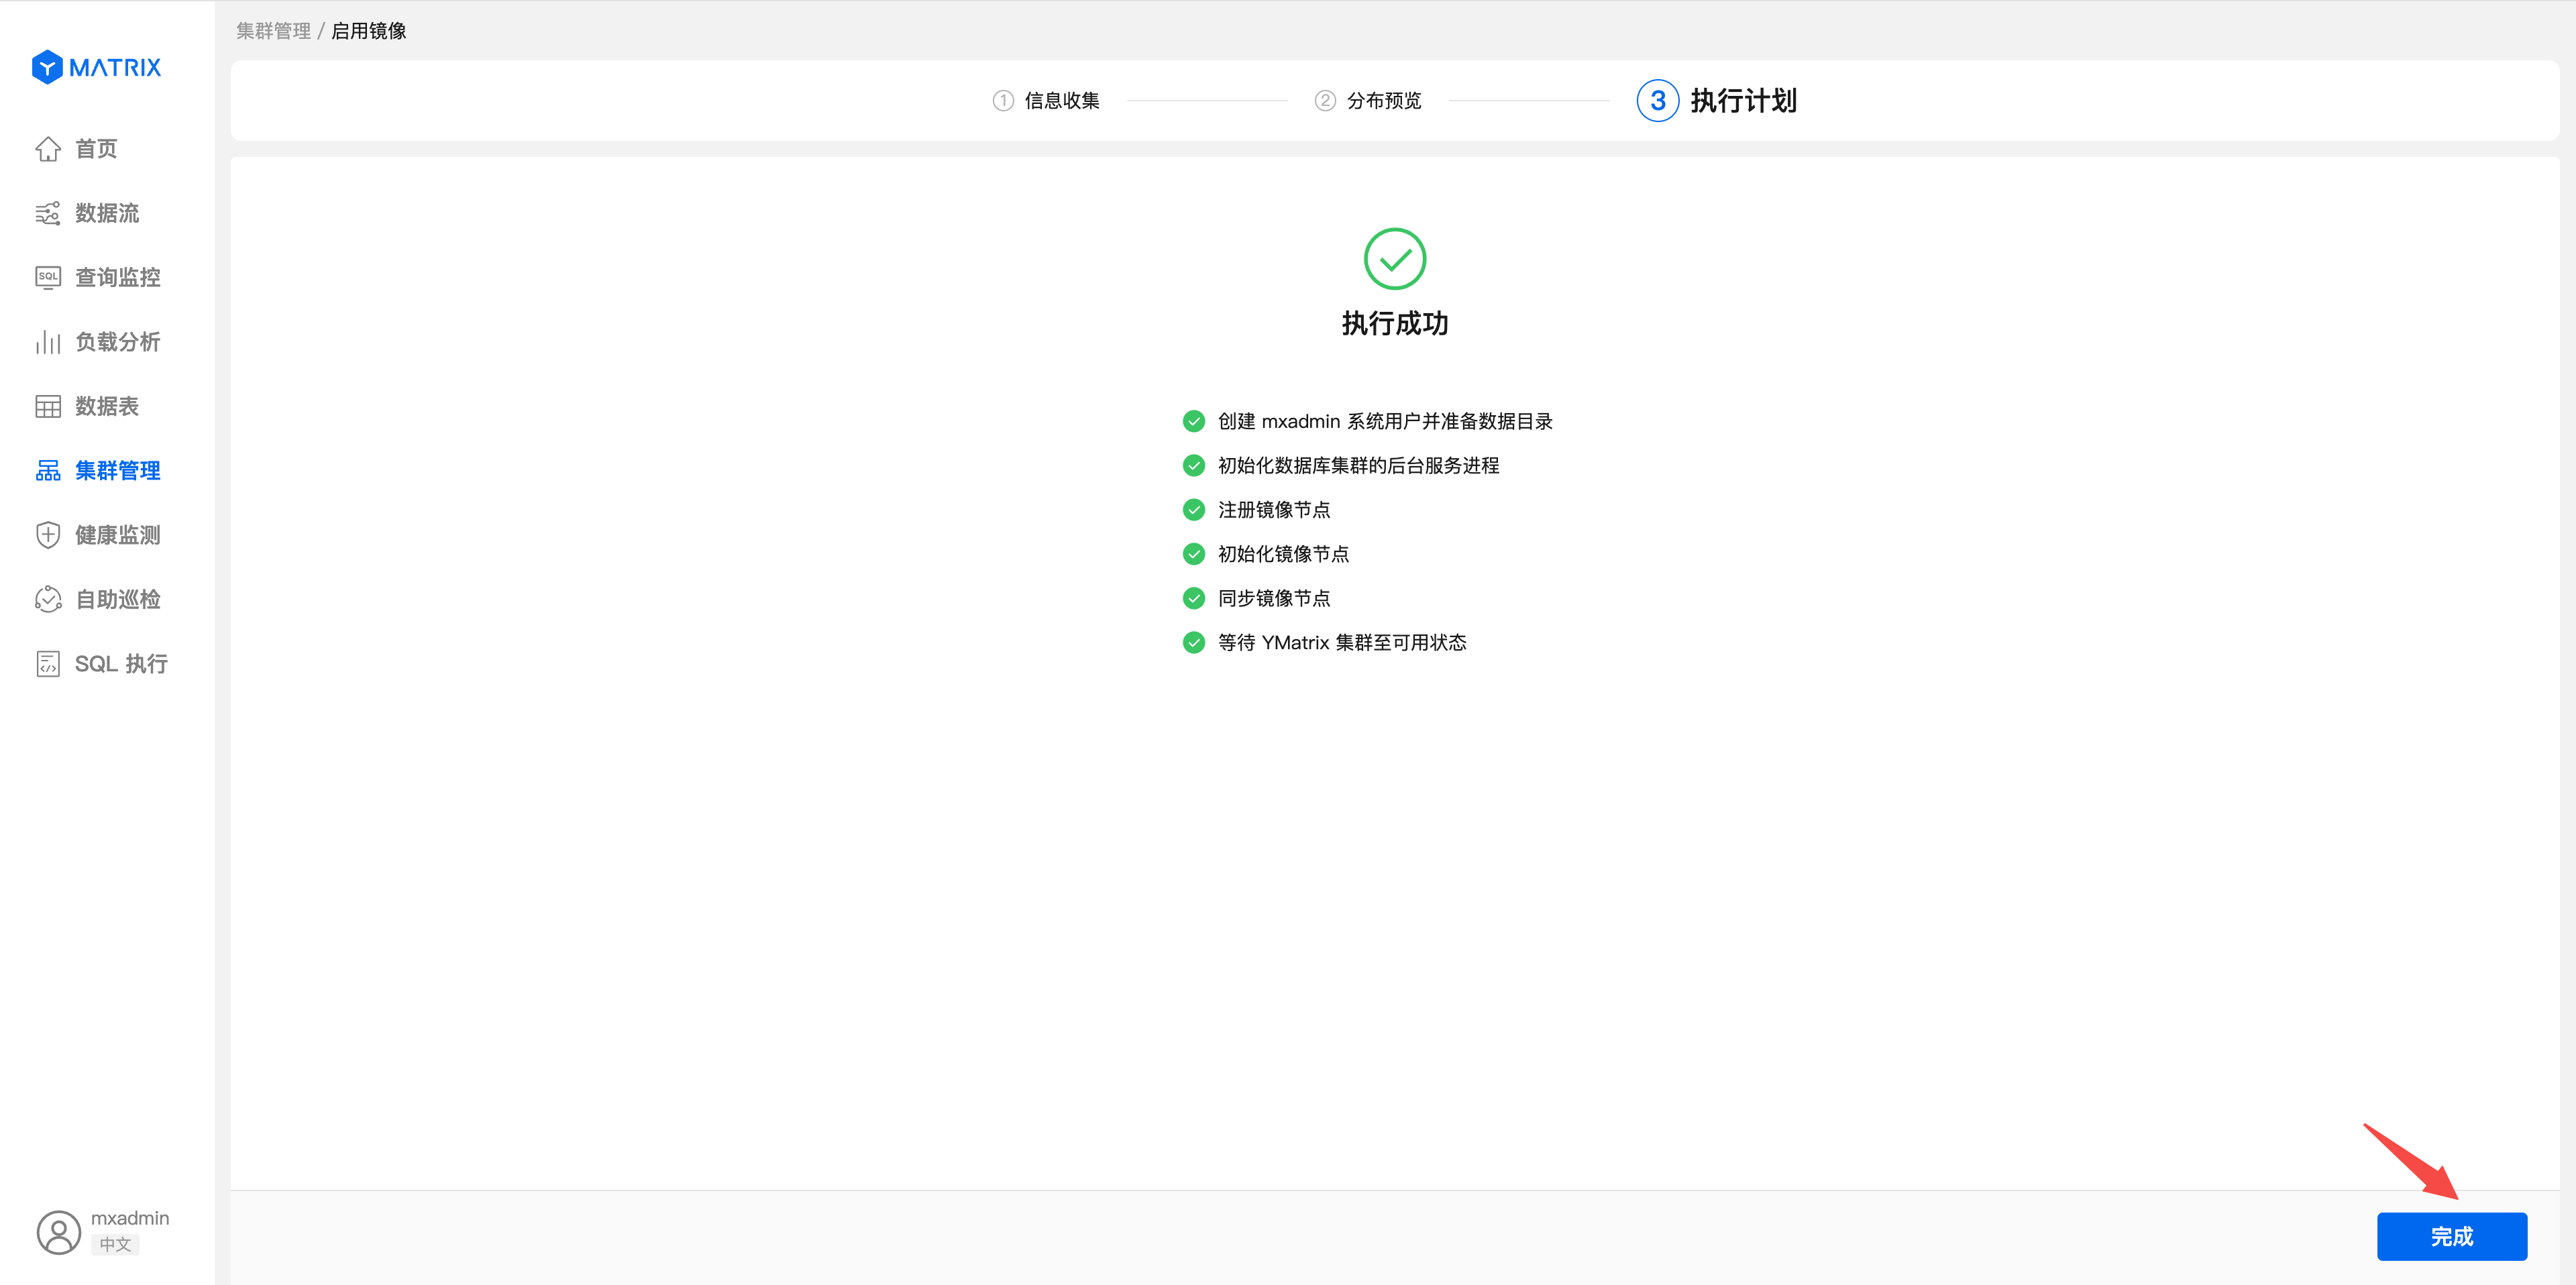
Open the "Cluster Management" page and select "Instance View" to see the newly added mirror node topology map in the cluster topology.

If you need to use the
mxaddmirrorstool to start the mirror, you can refer to [Tool Guide] (/doc/latest/tools/mxaddmirrors) for operation.