Quick onboard
Deployment
Data Modeling
Connecting
Migration
Query
Operations and Maintenance
Common Maintenance
Partition
Backup and Restore
Expansion
Mirroring
Resource Management
Security
Monitoring
Performance Tuning
Troubleshooting
Reference Guide
Tool guide
Data type
Storage Engine
Executor
Stream
DR (Disaster Recovery)
Configuration
Index
Extension
SQL Reference
Asymmetric deployment is designed to provide a deployment method for enterprise users with resource constrained and highly available needs or with specific business scenario needs.
Before performing database deployment, the deployment preparation steps such as installation preparation, database package installation, etc. can be completed according to the cluster deployment steps under different systems.
For the installation of operating systems such as CentOS 7 and RedHat 7, click here; for the deployment steps of CentOS 8 and RedHat 8, please click here; For Ubuntu 20.04 deployment steps, please click here.
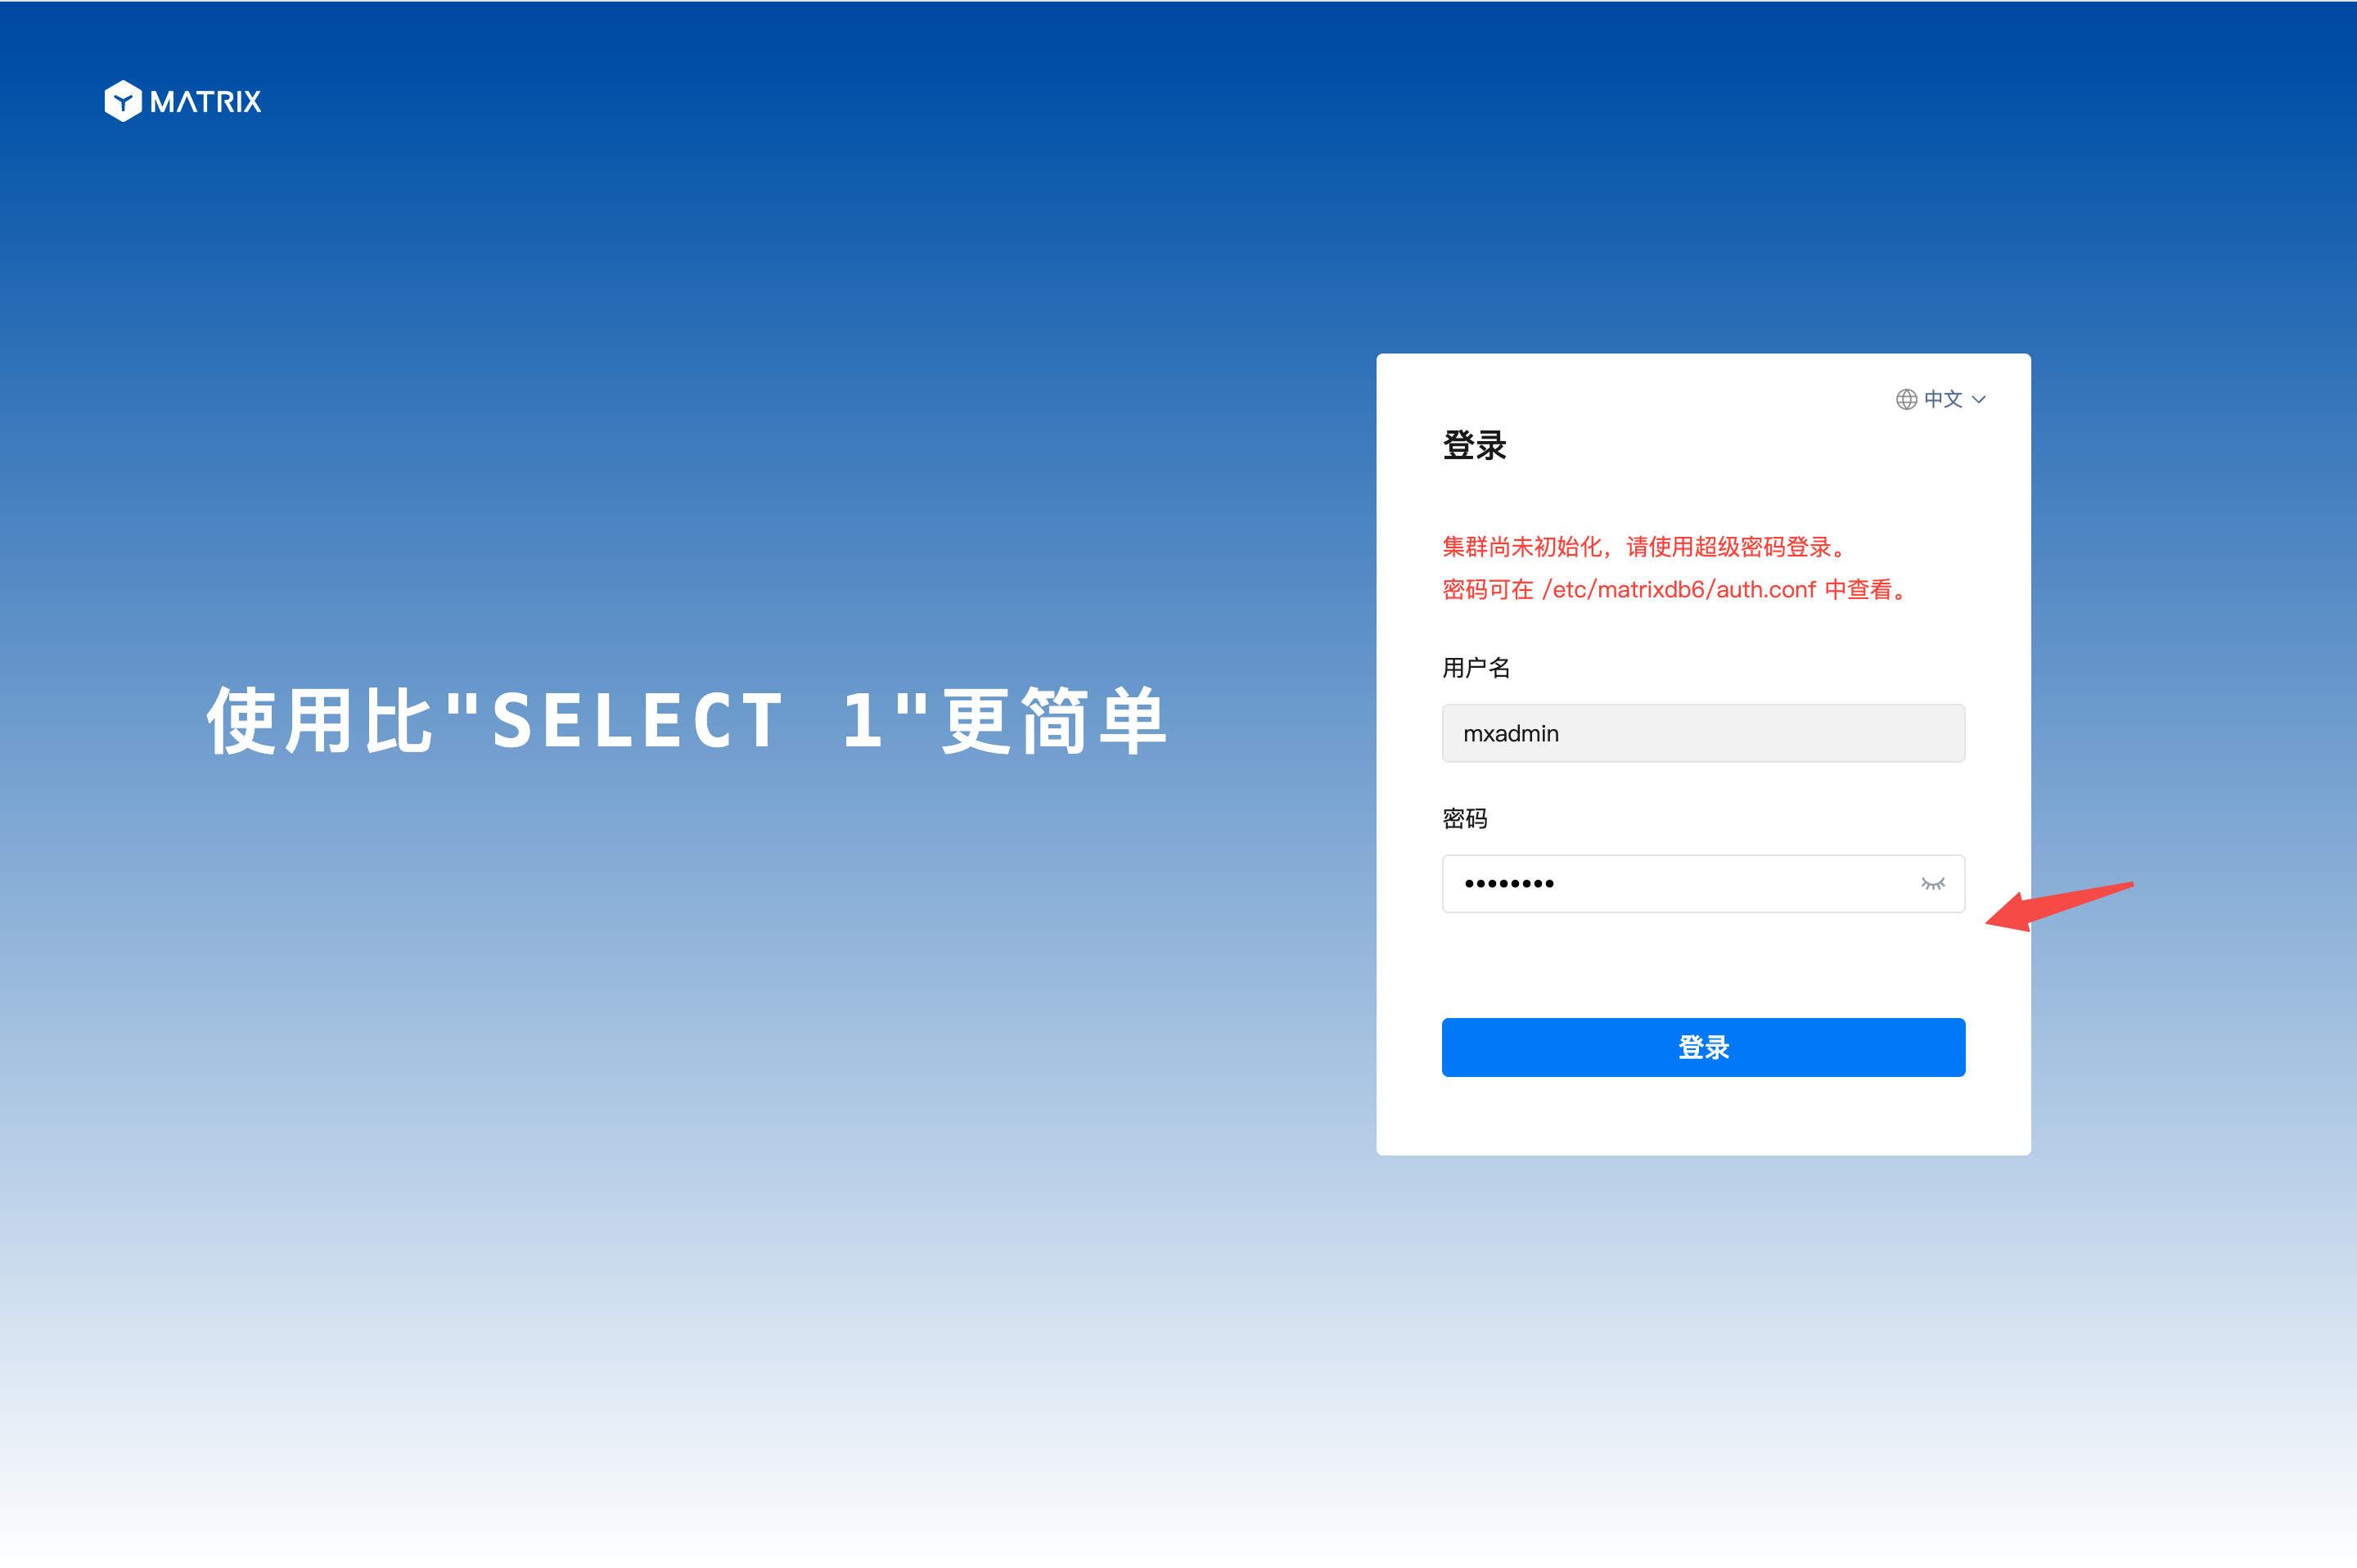
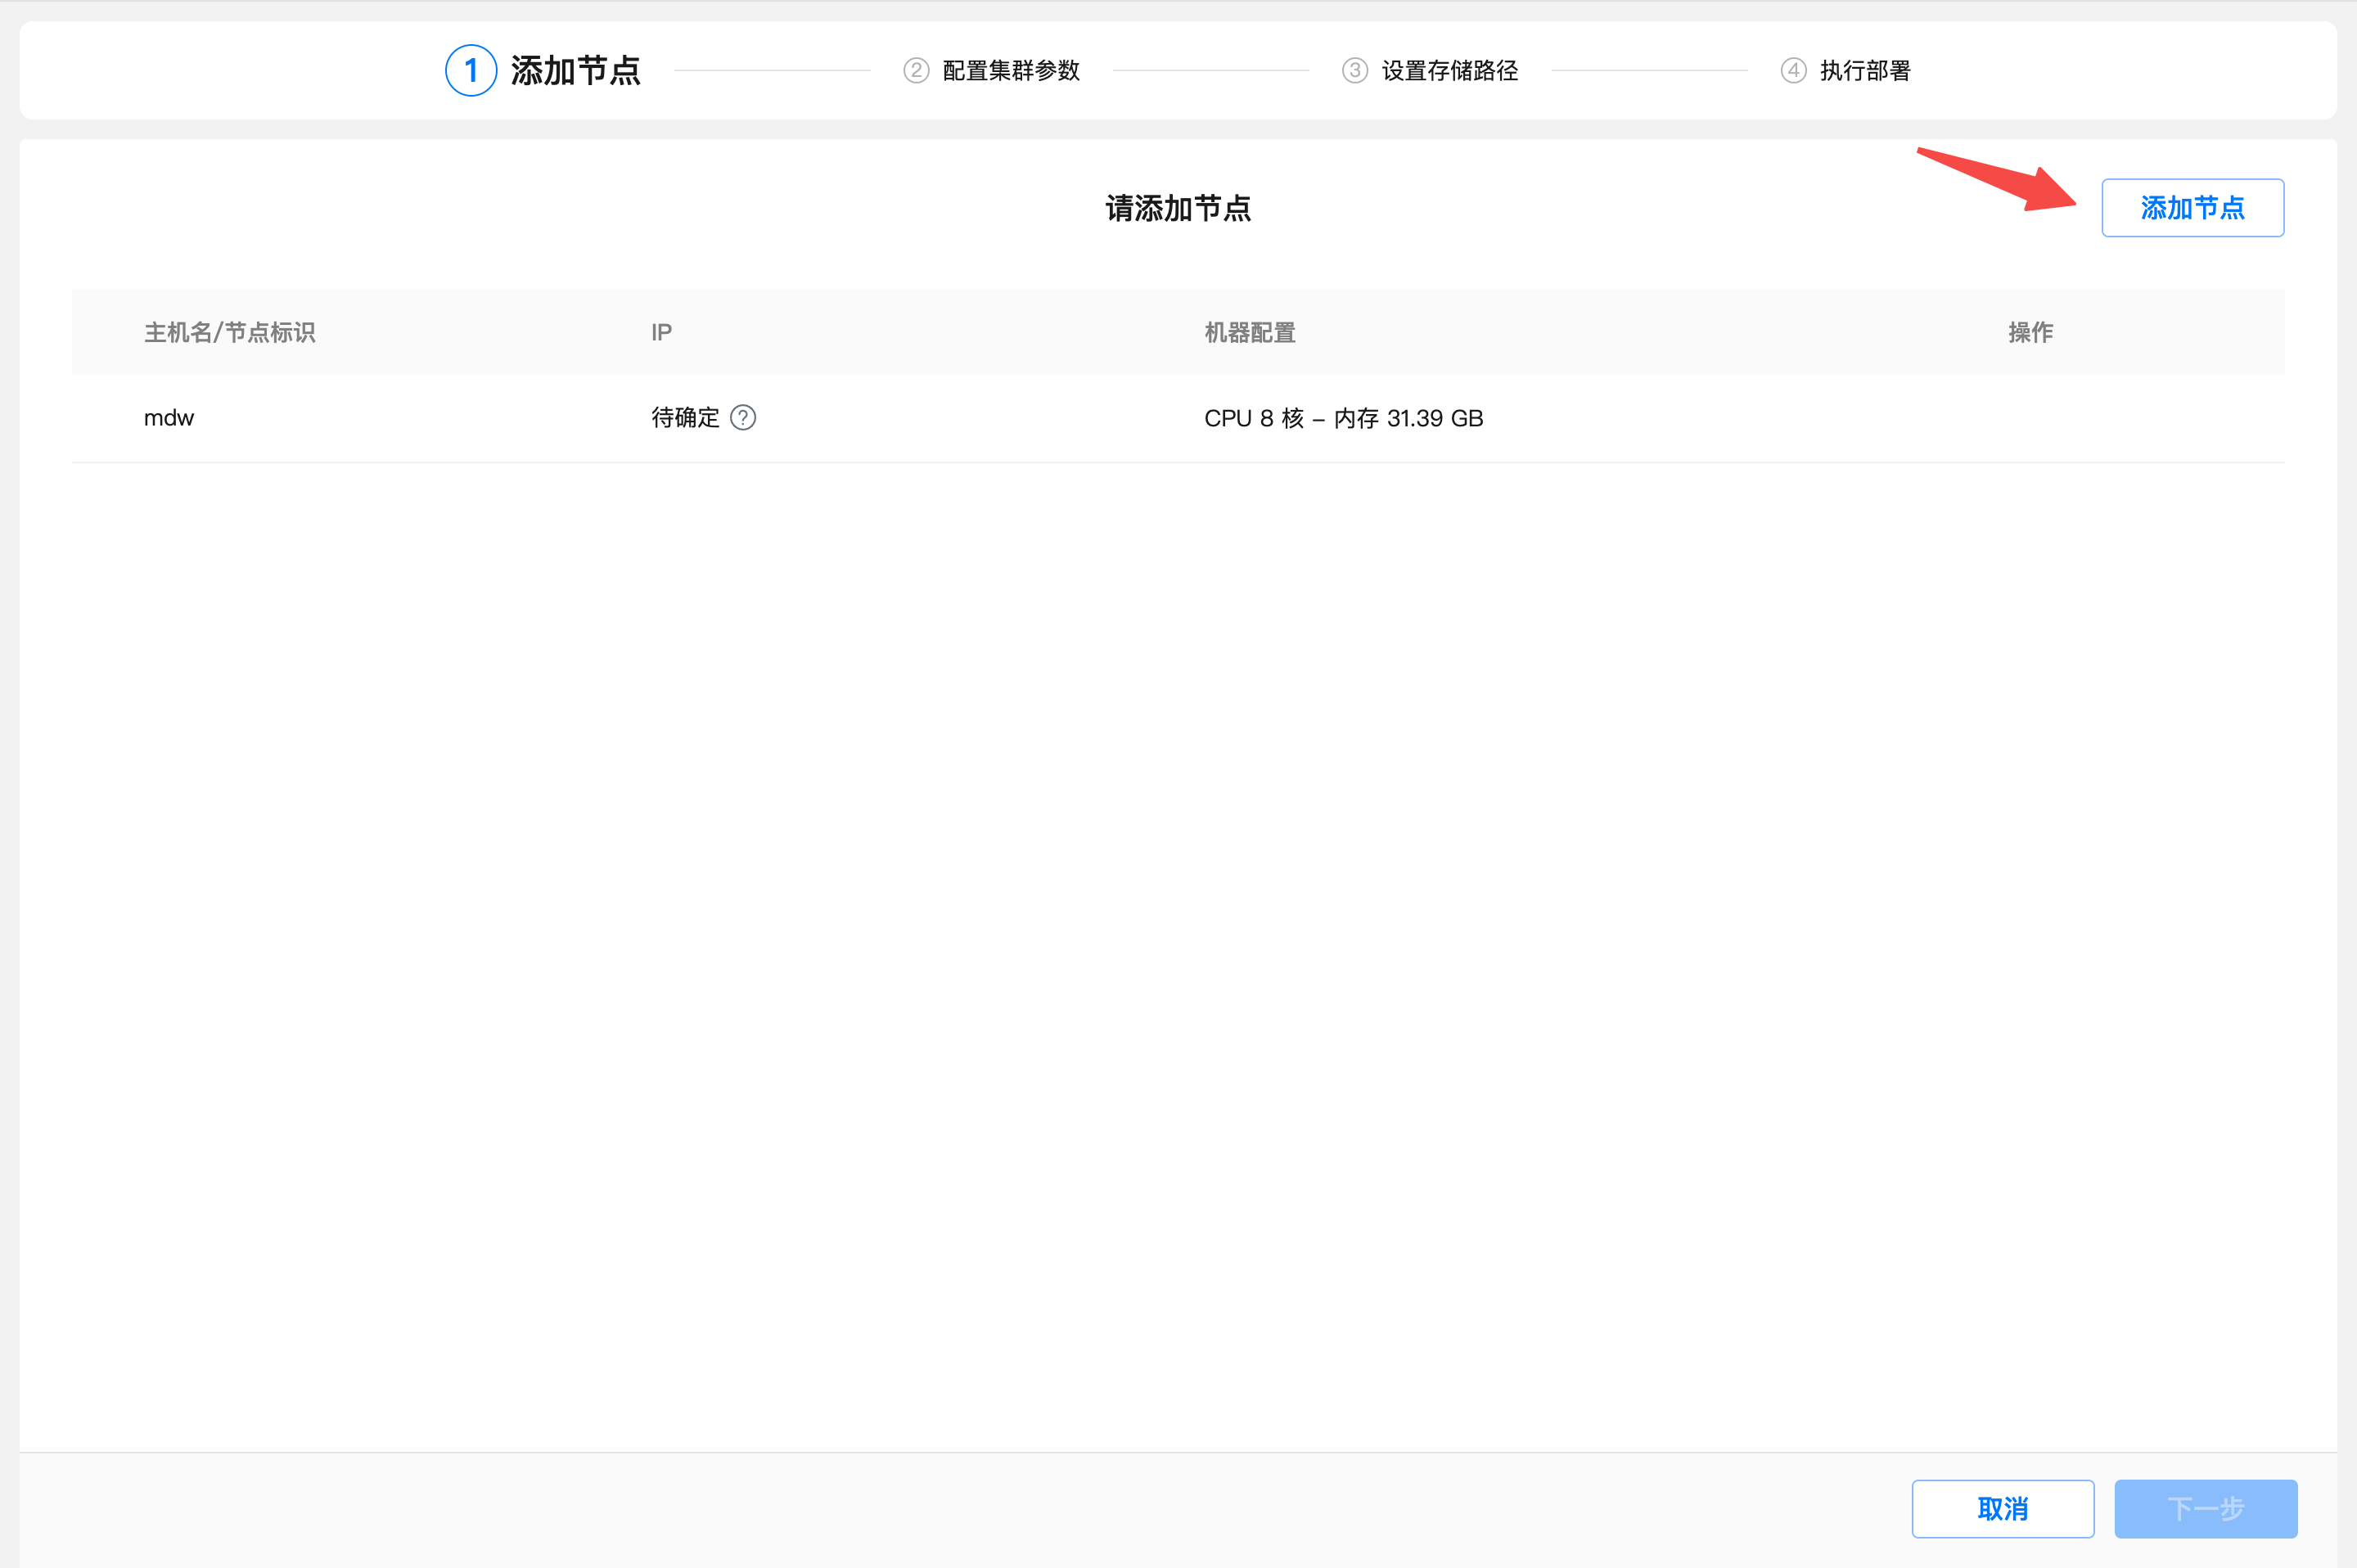
When the cluster is not deployed, use your browser to access the following graphical installation wizard URL, where the server with the IP address will become the master of your cluster (mdw in this example):
http://<IP>:8240/On the first page of the installation wizard, you need to fill in the super user password and use the sudo more /etc/matrixdb6/auth.conf command to view it.
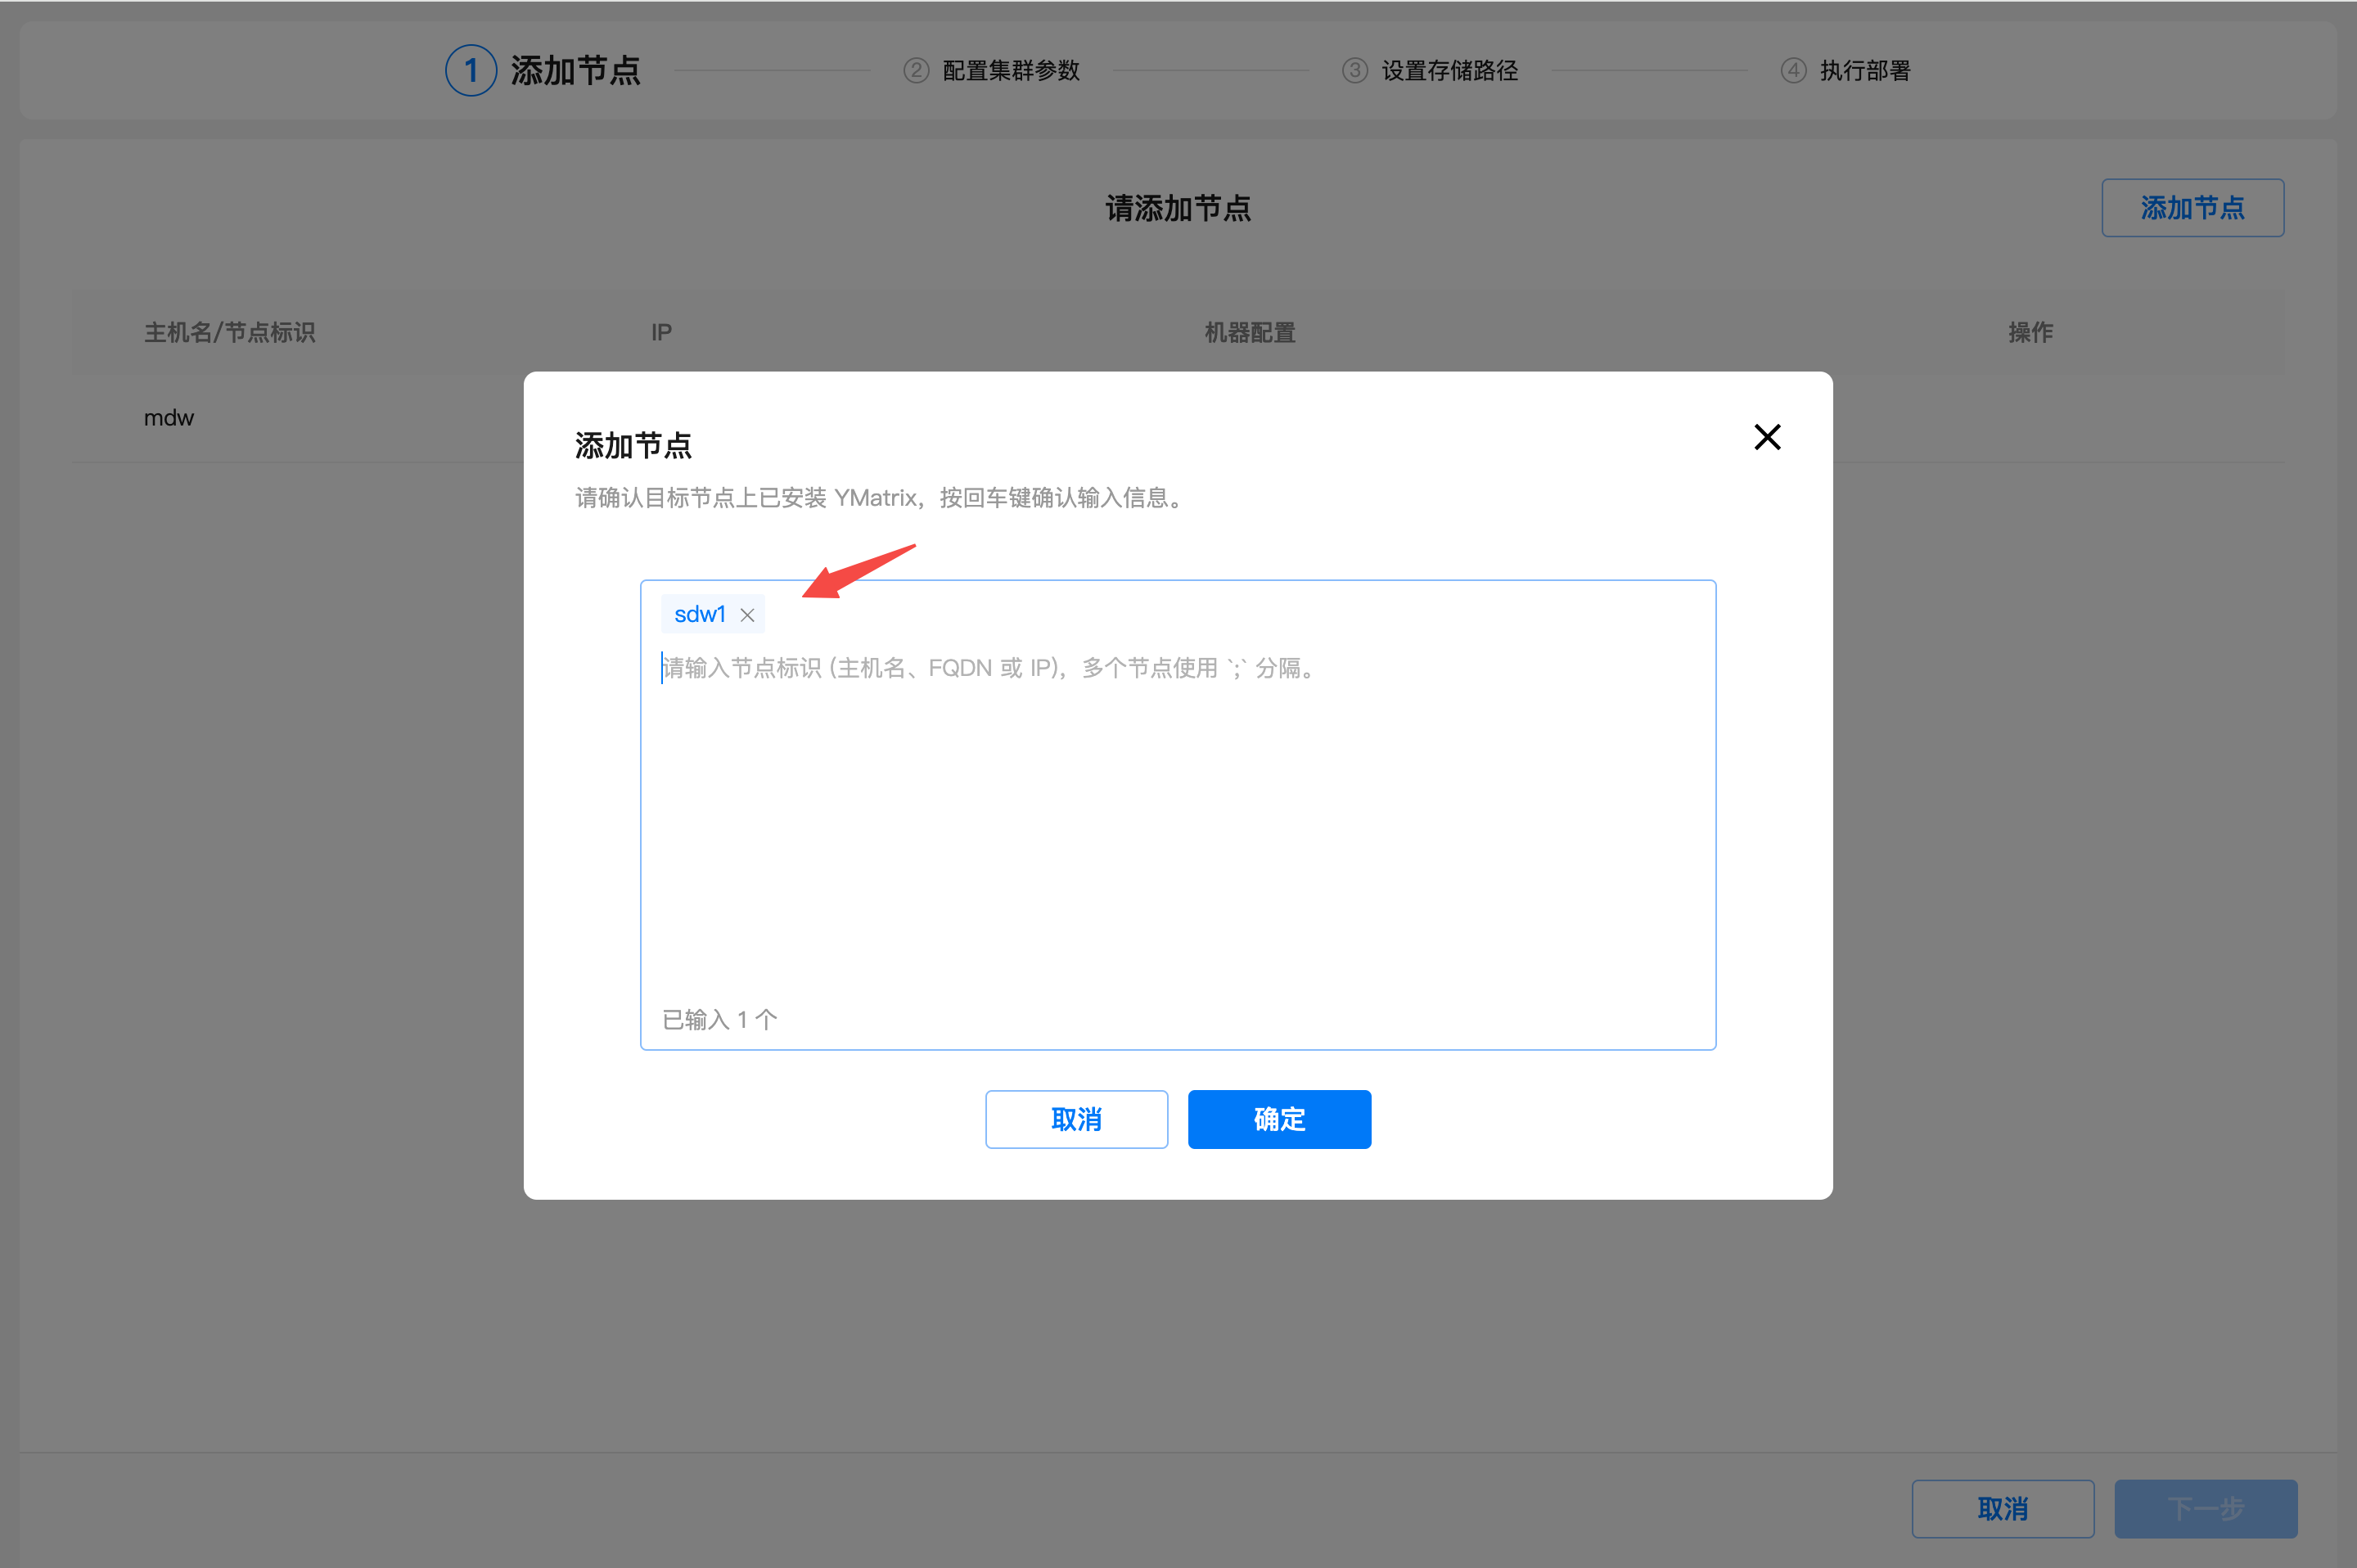
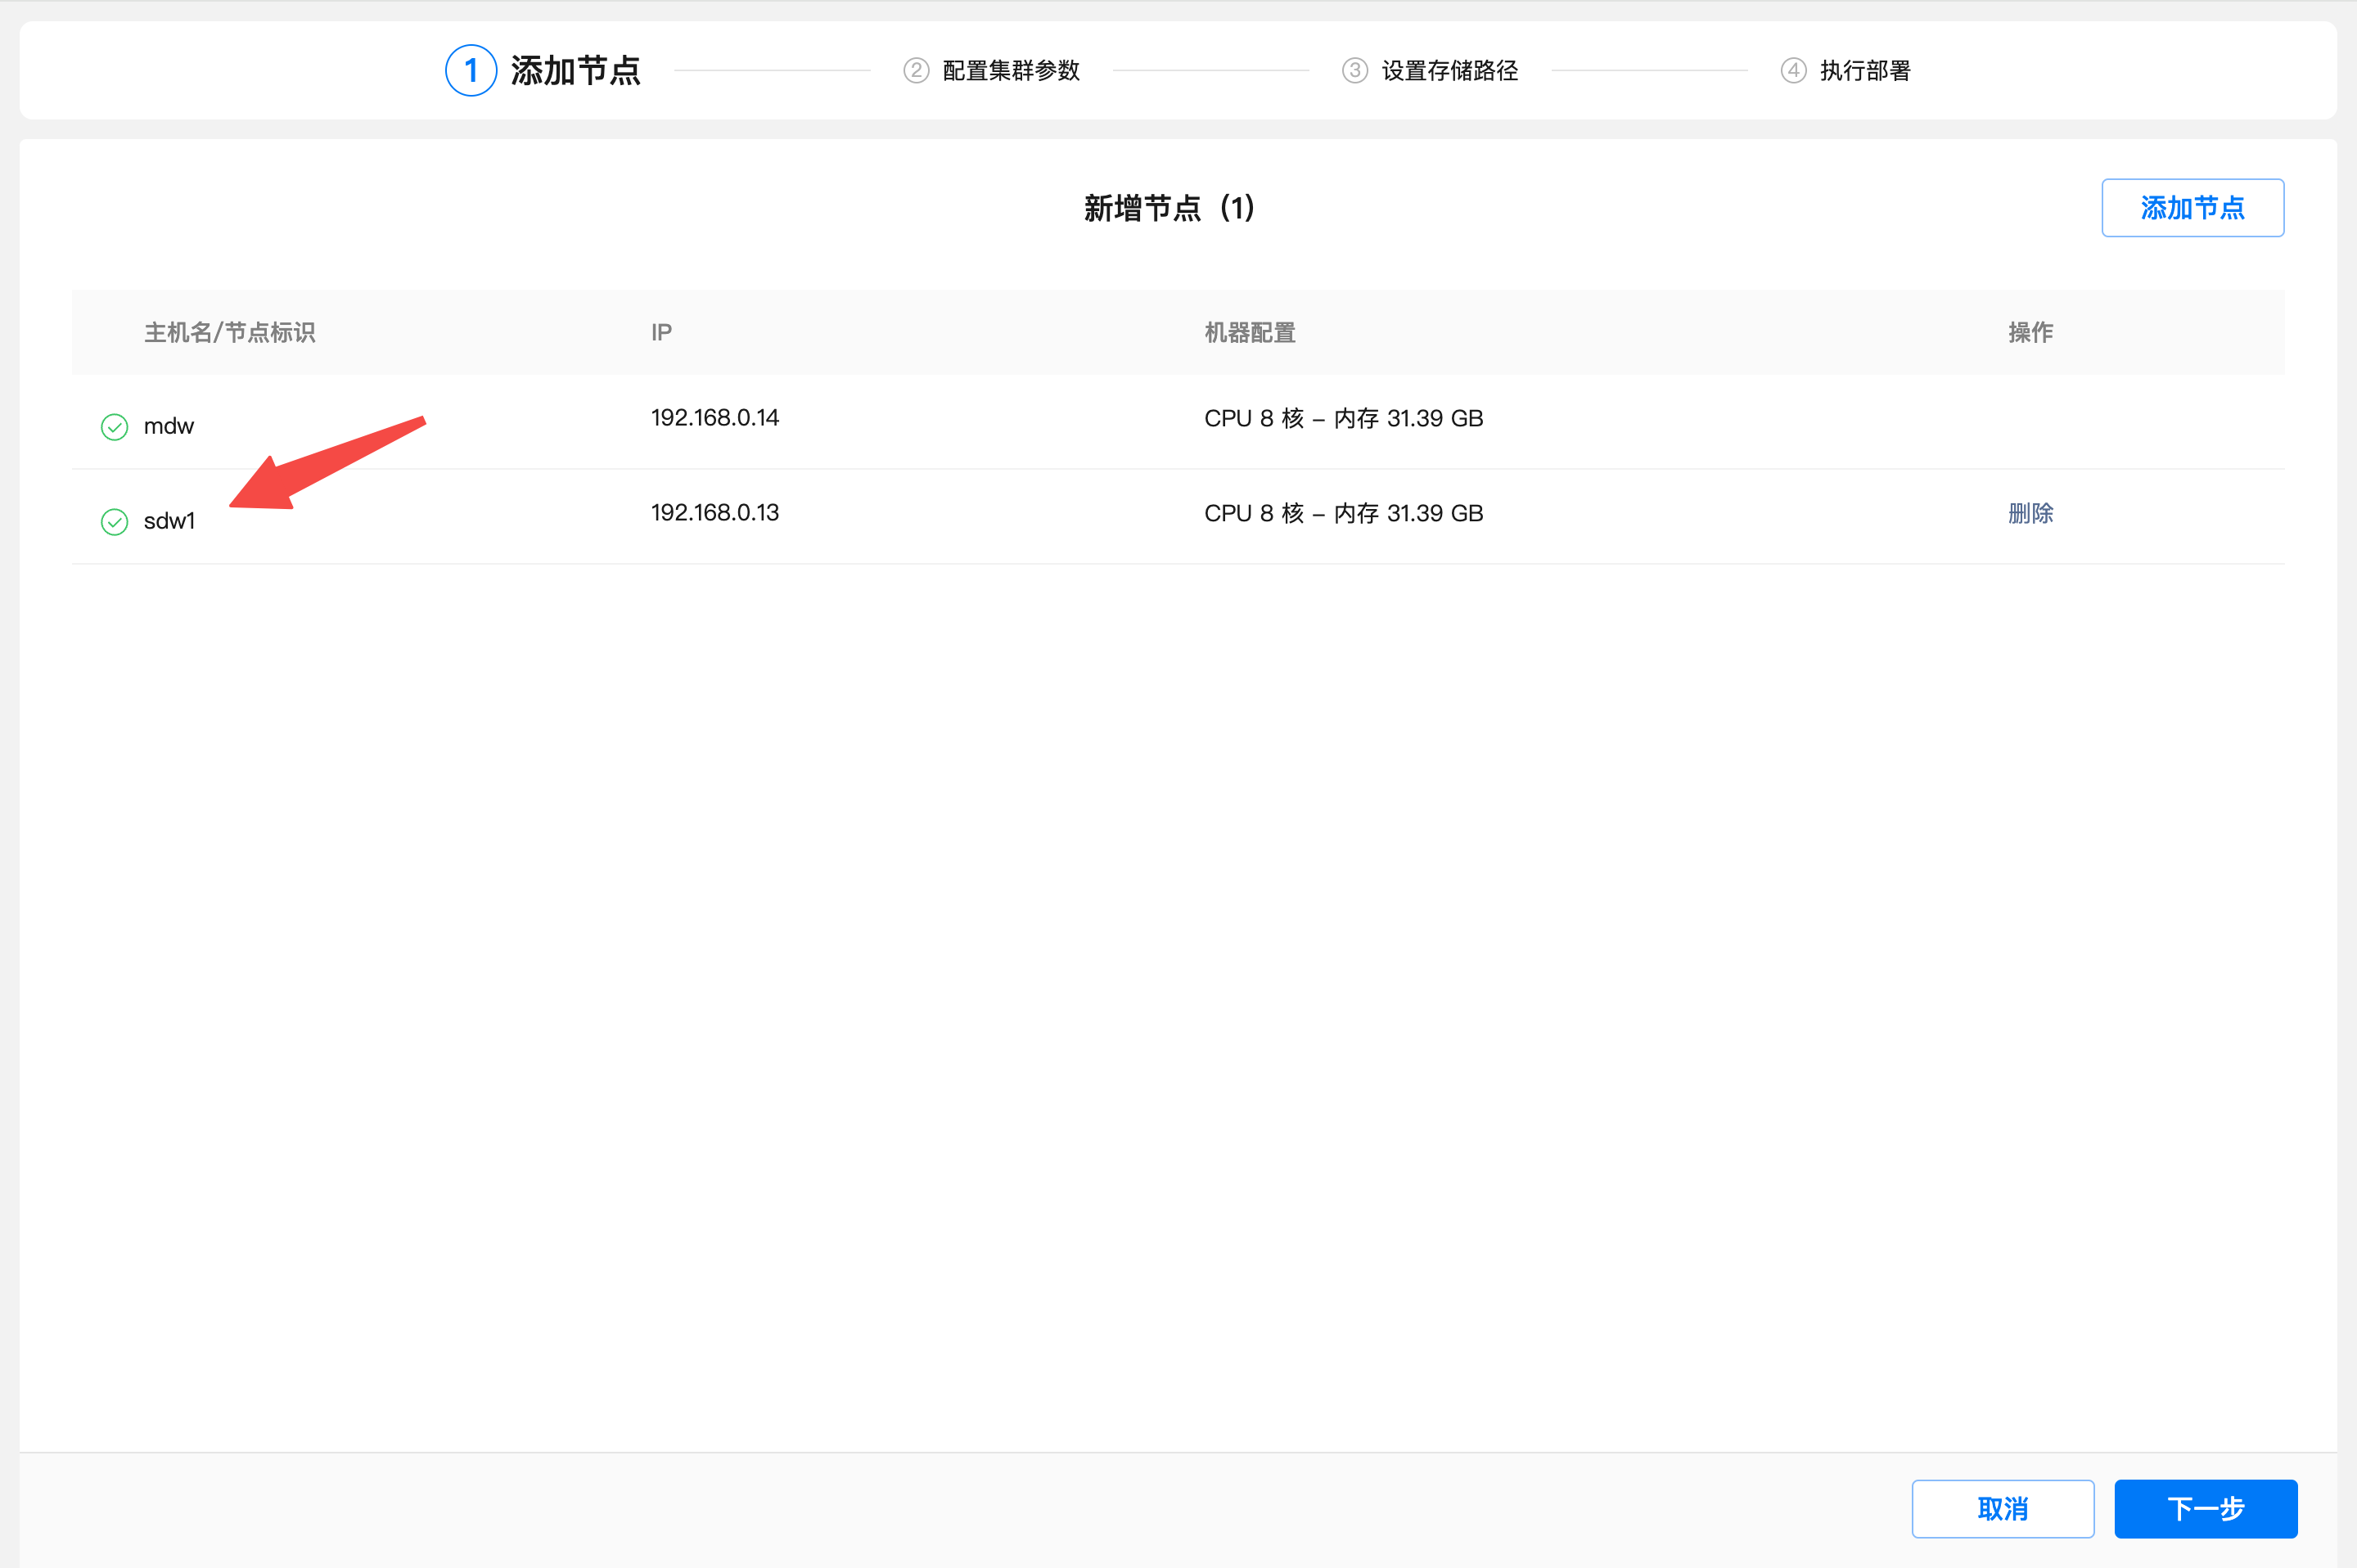
In this example, we add a node - sdw1.
Enter the IP address or hostname or FQDN of sdw1 in the text box and click OK.
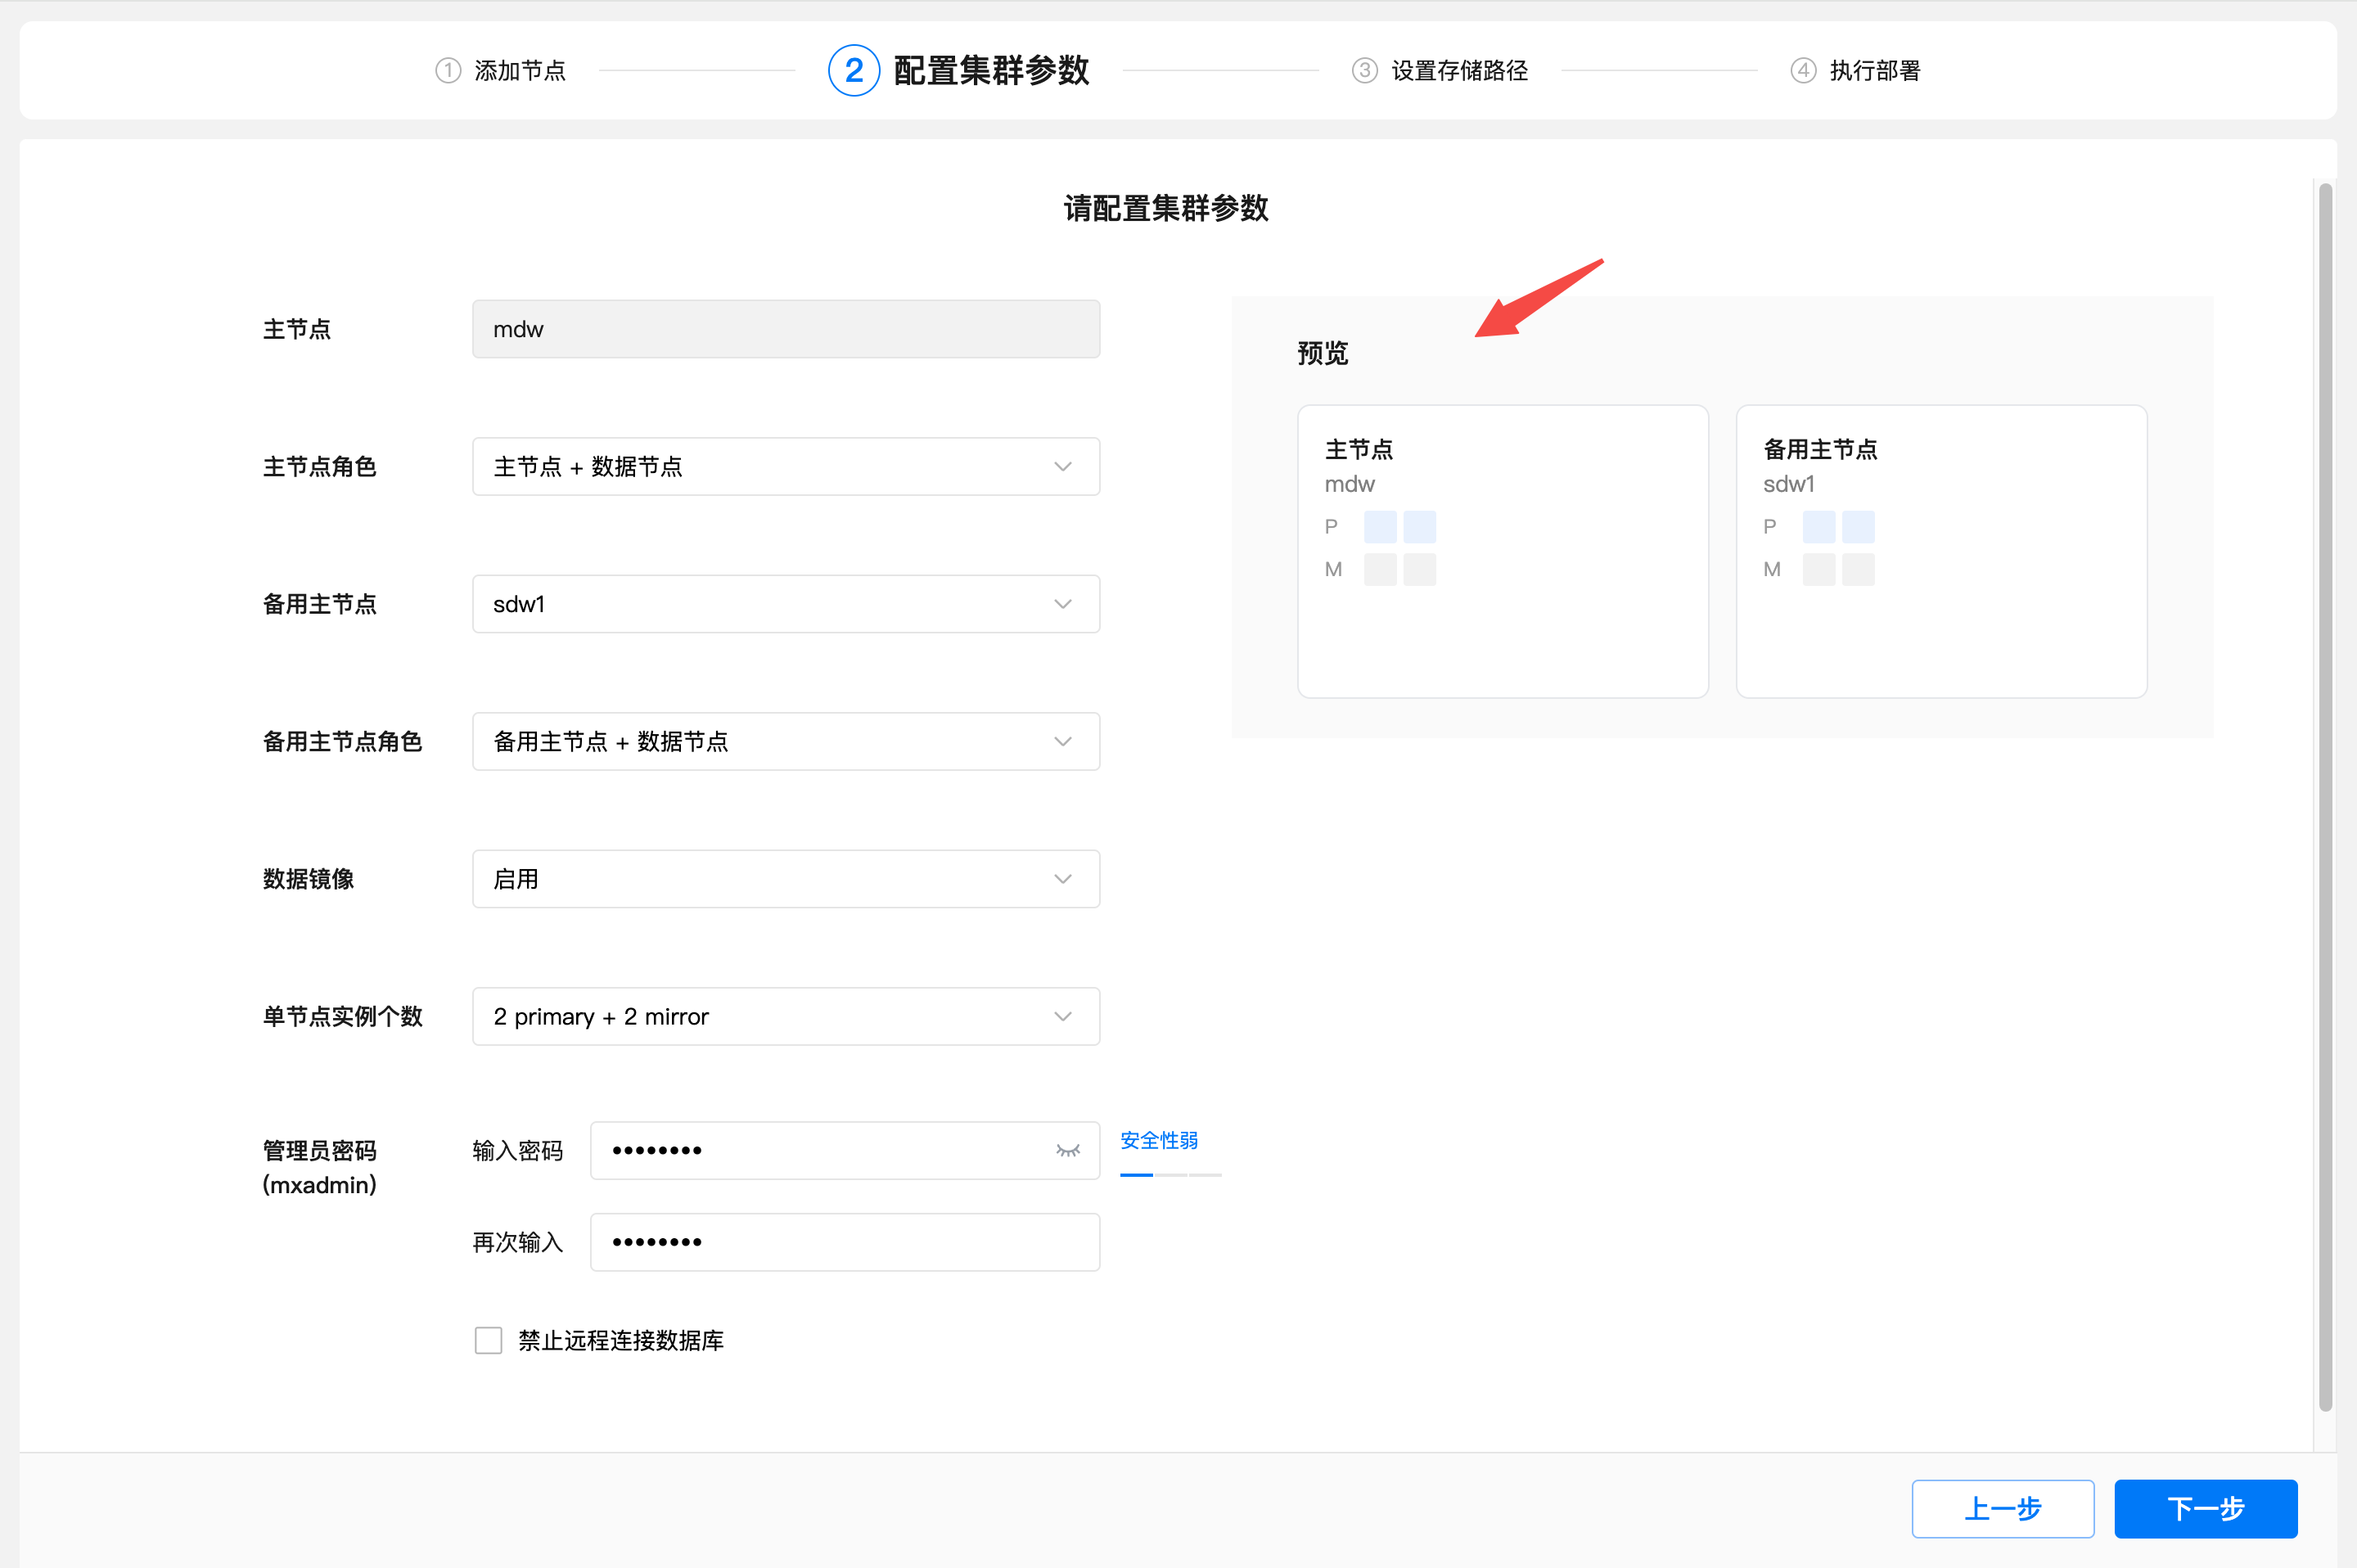
Configure cluster parameters, here sdw1 is set as a standby node, and enable data mirroring, and set the number of single node instances to 2 primary + 2 mirror. The configuration here will be adjusted according to the balanced deployment (standard cluster configuration method).
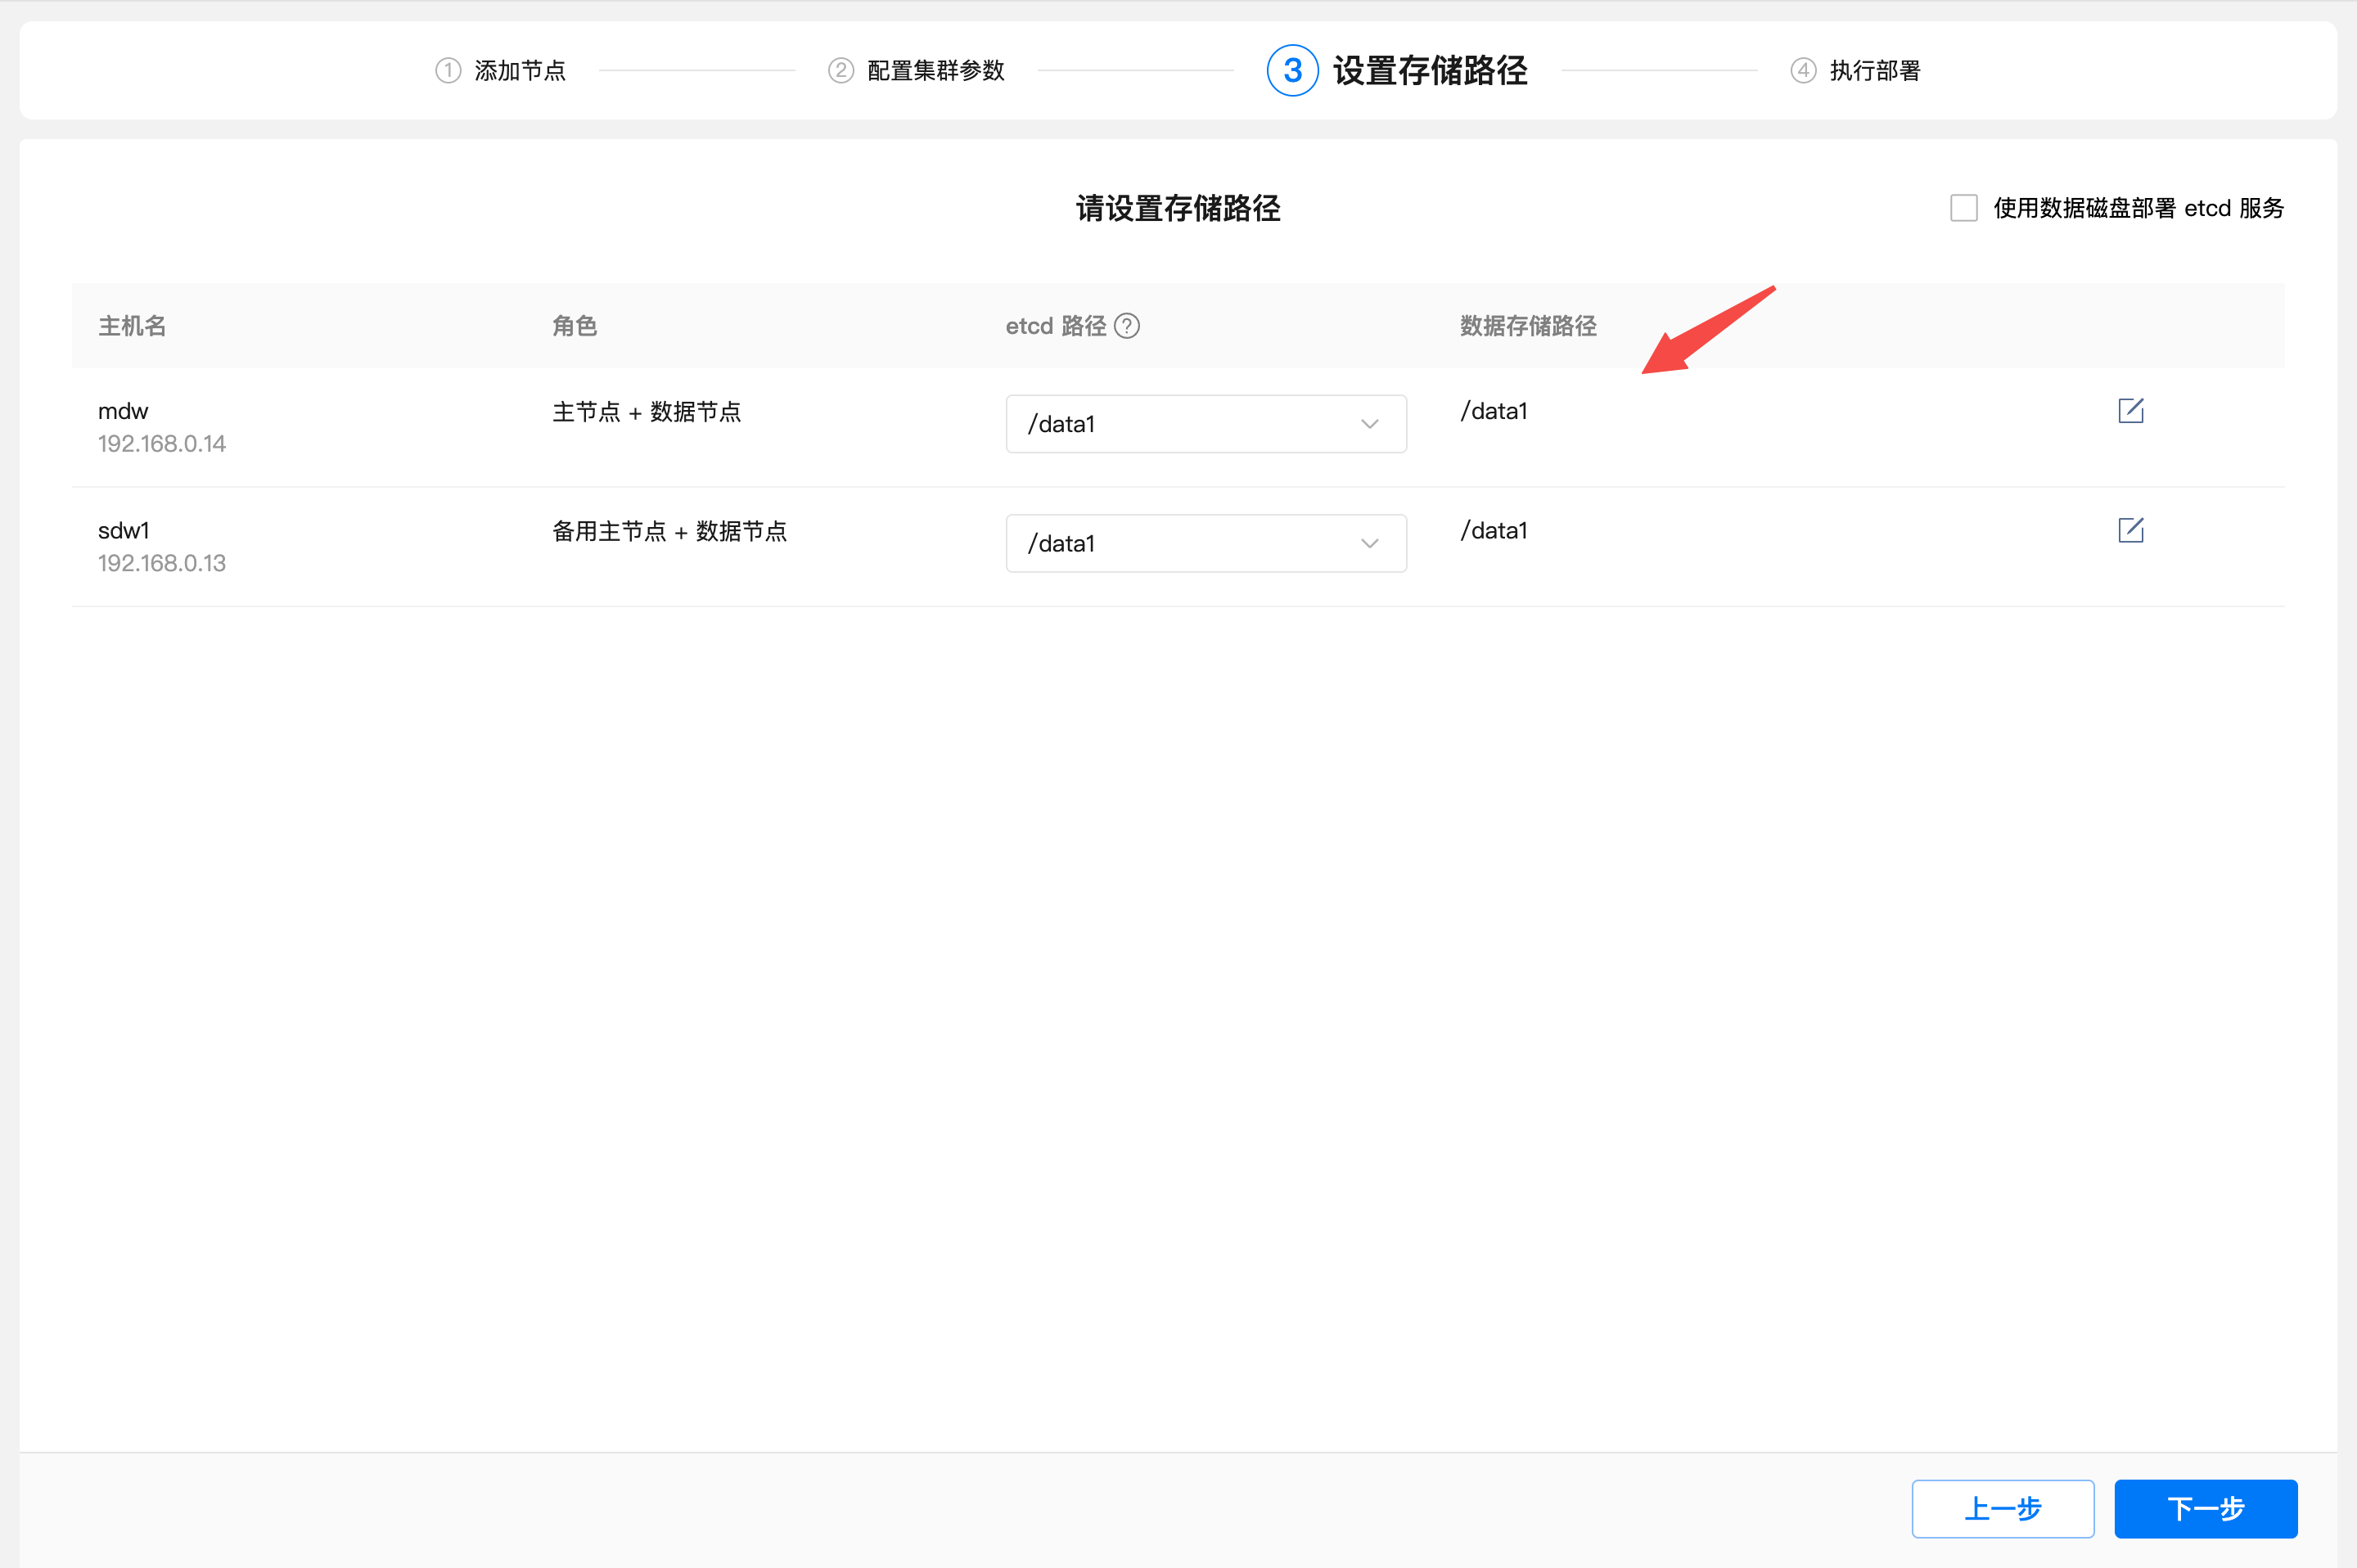
Set the data storage path and etcd path.
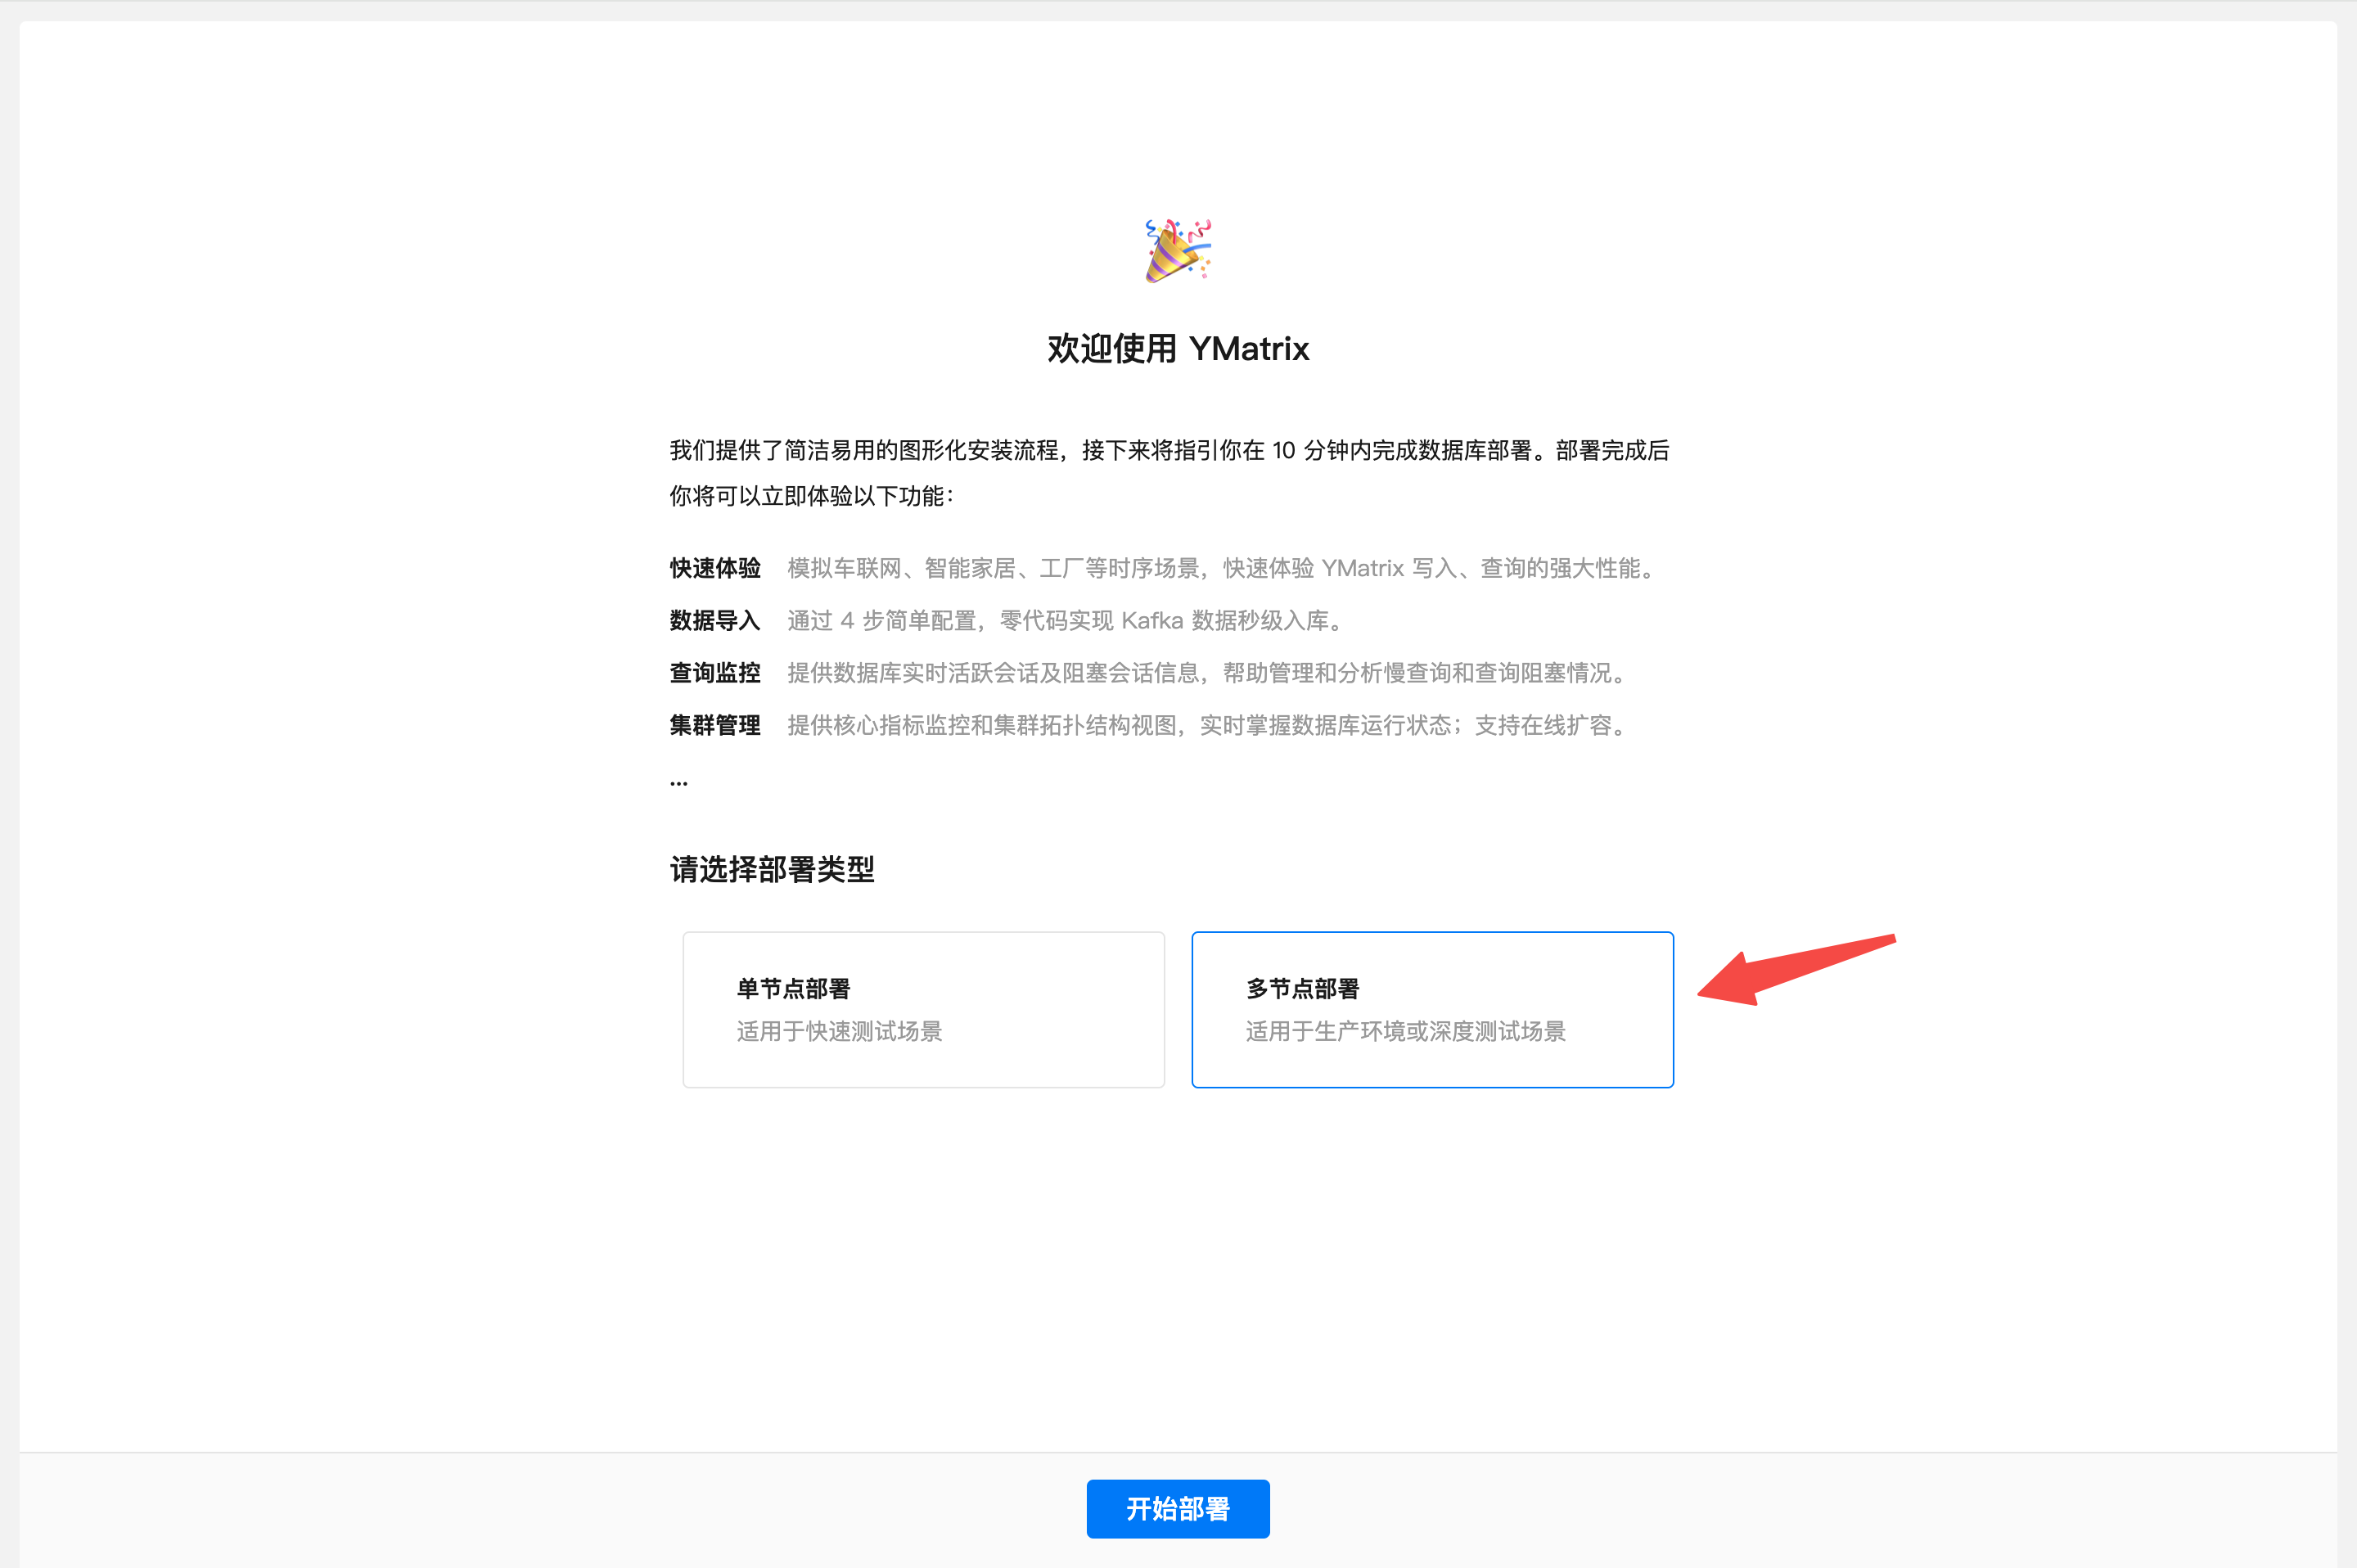
This subsection is a key step in unbalanced deployment.
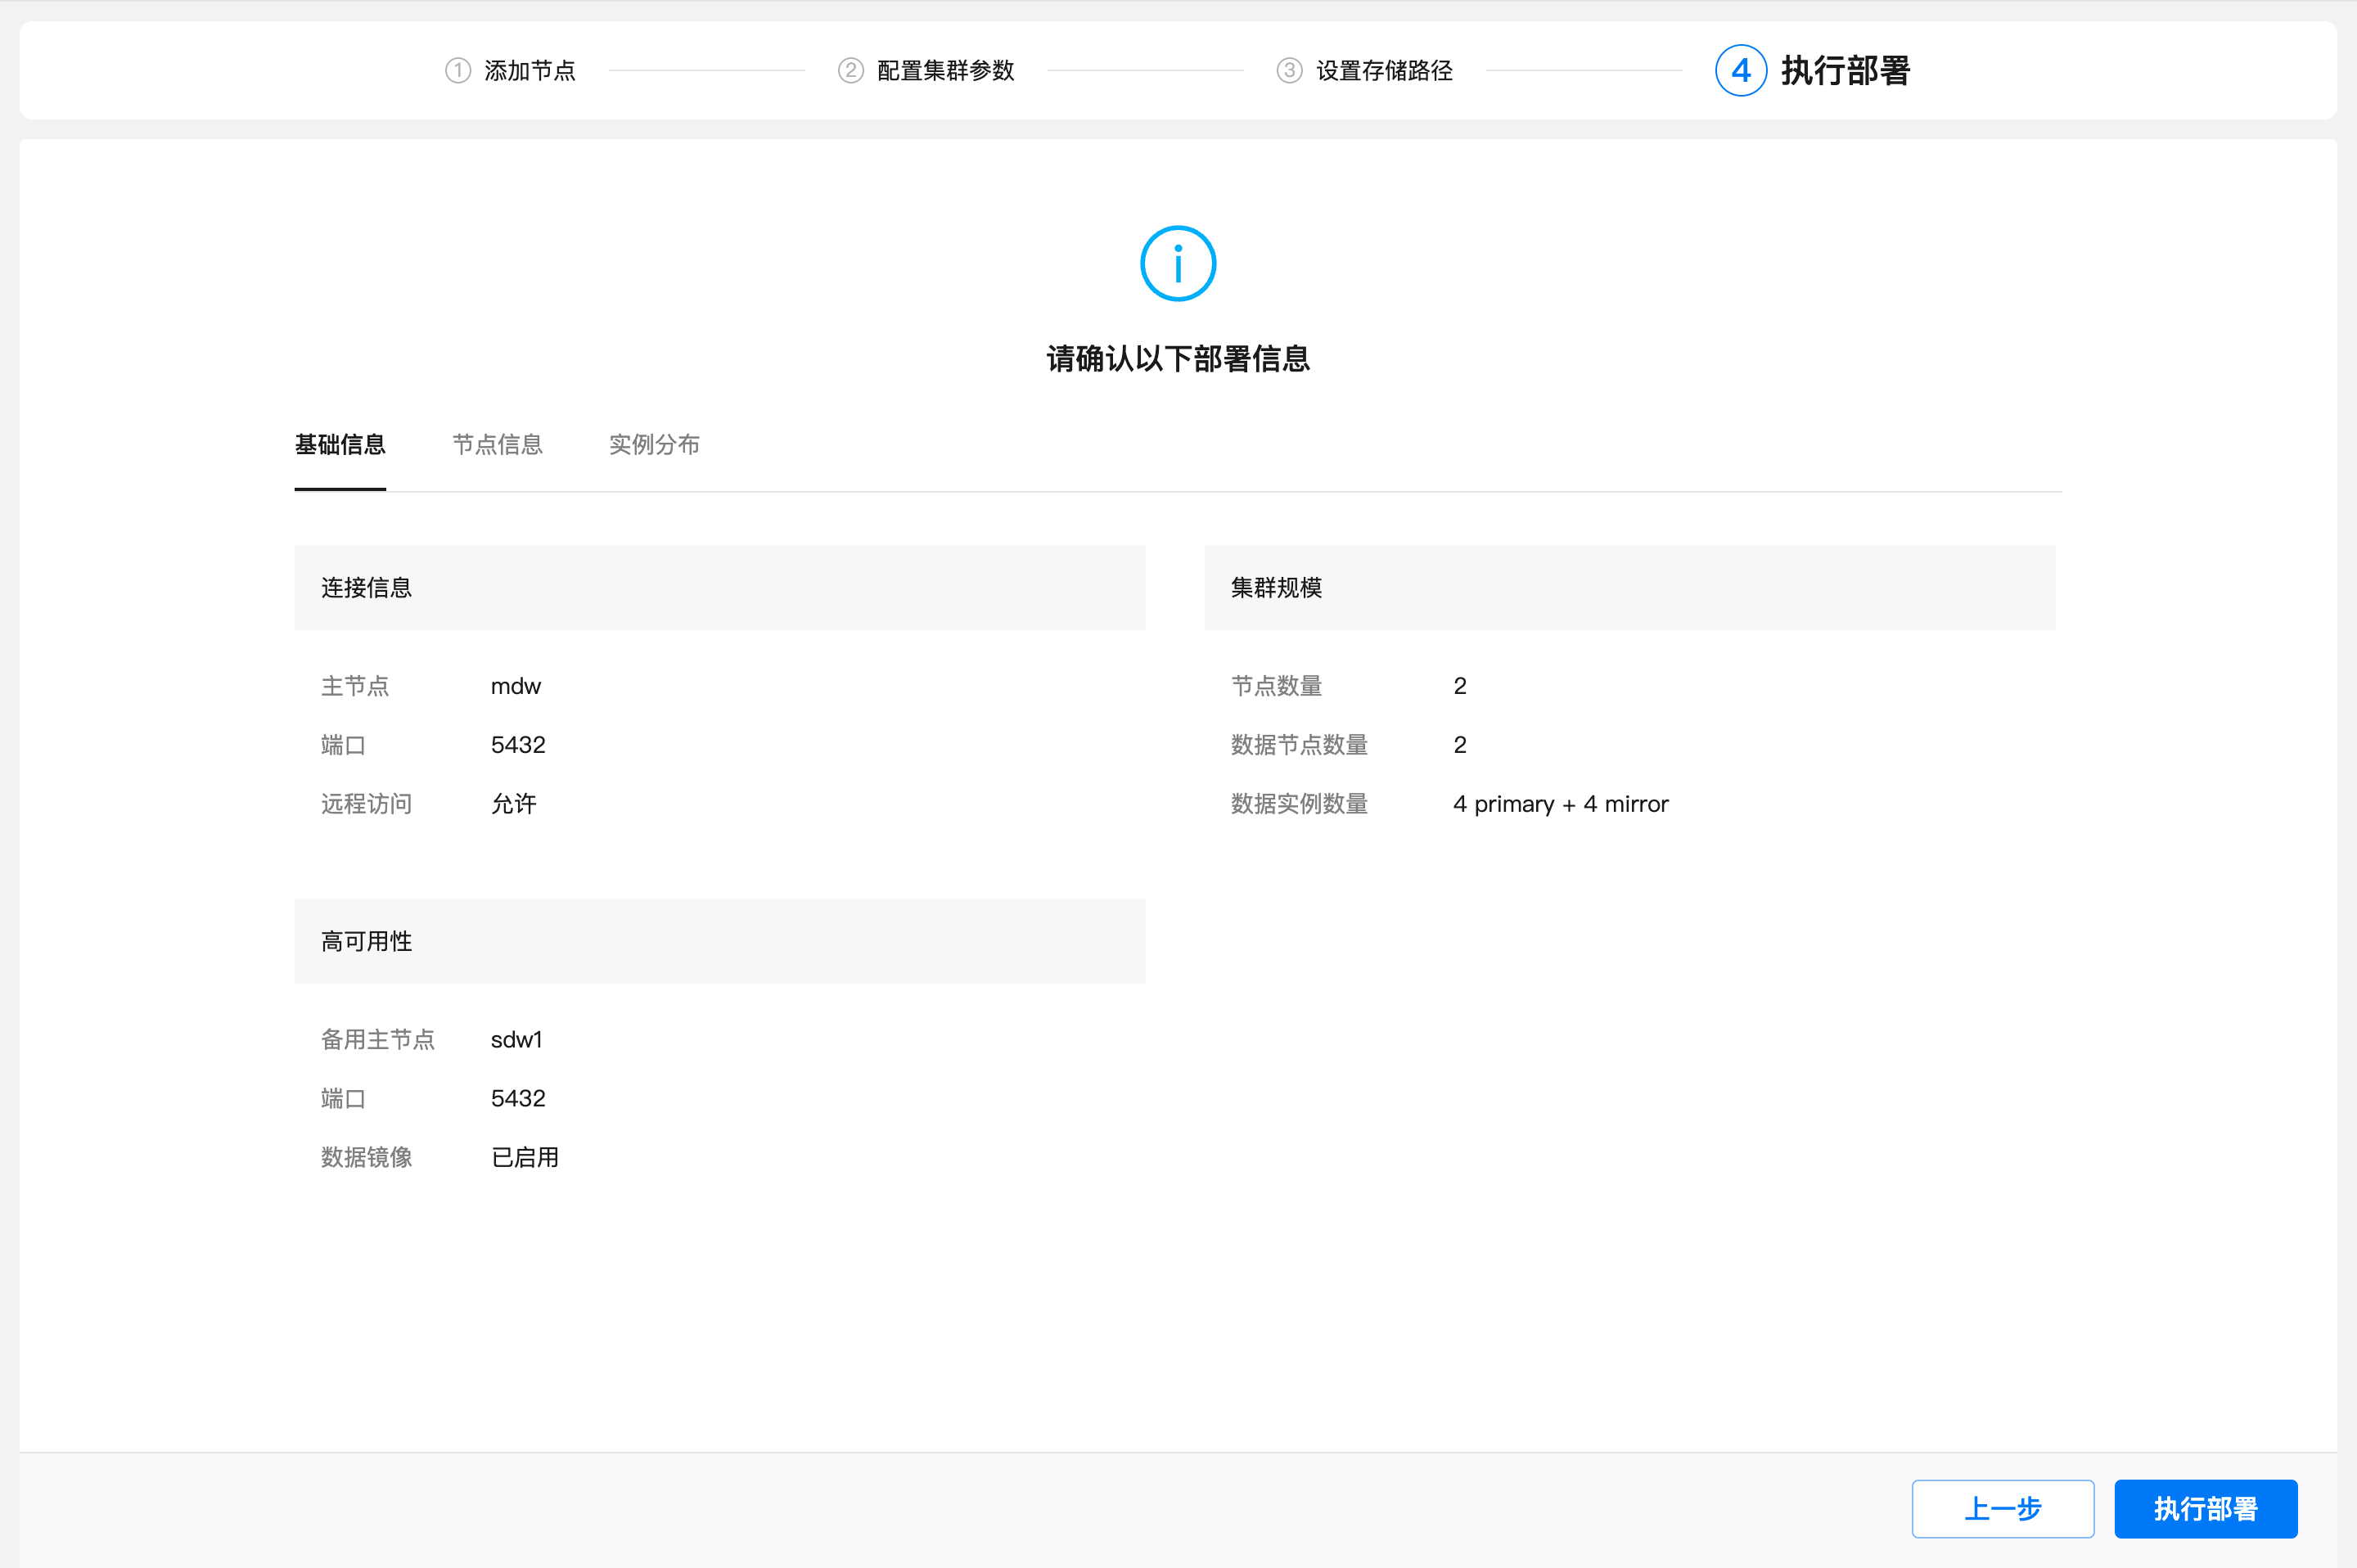
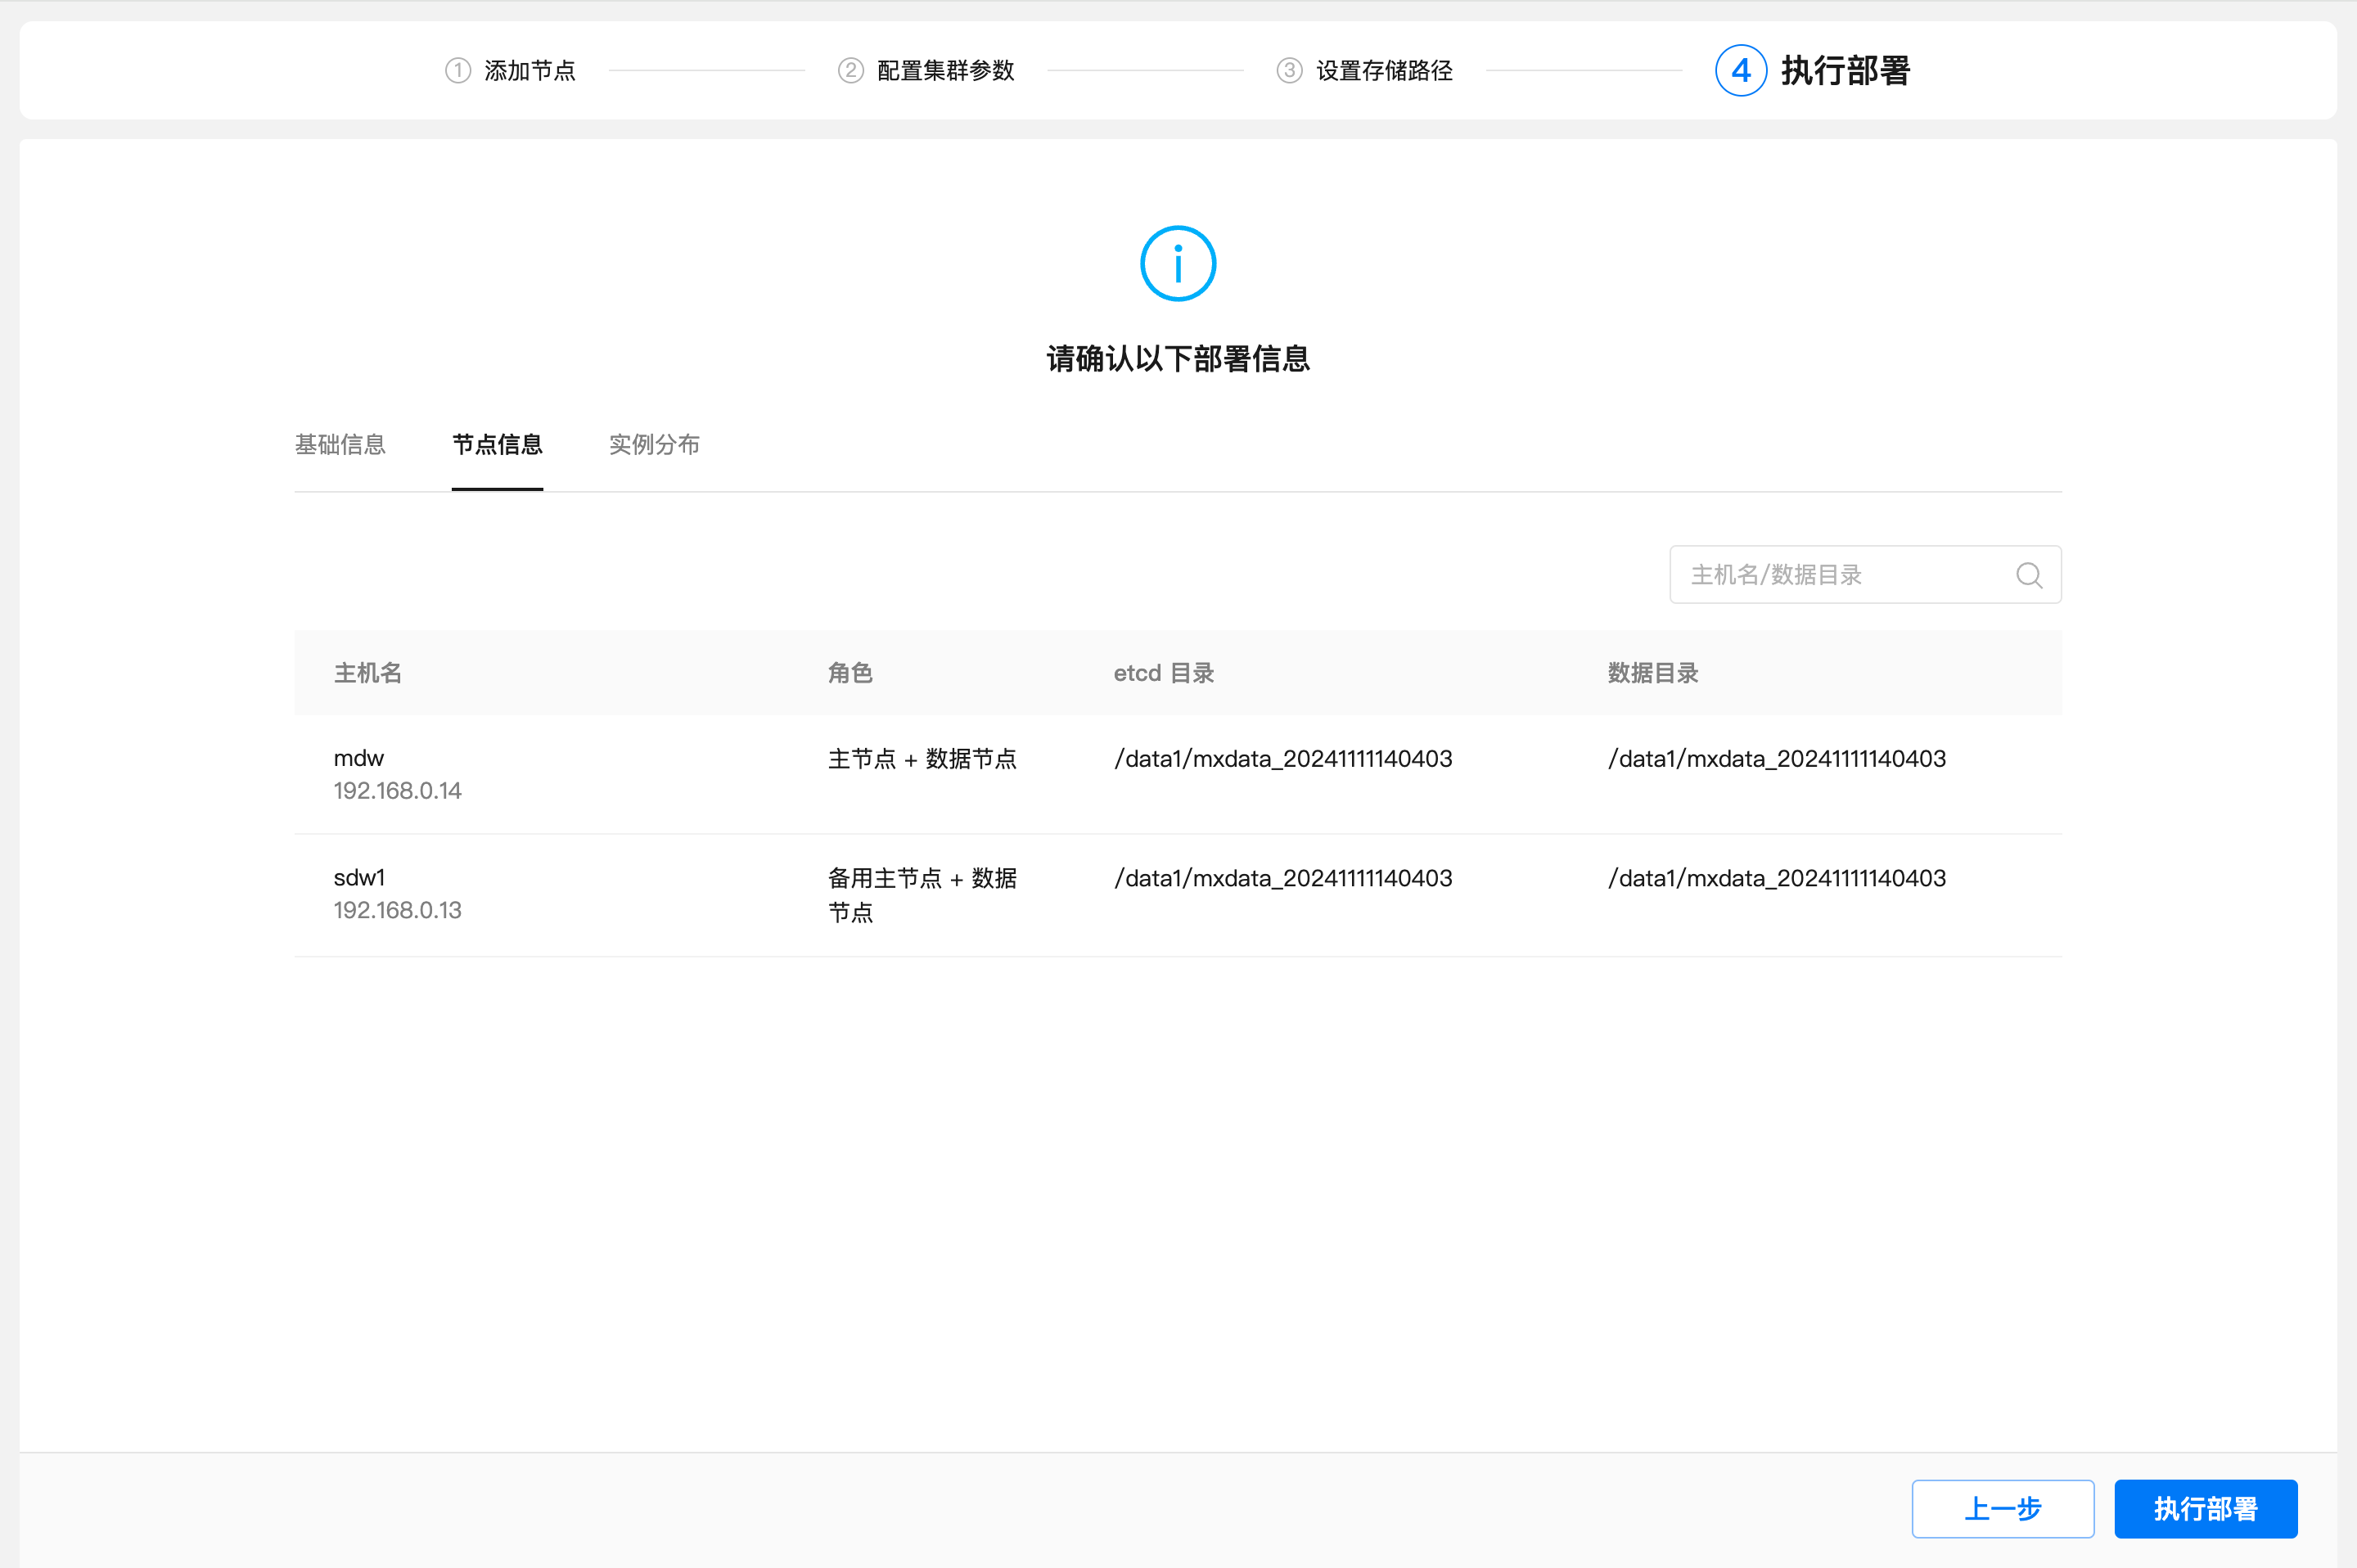
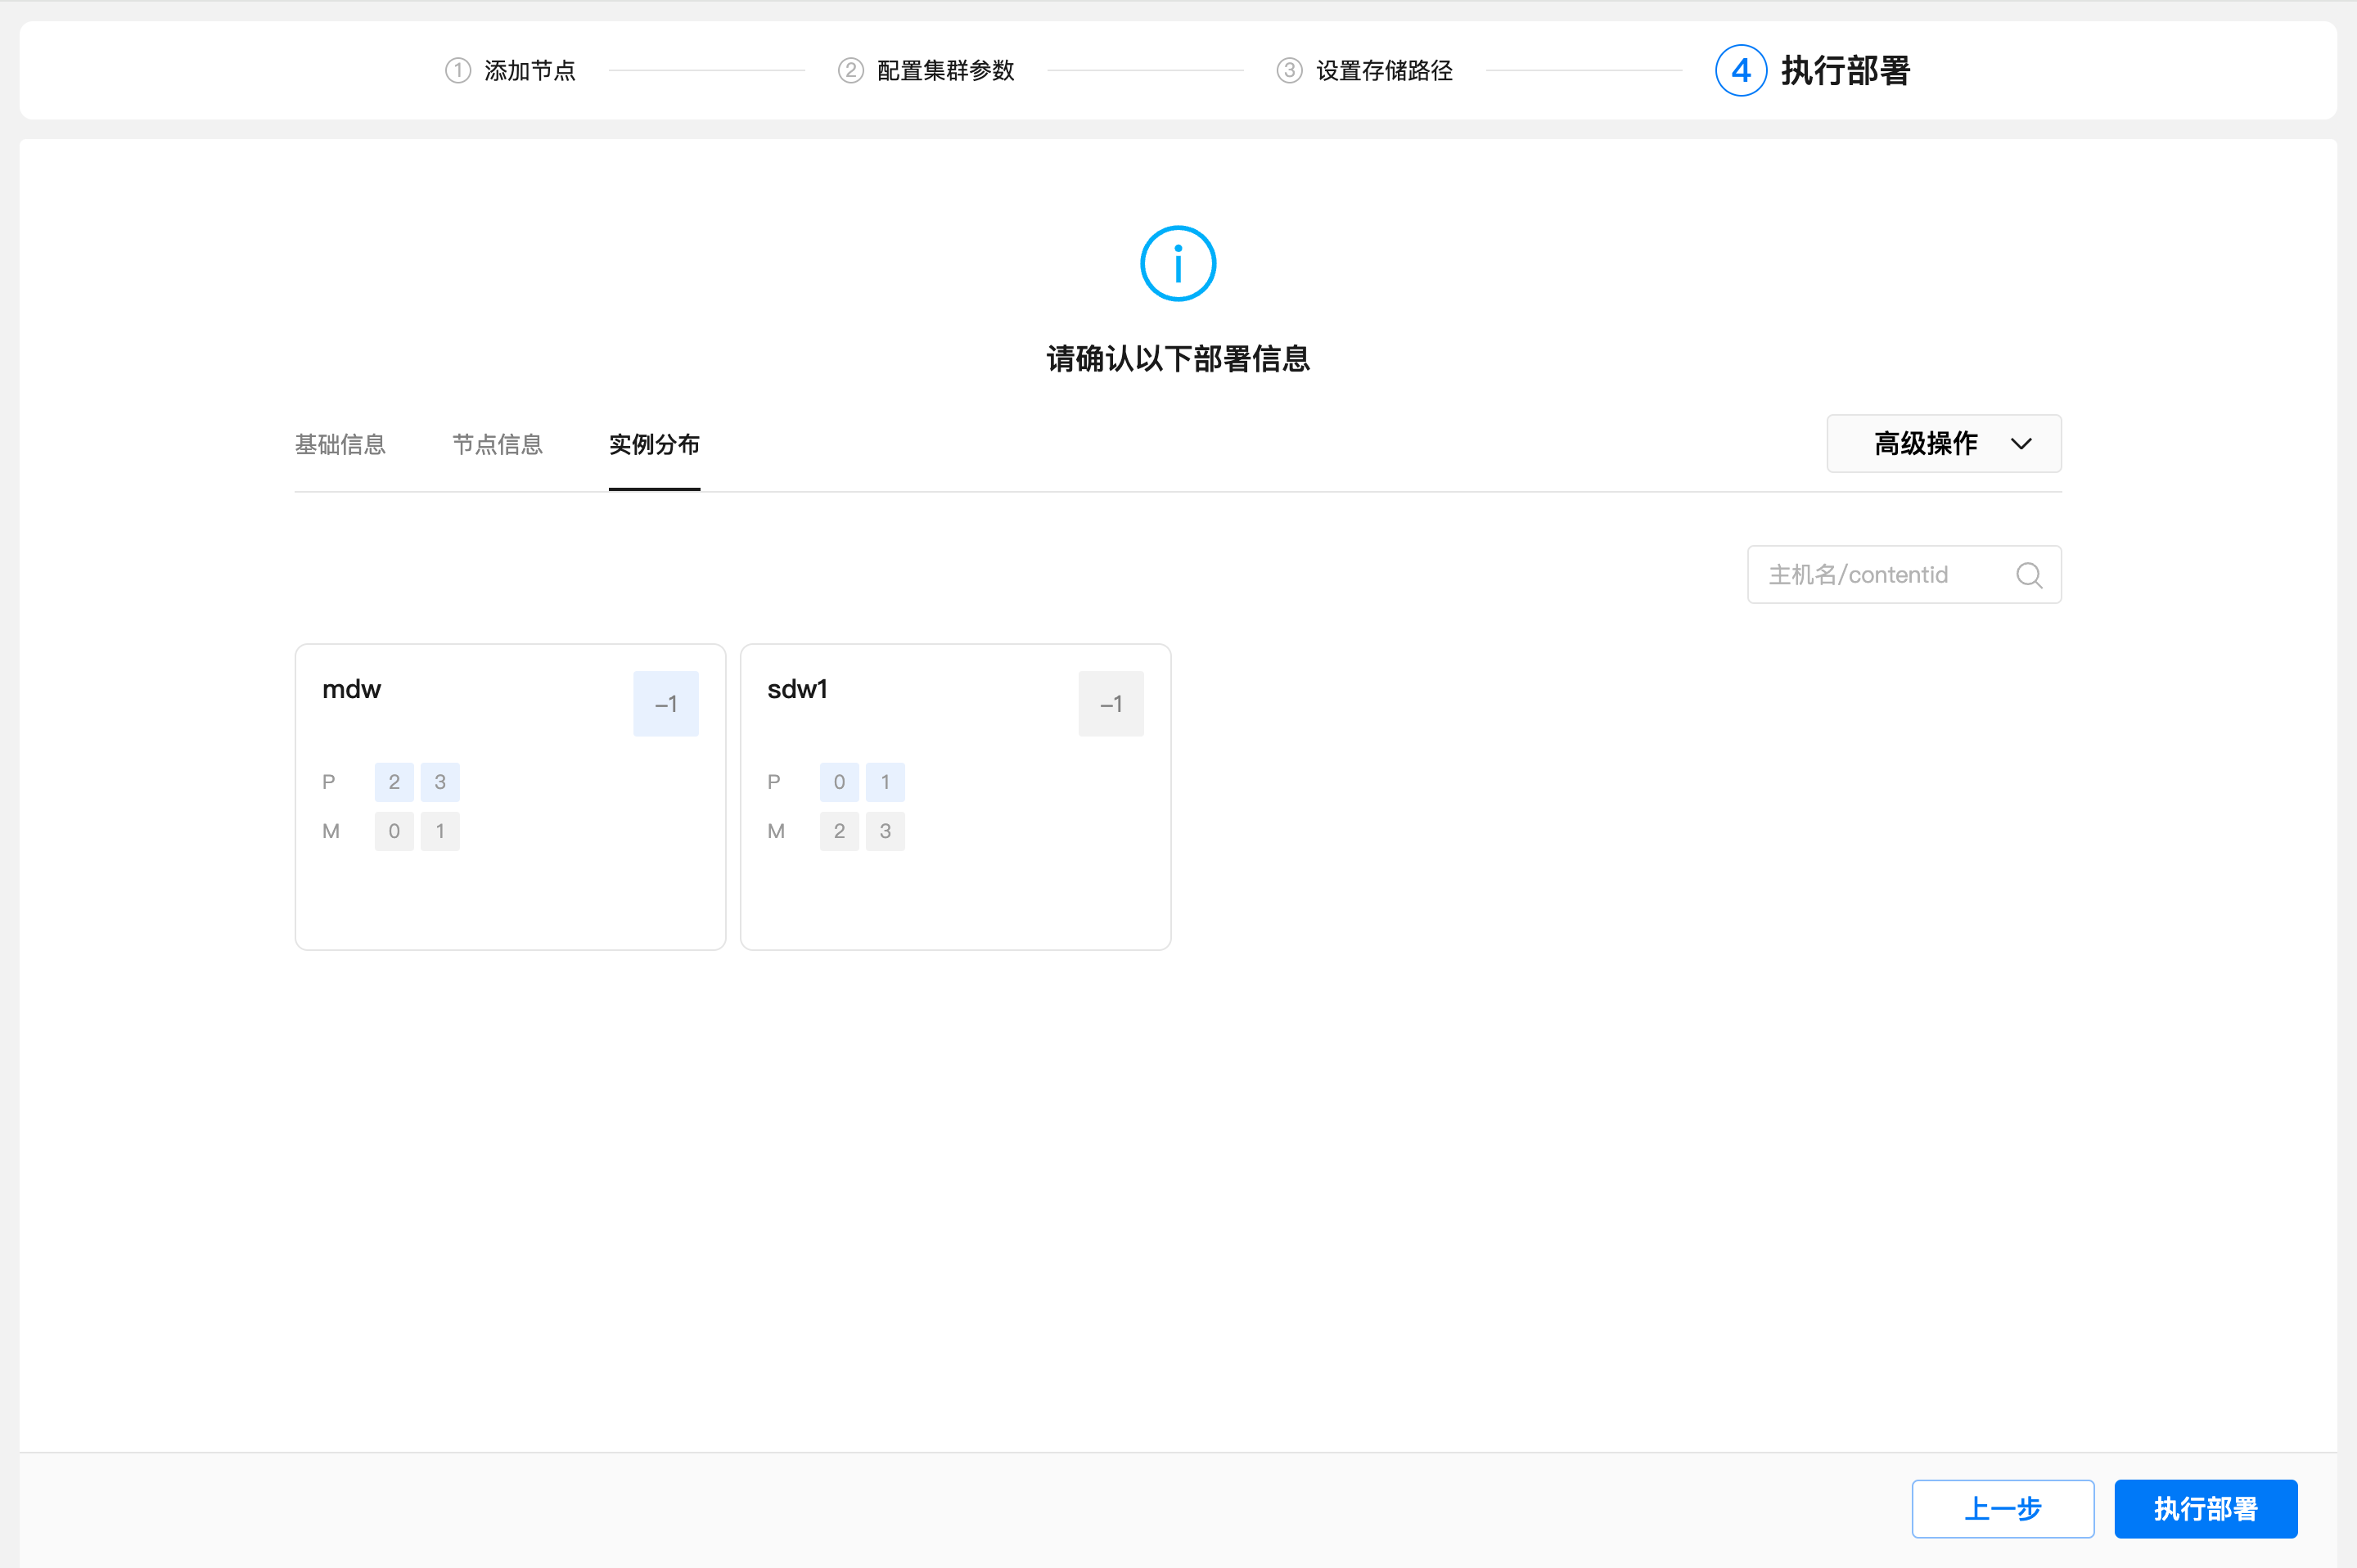
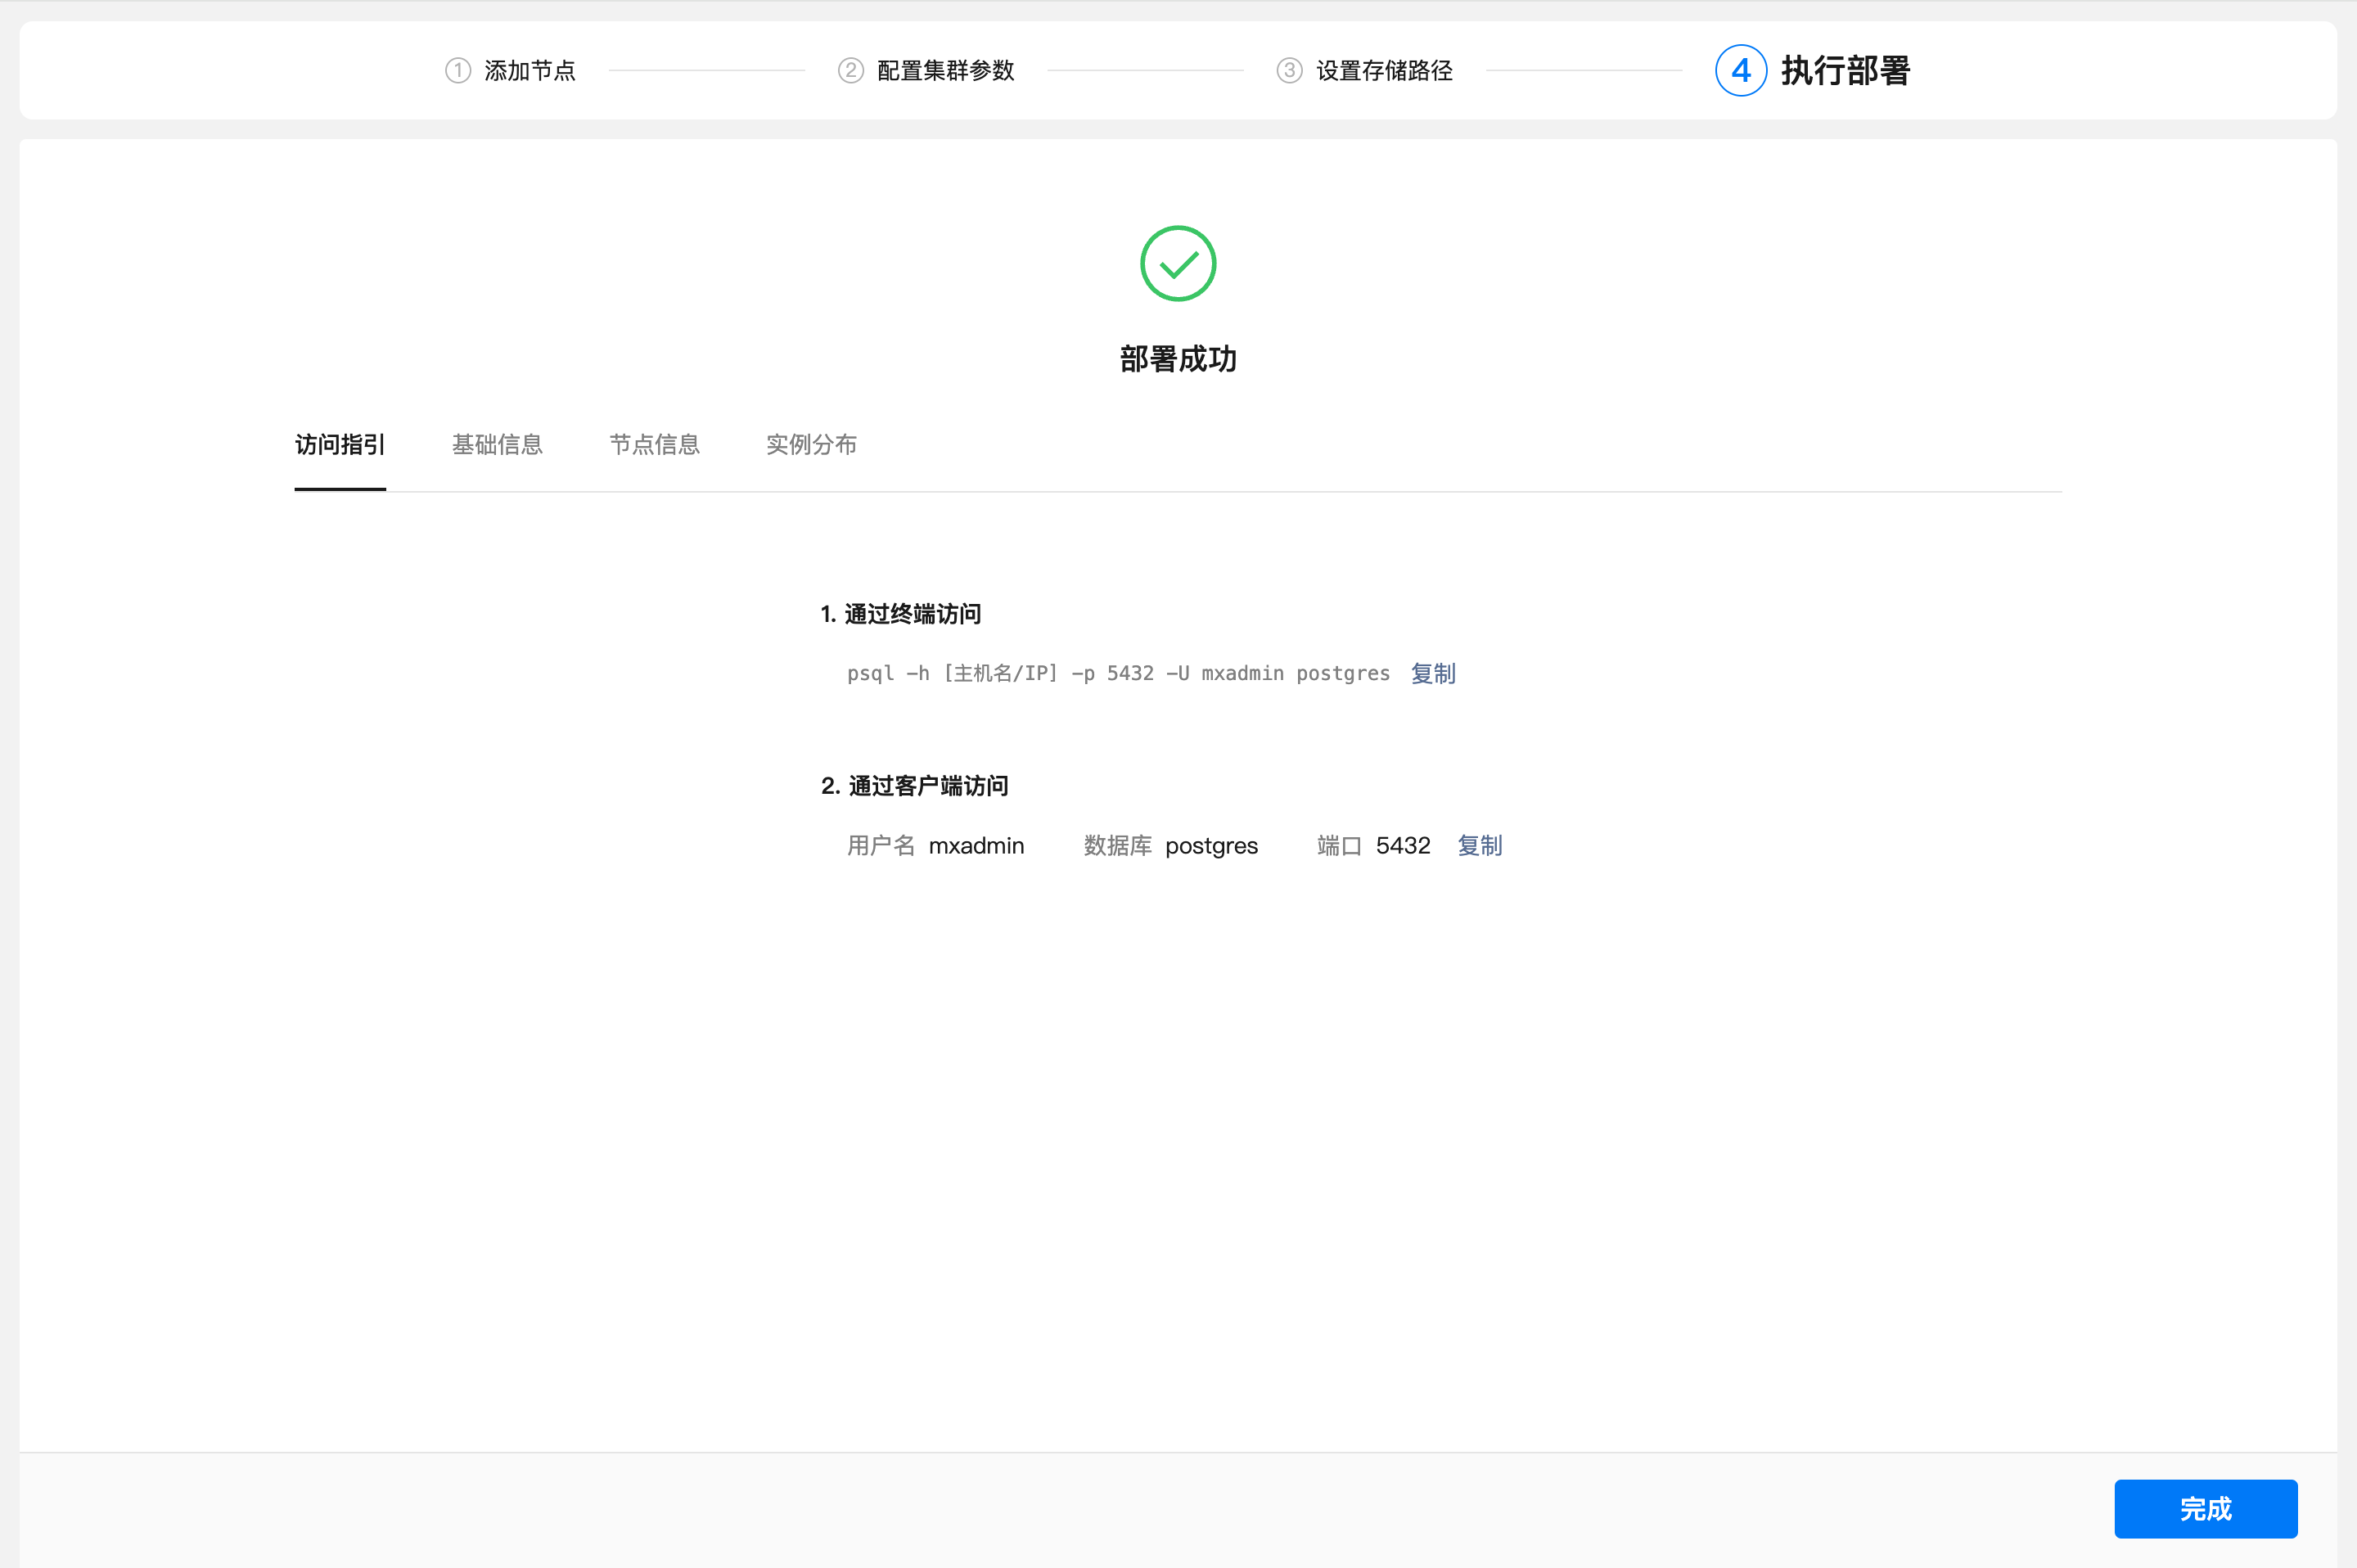
The execution deployment page is divided into 3 pages: basic information, node information and instance distribution.
The basic information page displays three aspects of the connection information of the cluster in the current deployment plan, cluster size and high availability.
The node information page displays the role of each node and the directory information list.
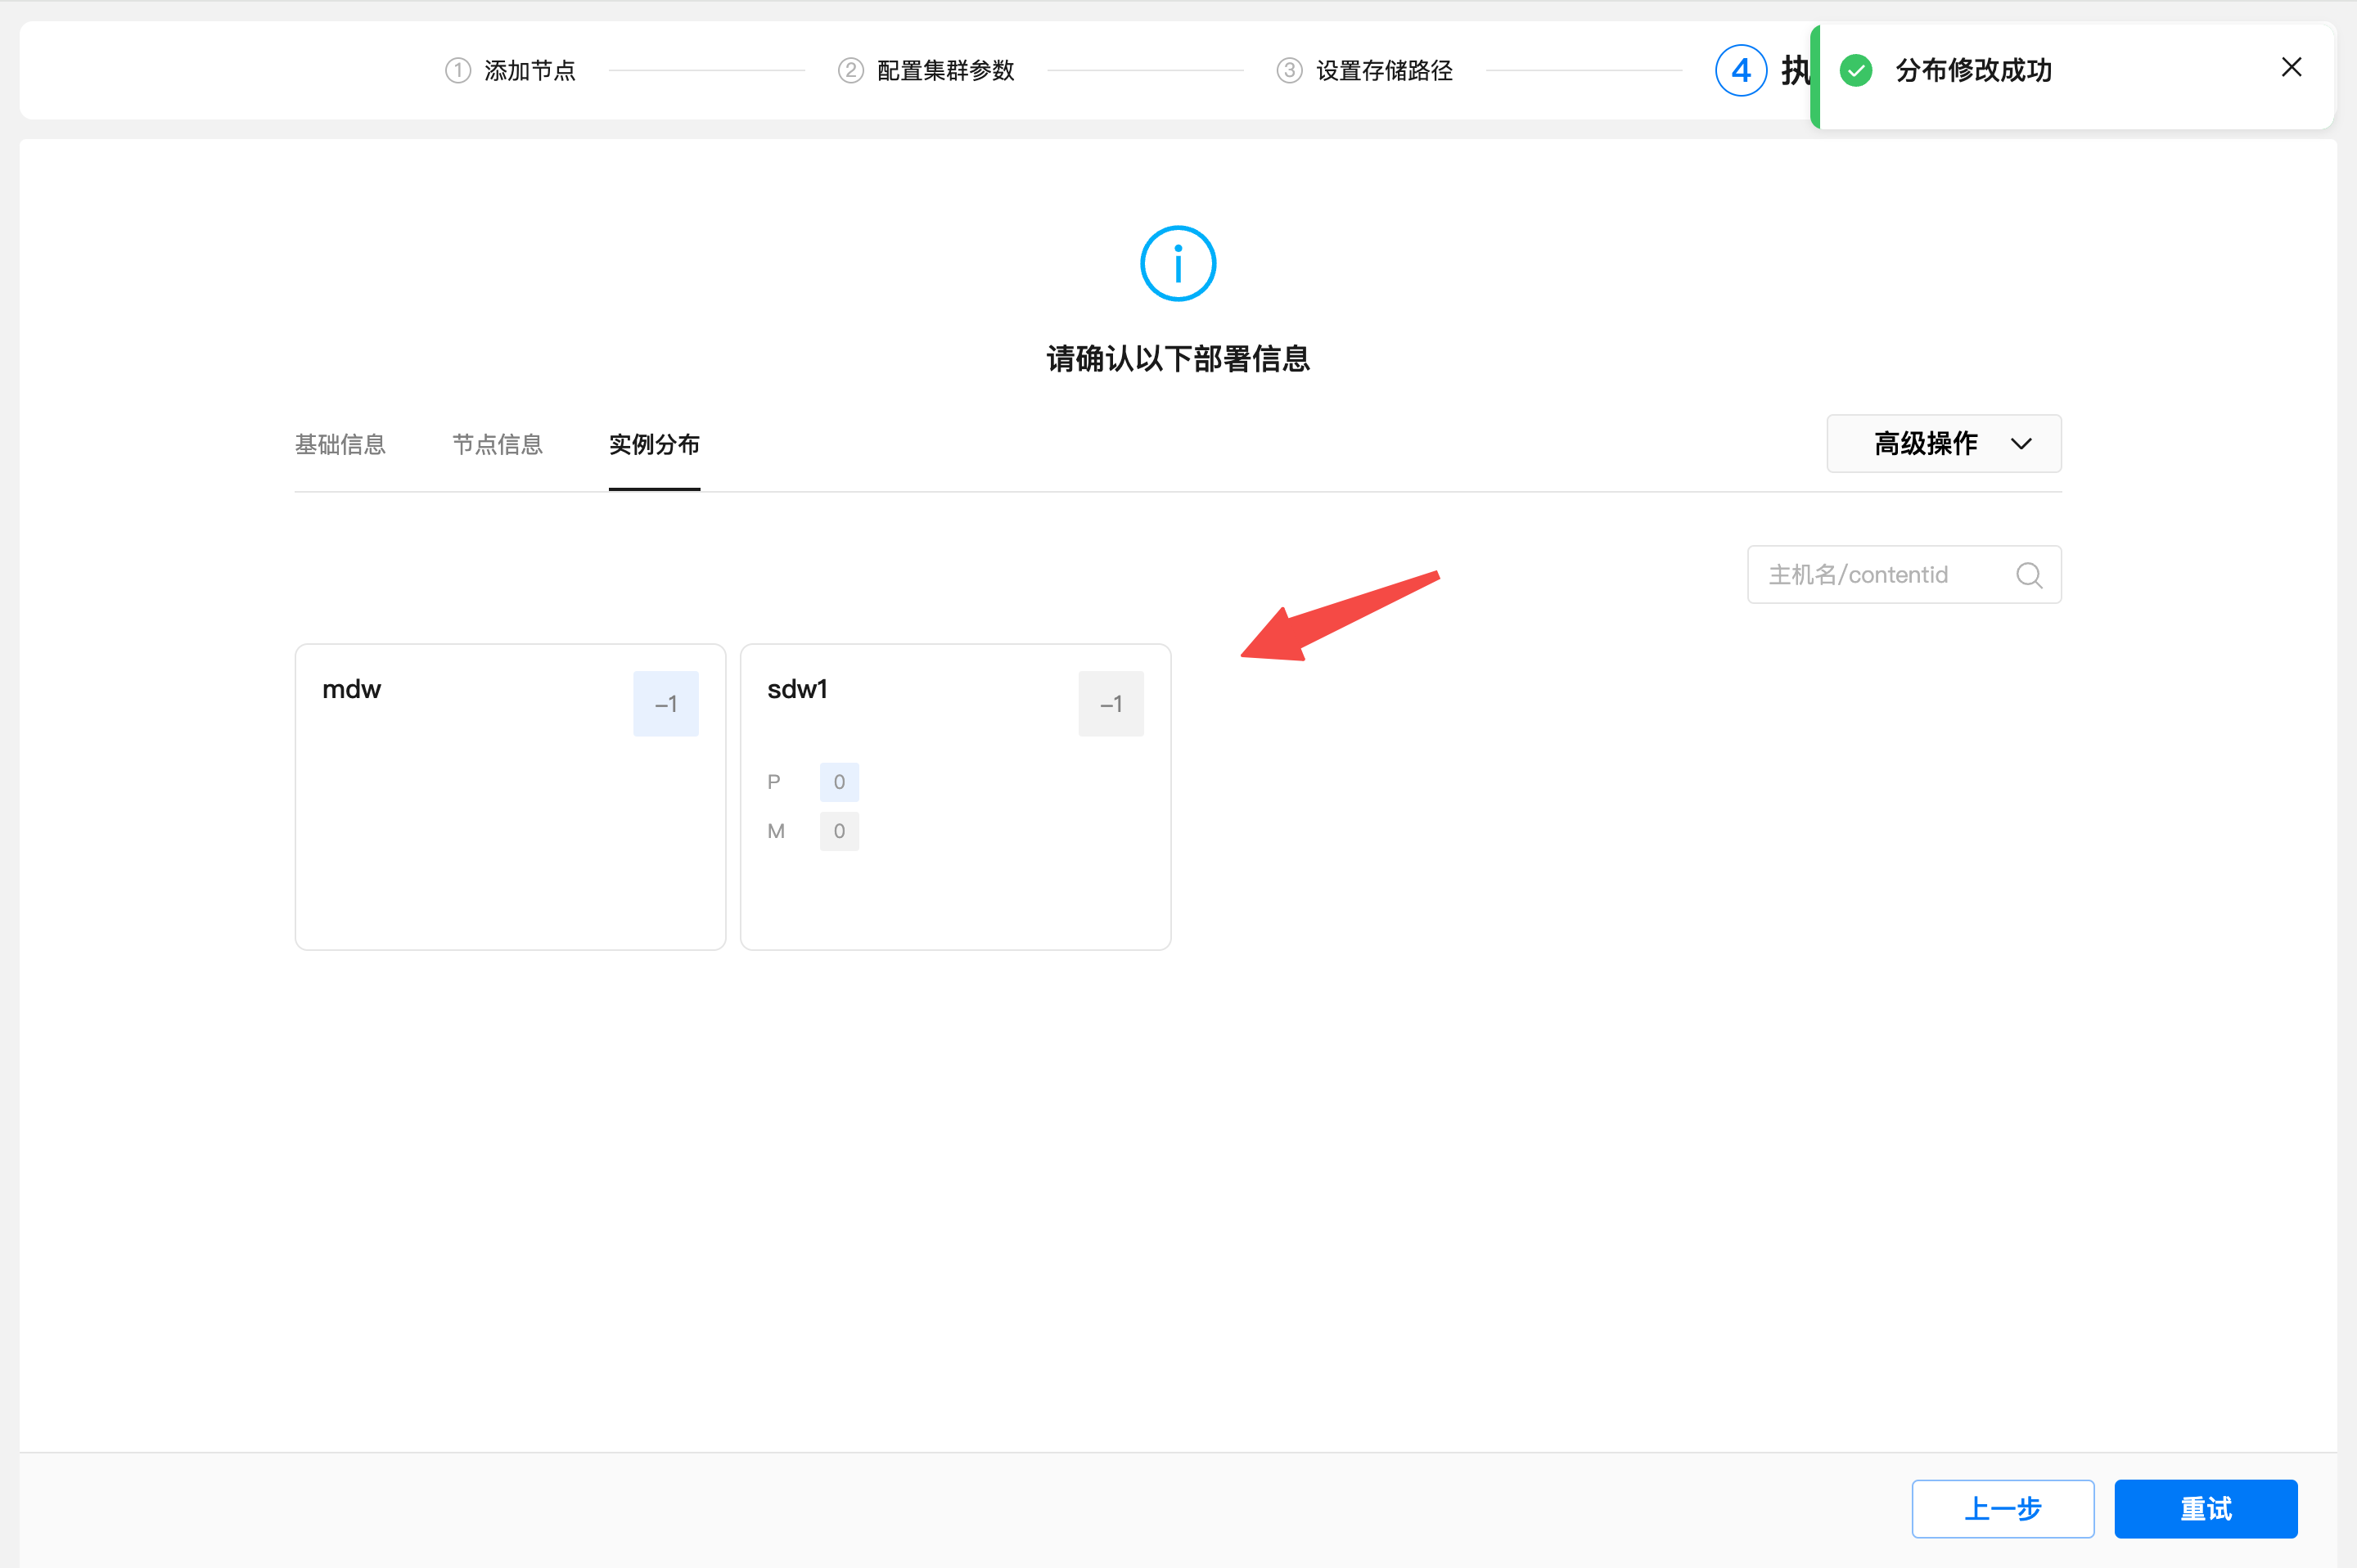
The instance distribution page displays the distribution topology map of all instances of the data cluster, including Master, Standby, Primary, and Mirror. Large squares represent nodes, small squares with numbers represent instances, and numbers are content id.
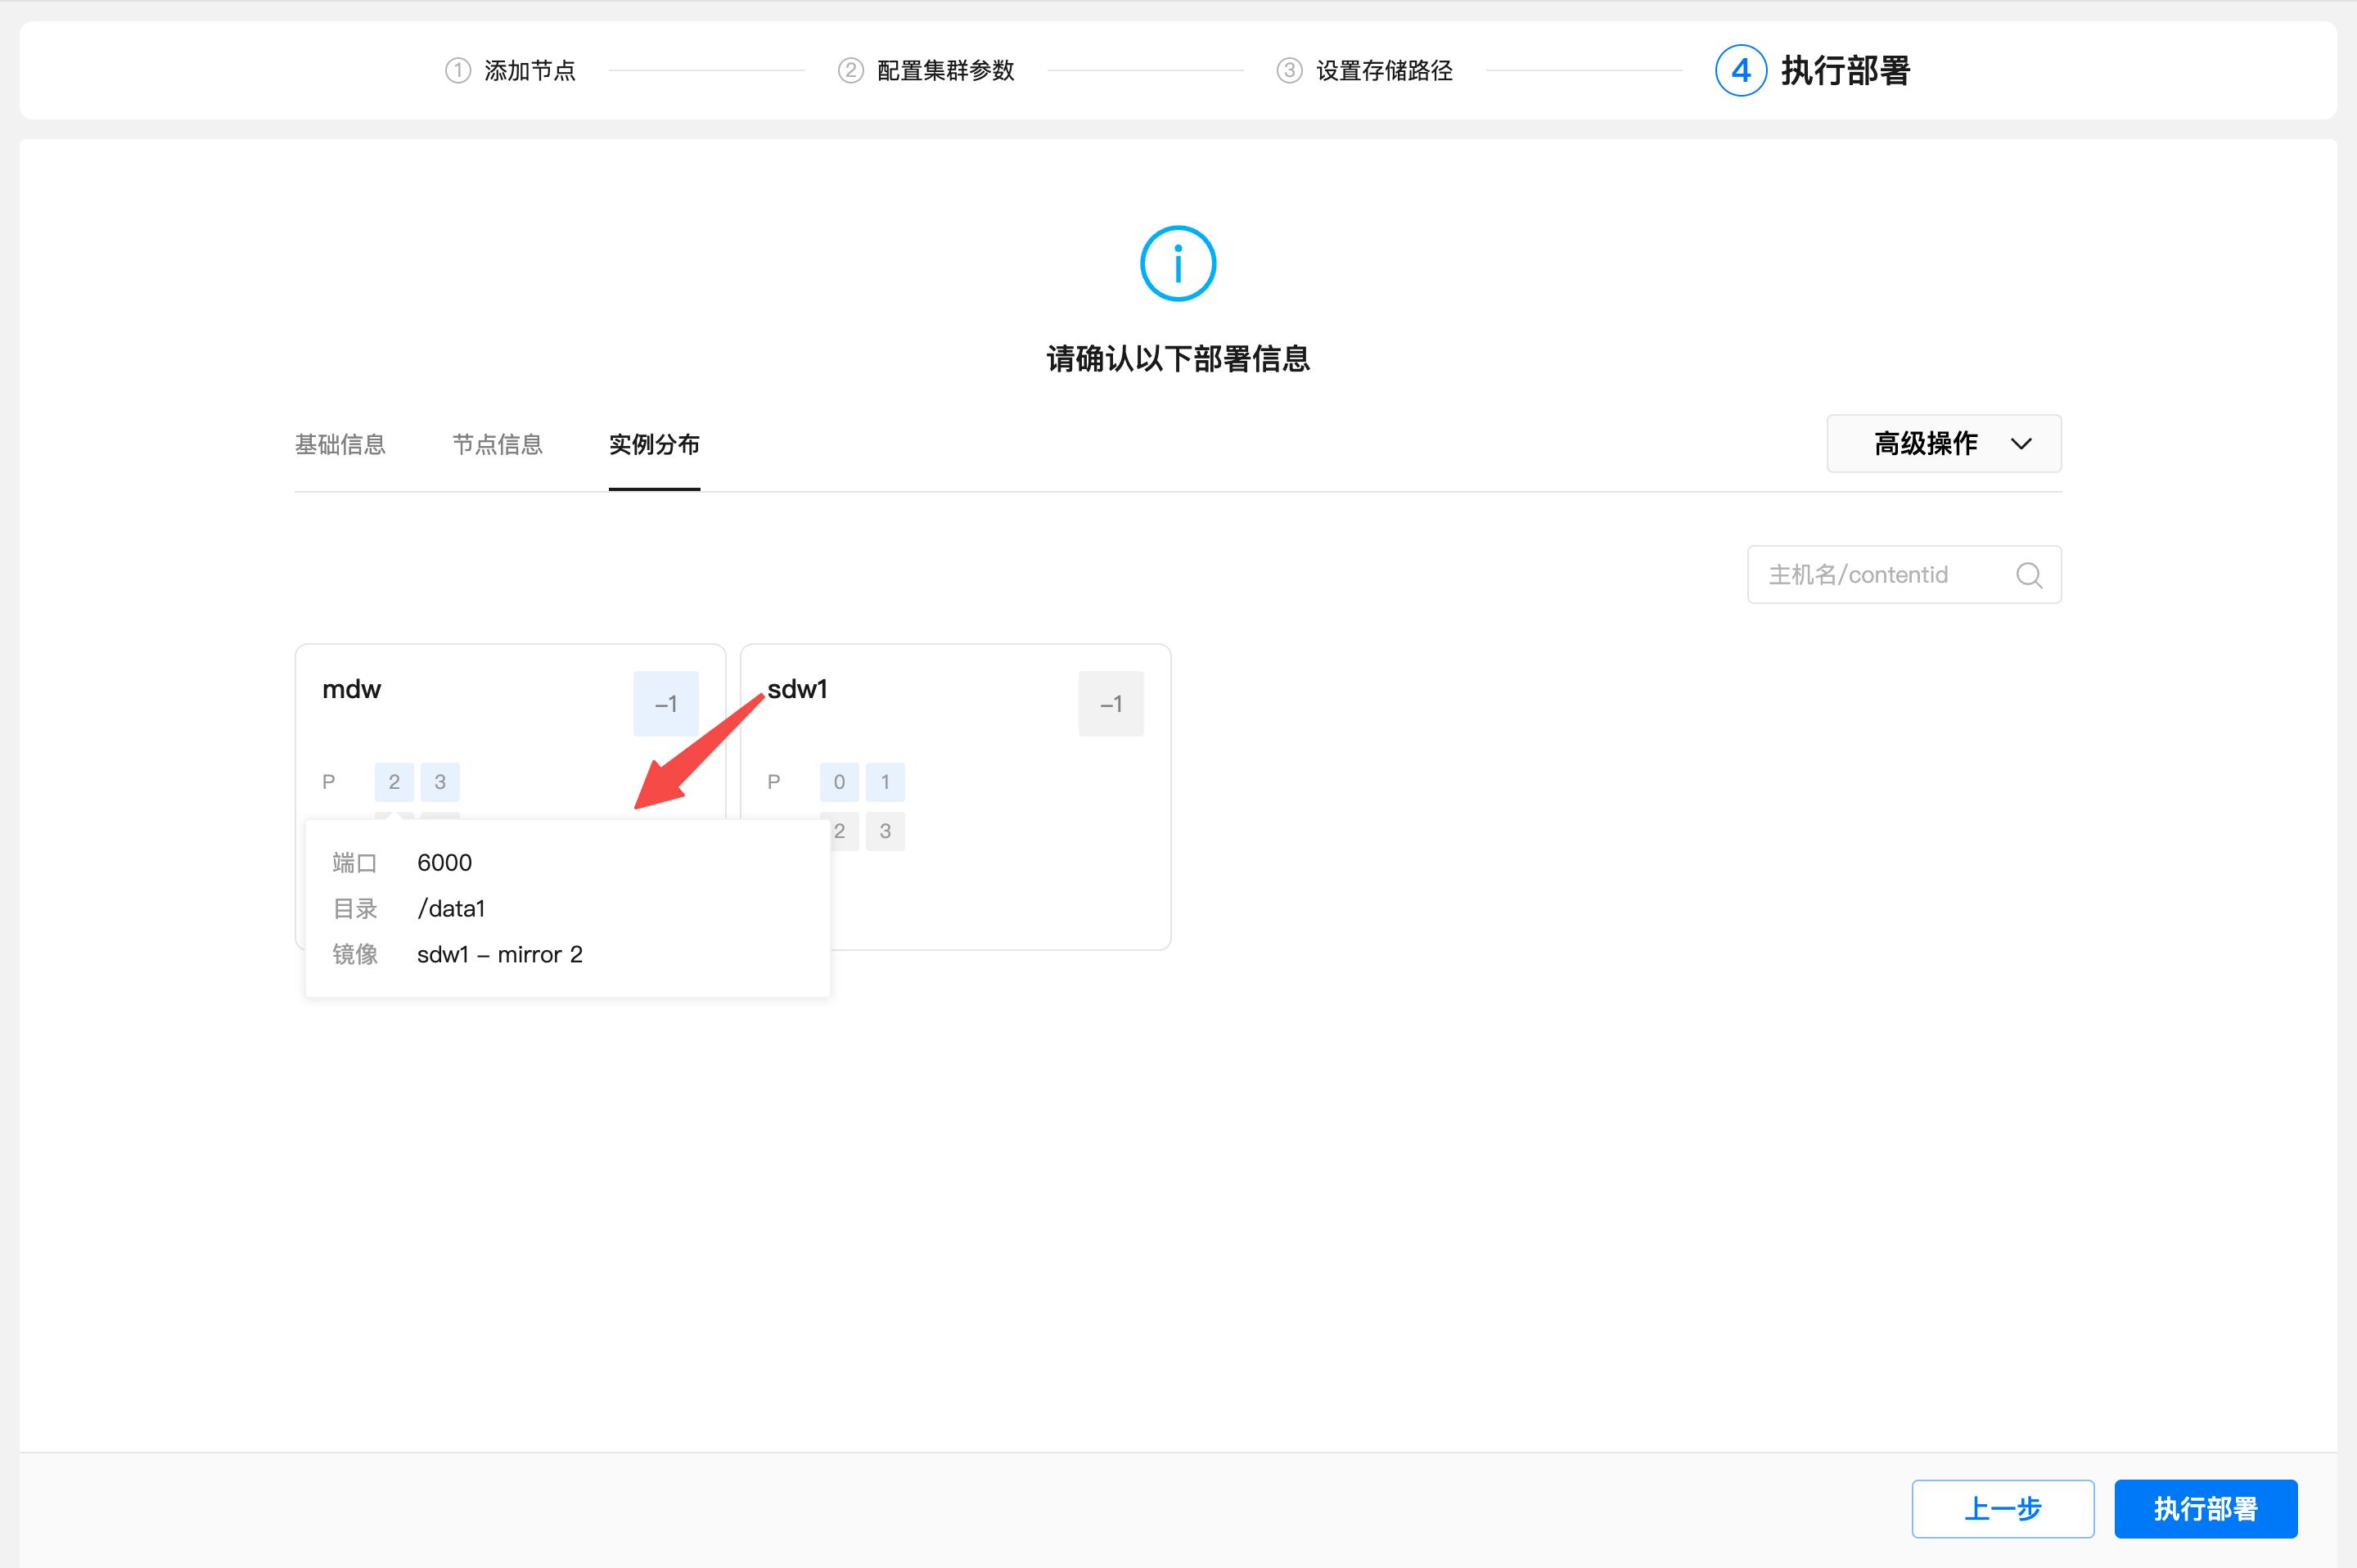
Put the mouse on the instance square and you can see the relevant information about the instance.
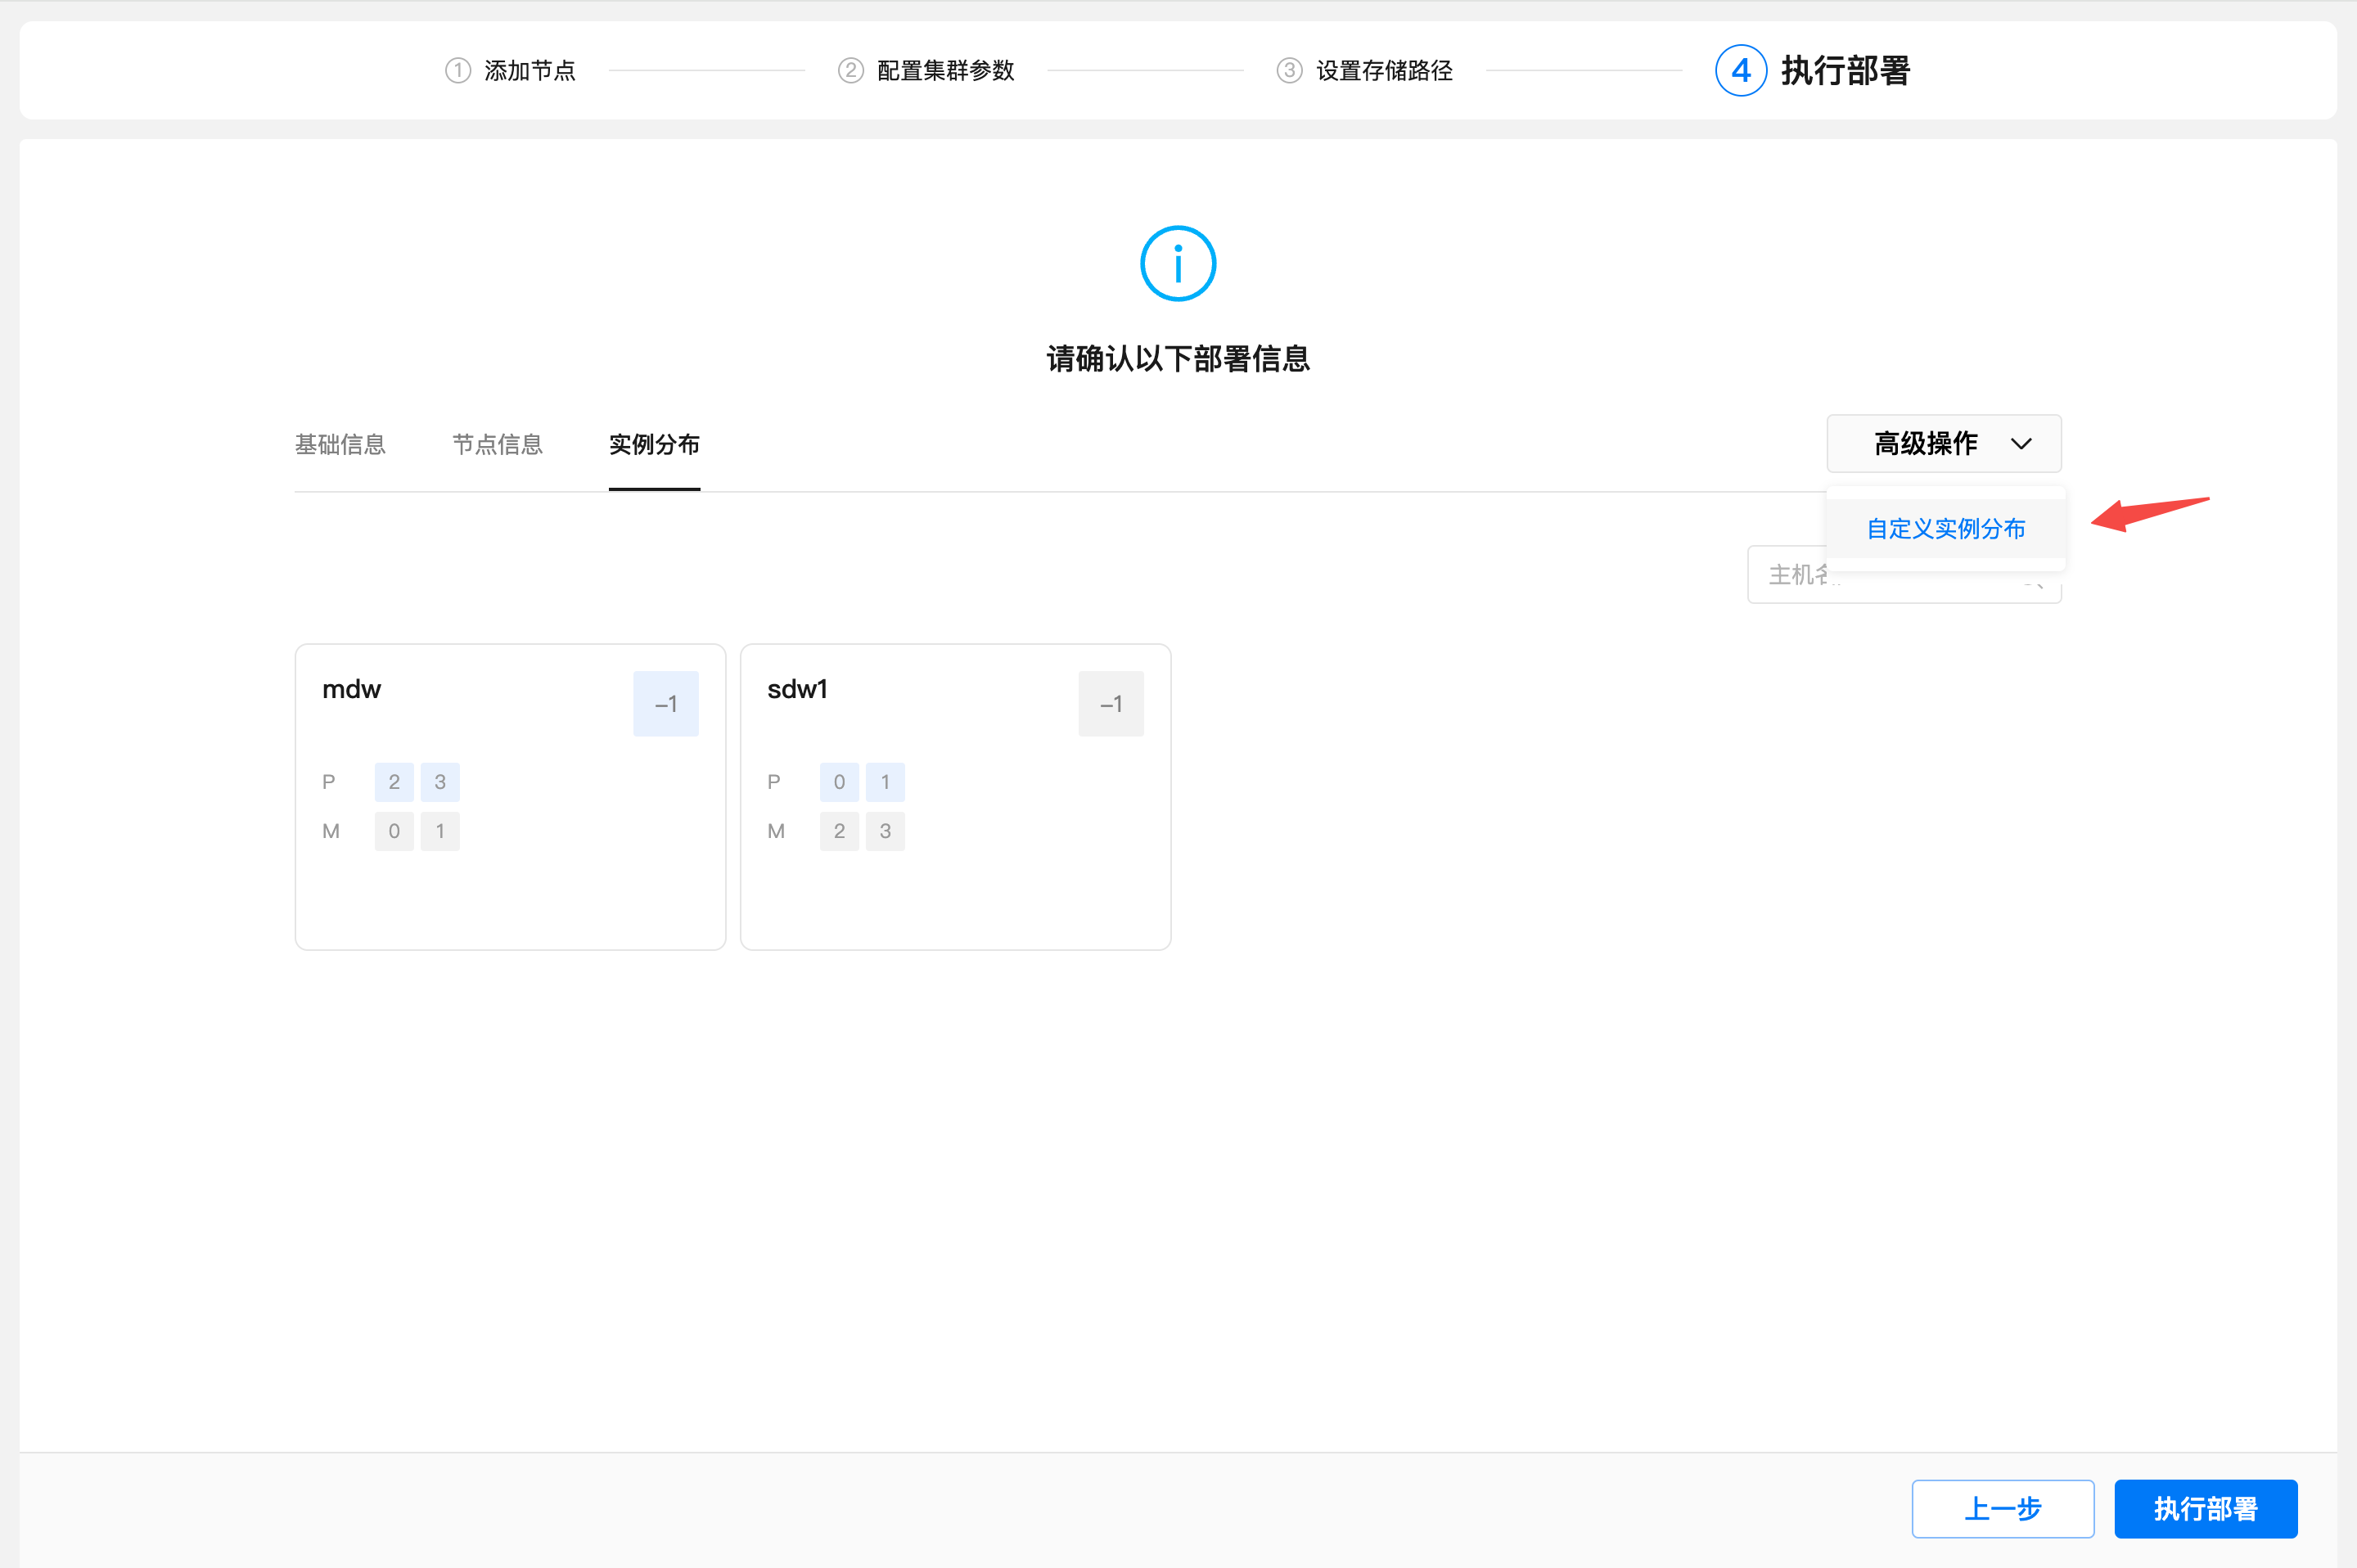
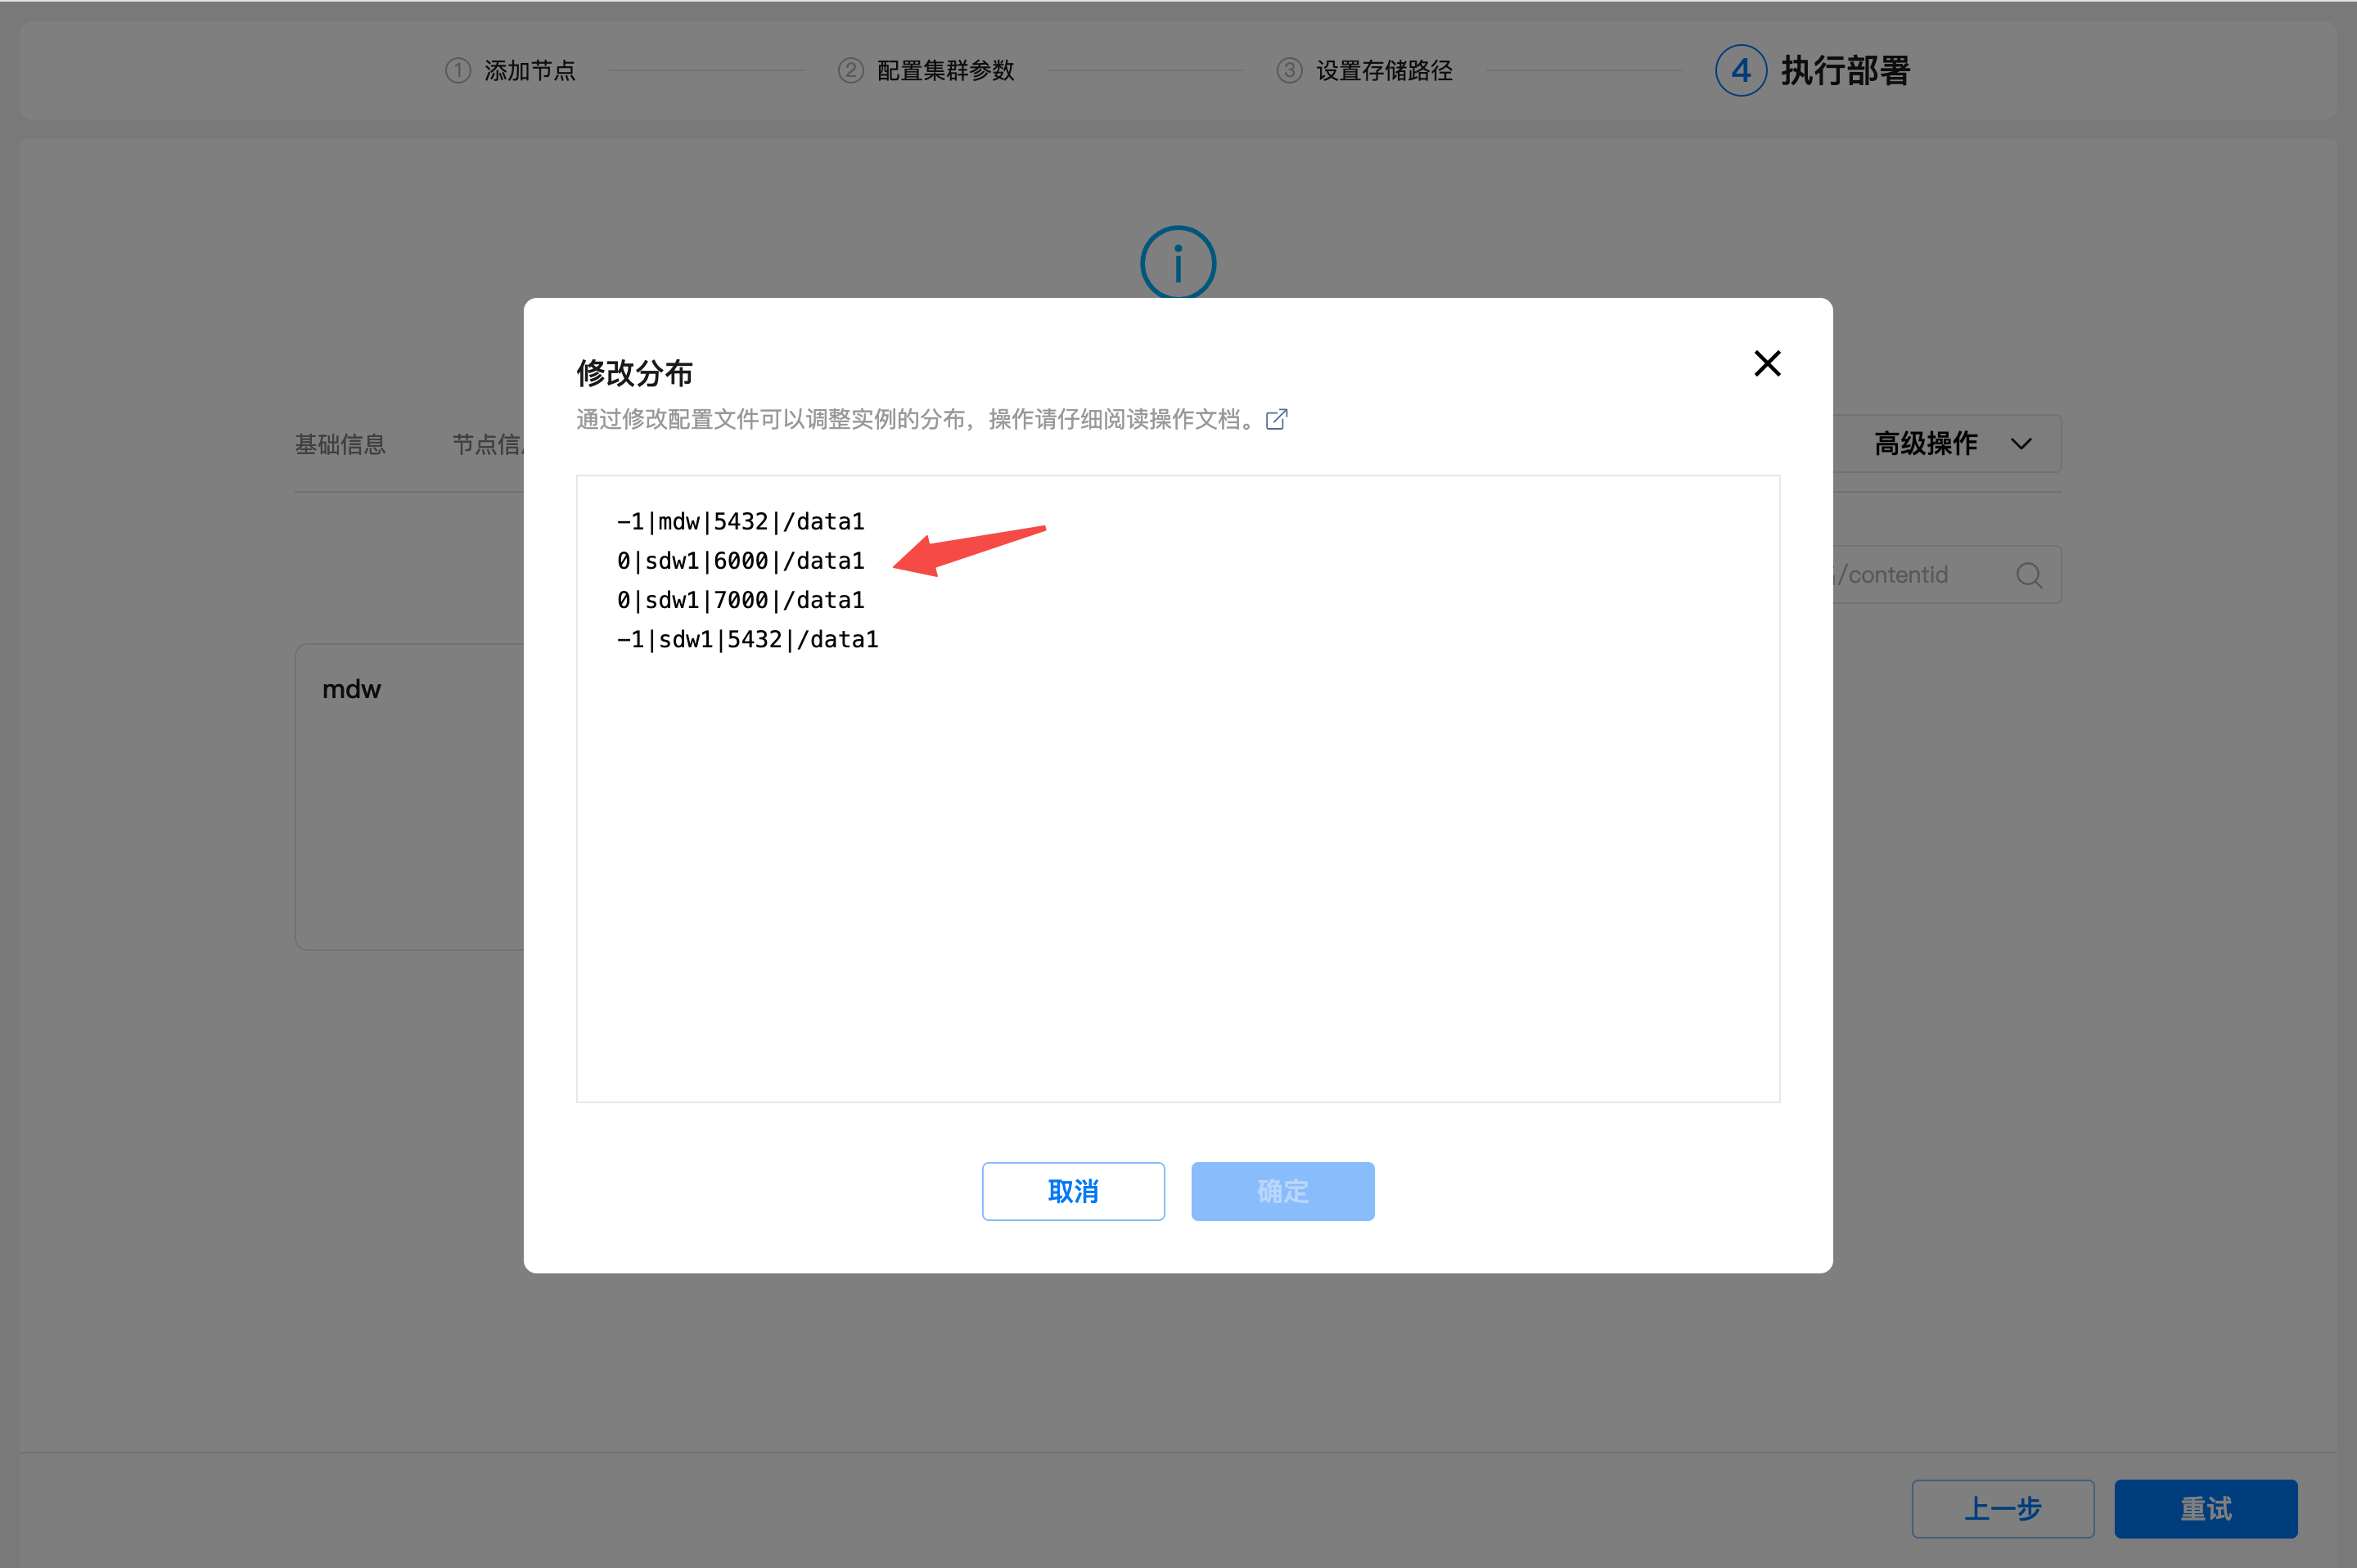
Click "Advanced Operations" and then click "Custom Instance Distribution" to see the original configuration file content of the instance distribution.
The content of the instance distribution configuration file is in CSV format. For each row, there are 4 columns in total, namely: content id, host name, port number, and data directory.
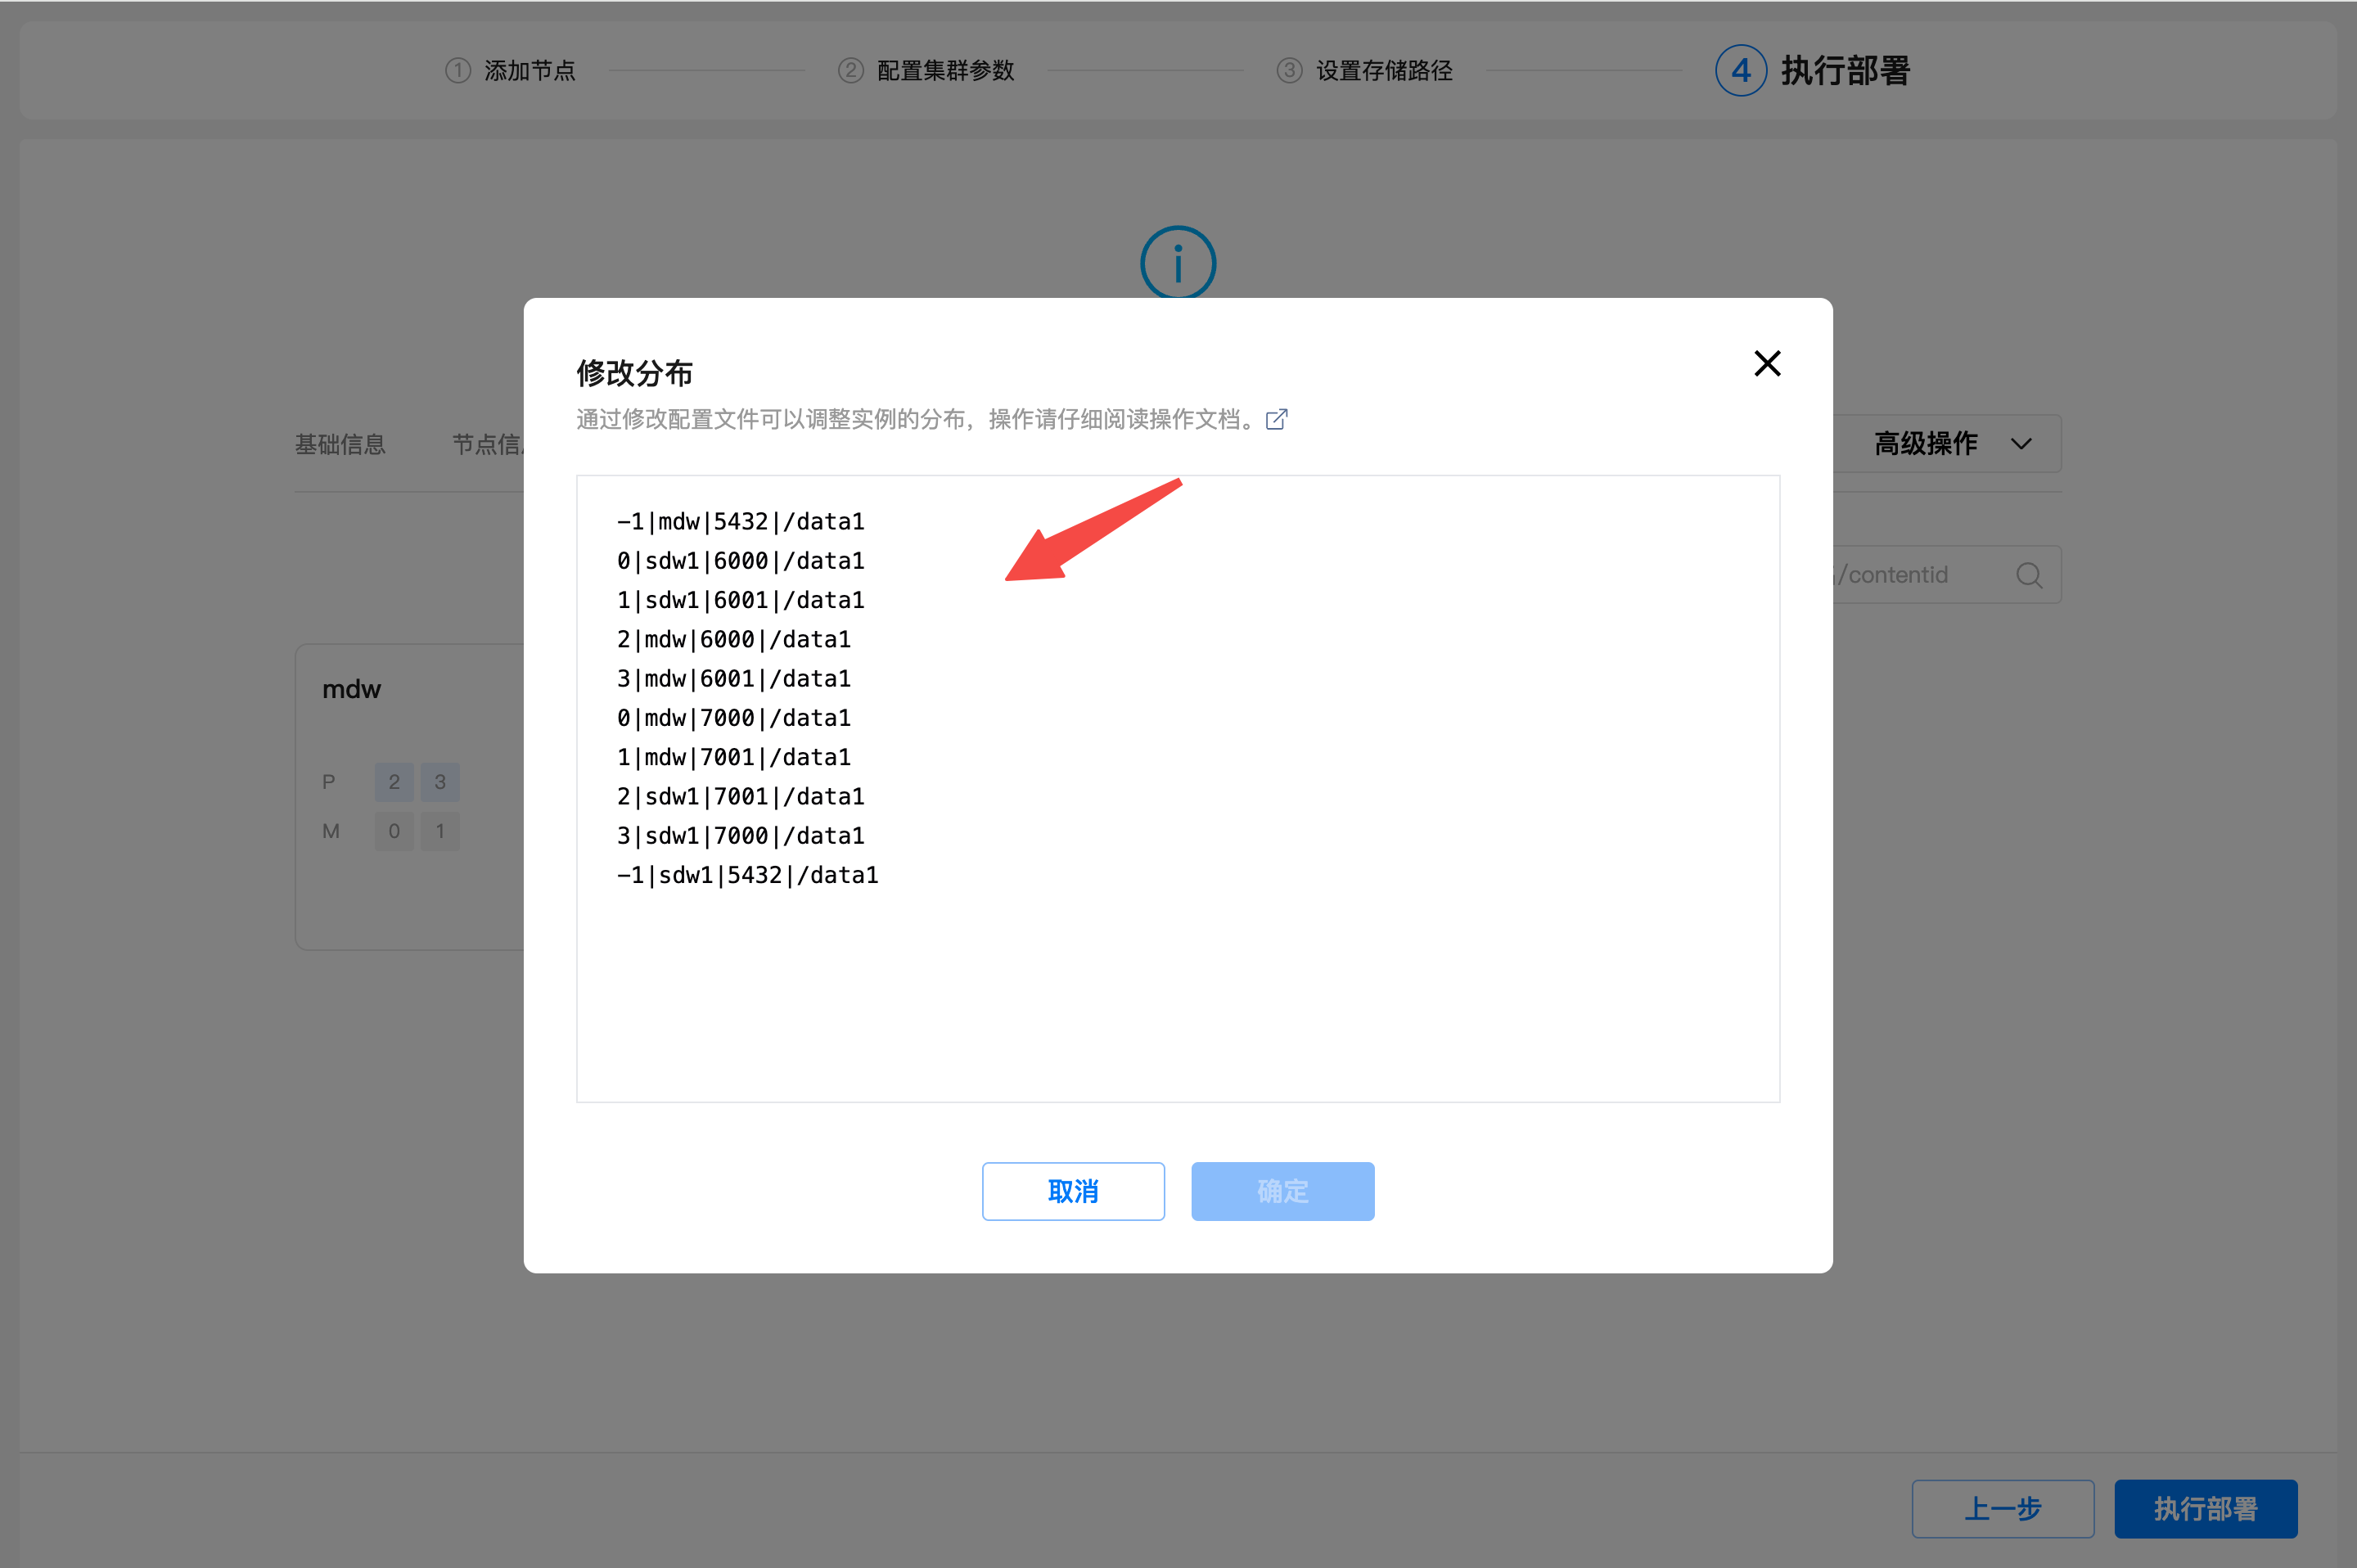
Customization of instance distribution configuration files should strictly follow the following rules.
Users need to edit the distribution rule file themselves, and customize and plan the desired unbalanced cluster topology by changing the host name, port number and data directory corresponding to the content id.
Note: The host name where the master is located in the first line cannot be changed, because the current browser page and background deployment commands are run on this machine, and changing them may cause unexpected errors.
/data2 is entered in the configuration file. After the deployment is finally completed, the actual data directory is /data2/mxdata_xxxxxxxxxxxxxxxx/master/mxseg-1/.Note: Changing the fourth column only affects the data directory of the corresponding segment. The storage path of etcd still follows the selection in the previous [1.5 Setting Storage Path].
After modifying the configuration file, click "OK". After saving successfully, you can see the configuration of the instance distribution changes in the instance distribution topology diagram.
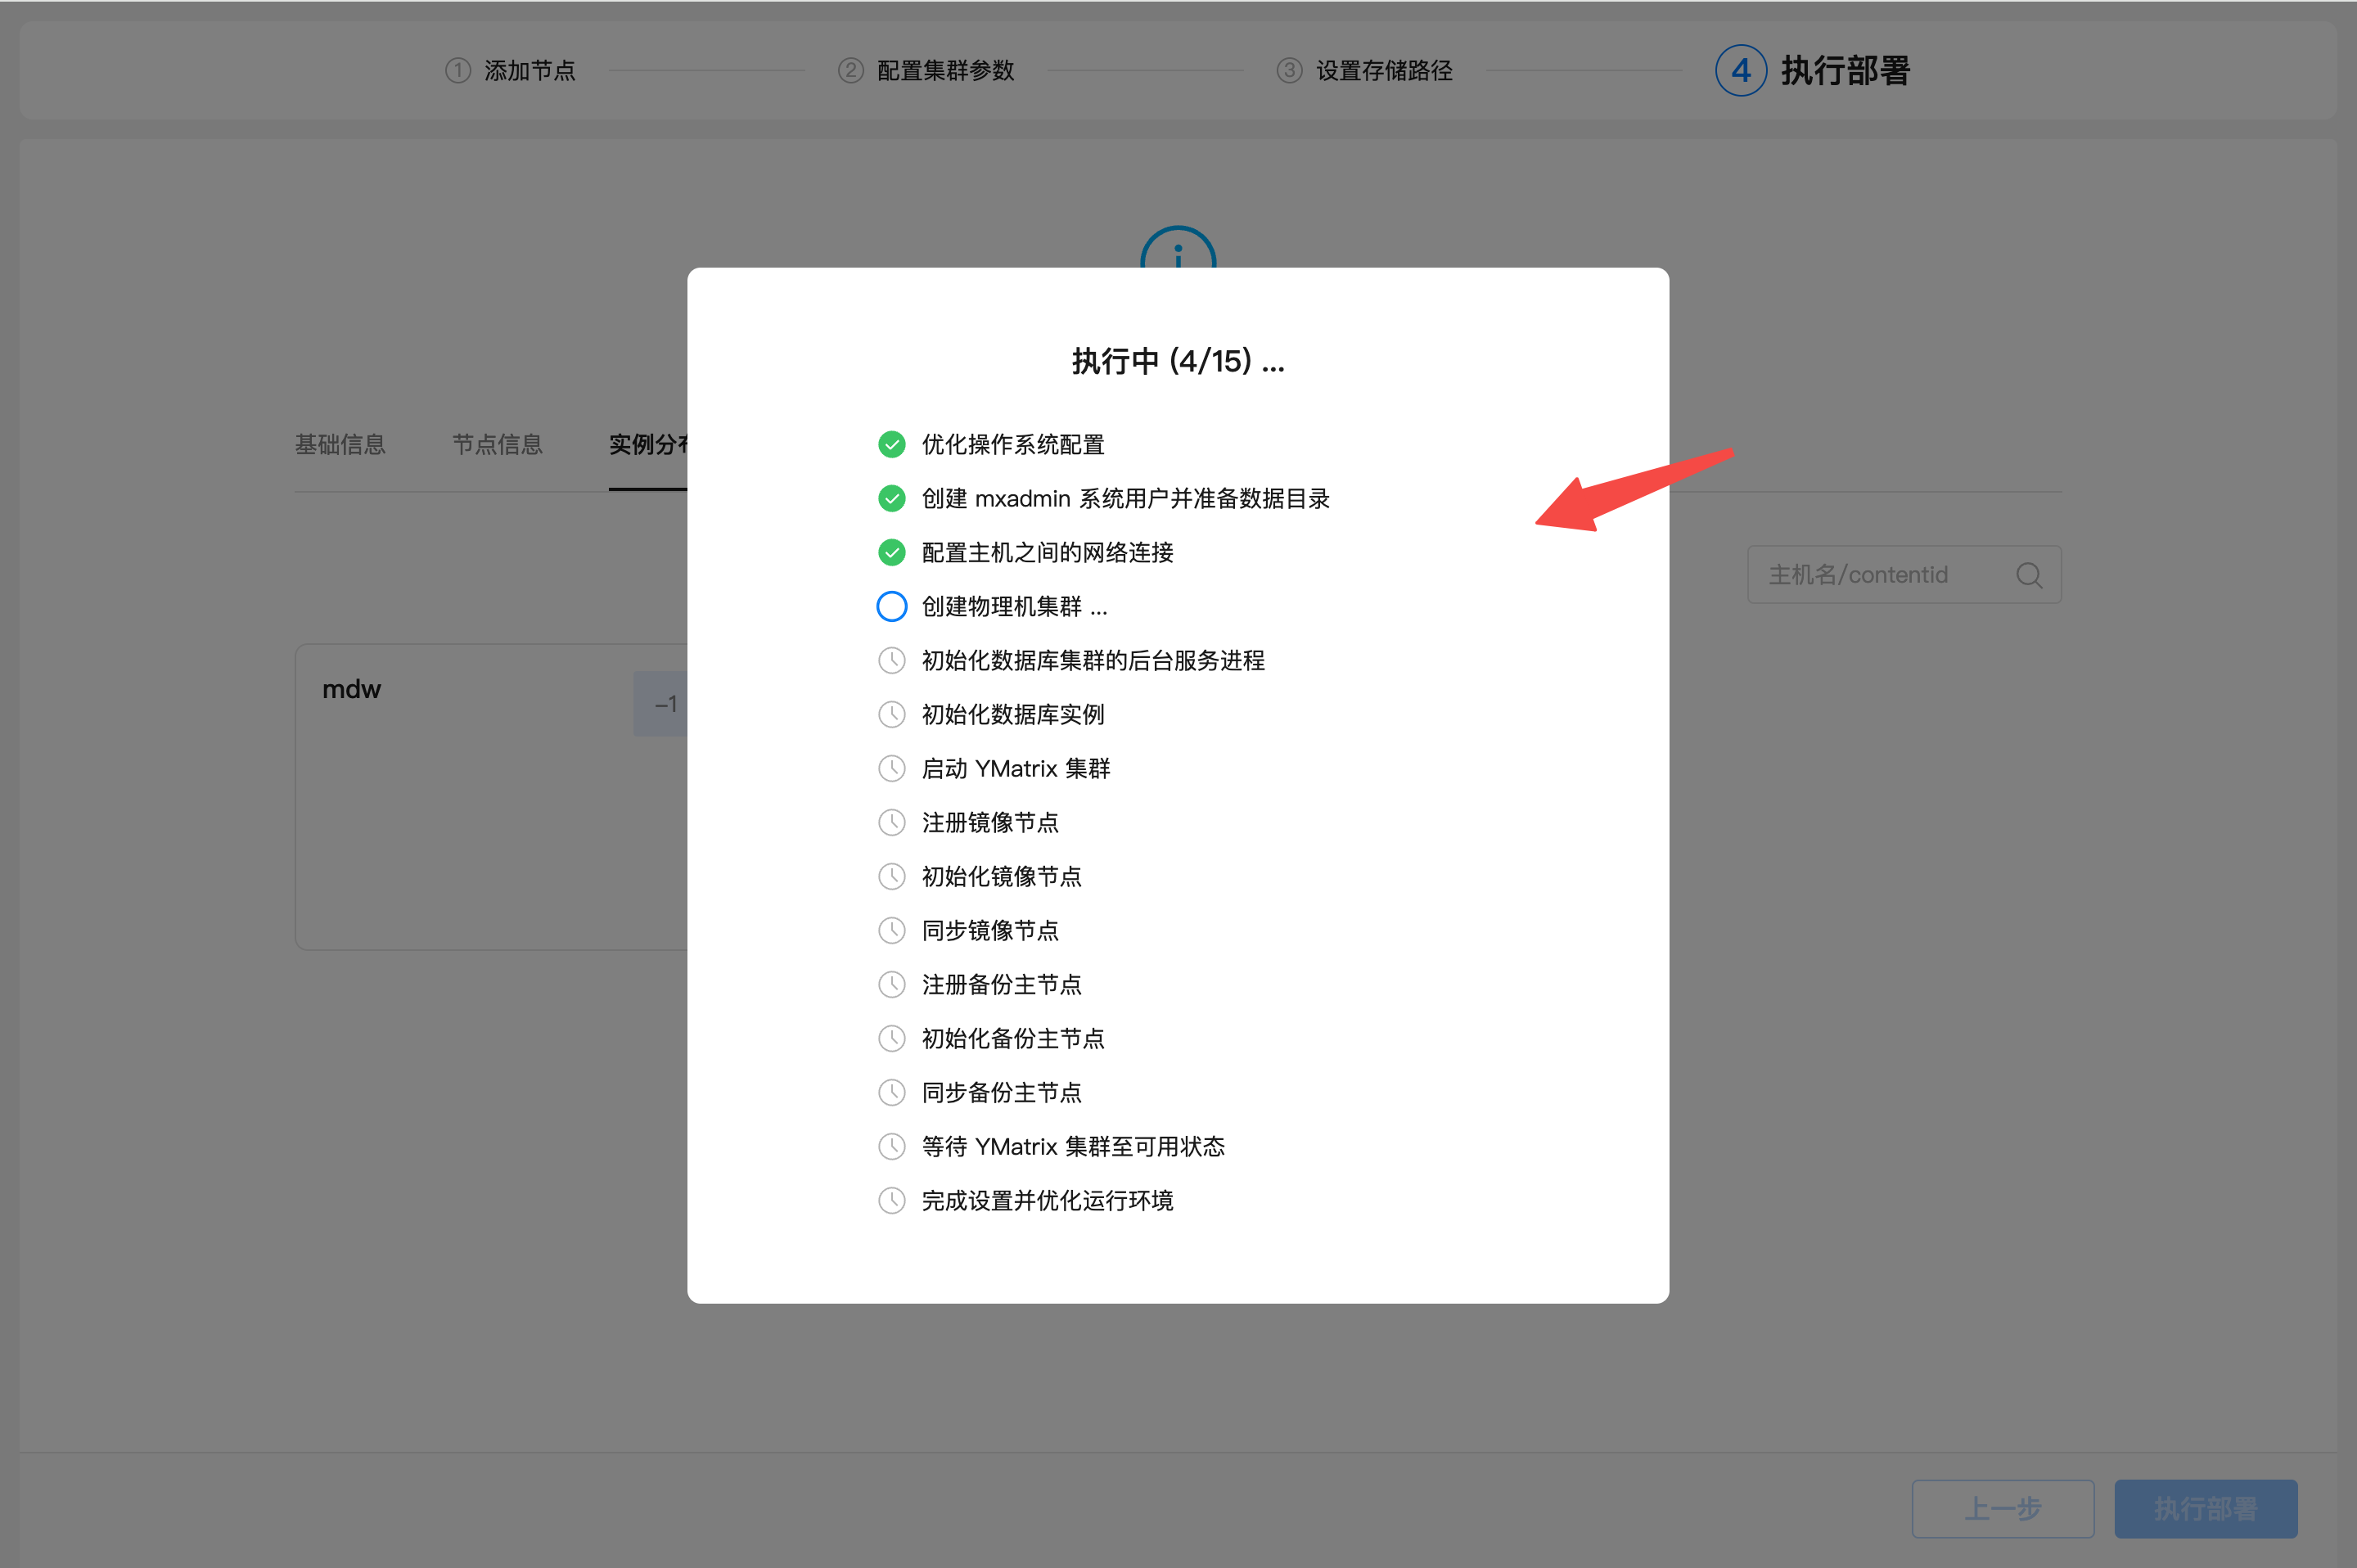
Click the "Execute Deployment" button to deploy the cluster and see the deployment progress.
After the deployment is successful, the **Access Guide page will be added, which mainly describes how to access the database.
At this point, the unbalanced deployment has been completed. Click the "Finish" button to jump to the UI homepage.
  mdw: master, seg0 (no workload), etcd0
  smdw: standby, etcd1
  sdw1 (low-fit hardware): etcd2