This document describes the main features of MatrixGate.
MatrixGate provides an HTTP API to the outside world, supporting various programming languages to import data into MatrixDB databases through the HTTP interface. The MatrixGate HTTP protocol format and response code are as follows:
MatrixGate HTTP protocol format
| Protocol Type | Protocol Format | Usage and Examples |
| --- | --- |
| URL | http://\
Timestamp|ID]|C1|C2|..|Cn | Body format The first behavior of data loading target table, SchemeName can be omitted, default is Public, TableName is a required item, and the second row starts with a time-series data row. Each row corresponds to a row of the target table. The | separator is used between columns, and the \n separator is used between rows. The first field of each row is a timestamp, the format is UNIX timestamp is accurate to seconds, see the description of --time-format. The second field of each row is TagID, integer. The third field to the last field of each row is the column corresponding to the target table. It is recommended that the DDL definition of the target table also follows the column order of (Timestamp, TagID, C1, C2,…, Cn) |
MatrixGate HTTP response code
| Response Code | Response Code Meaning | Remarks |
| --- | --- |
| 200 | StatusOK | Some data format is wrong, and the response Body will contain the wrong line with error message, such as: At line: 2missing data for column "c3" |
| 204 | StatusNoContent | Data loaded successfully to MatrixGate |
| 400 | StatusBadRequest | Data request errors, such as POST BODY format error, target table does not exist, data compression format does not match the HTTP request header, etc. |
| 405 | StatusMethodNotAllowed | HTTP Non-POST Request |
| 408 | StatusTimeout | Request timeout |
| 500 | StatusIntervalServerError | Database error, data loading failed, response Body contains detailed error information |
| 503 | StatusServiceUnavailable | MatrixGate rejects requests, such as exceeding the maximum number of connections, or MatrixGate is closing, etc |
CREATE TABLE testtable (time TIMESTAMP WITH TIME ZONE, tagid INT, c1 INT, c2 INT, c3 INT)
DISTRIBUTED BY (tagid);mxgate config --db-database testdb \
--db-master-host localhost \
--db-master-port 5432 \
--db-user mxadmin \
--db-password 123123 \
--target public.testtable \
--format csv \
--time-format unix-second \
--delimiter '|' \
--parallel 256 \
--stream-prepared 3 \
--interval 250 \
--transform plain \
> mxgate.confpublic.testtable
1603777821|1|101|201|301
1603777822|2|102|202|302
1603777823|3|103|203|303mxgate --config mxgate.confcurl http://localhost:8086/ -X POST -H 'Content-Type: text/plain' --data-binary "@data.txt"demo=# SELECT extract(epoch FROM "time"), * FROM testtable;
date_part | time | tagid | c1 | c2 | c3
----------------------------------------------------------------------------------------------------------------------------------
1603777821 | 2020-10-27 13:50:21+08 | 1 | 101 | 201 | 301
1603777822 | 2020-10-27 13:50:22+08 | 2 | 102 | 202 | 302
1603777823 | 2020-10-27 13:50:23+08 | 3 | 103 | 203 | 303
(3 rows)SDK (Software Development Kit) refers to a software development toolkit, which can free developers from non-business logic functional development, greatly improving development efficiency and experience, and increasing ease of use.
Notes!
Choose any of the above methods**. It is recommended to use (1) or (2) to directly introduce SDK from Maven or Gradle remote warehouses, which is efficient and convenient. (3) Please refer to MatrixGate FAQ:19. It is recommended to search the keywordJAVA SDKdirectly, because it is not commonly used, I will not explain it in detail here.
(1). Call Maven remote repository to automatically download SDK packages Configure the following dependencies in the pom.xml file of your JAVA project.
<dependencies>
    <dependency>
        <groupId>cn.ymatrix</groupId>
        <artifactId>mxgate-sdk-java</artifactId>
        <version>1.1.2</version>
    </dependency>
</dependencies>
(2). Use Gradle Remote Repository to Introduction SDK Dependencies
repositories {
    mavenCentral()
}

dependencies {
    implementation 'cn.ymatrix:mxgate-sdk-java:1.0.20'
}Notes!
You need to use a MatrixDB version that supports gRPC, i.e. 4.6.1 and later.
Write the mxgate configuration file mxgate_grpc.conf on the Master and start mxgate.
Notes!
Before using mxgate, you need to create tables in the database first. In the example, the Master host is mdw, the database is demo, and the data table is test_table_transfer.
The code is as follows:
# Create mxgate config file
[mxadmin@mdw ~]$ mxgate config \
    --source grpc \
    --db-database demo \
    --target public.test_table_transfer \
    --time-format raw \
    --grpc-port 8087 \
    --format csv \
    > mxgate_grpc.conf

# Start mxgate
[mxadmin@mdw ~]$ mxgate start --config mxgate_grpc.conf
As shown in the example code, to use the SDK to write data to mxgate, you need to specify that the source parameter of mxgate is grpc and format is csv. At the same time, since the SDK needs to know where to write the data, it is necessary to specify the grpc-port port number in the configuration file, 8087 in the example.
Notes!
Starting mxgate through HTTP still requires specifying the gRPC port number of mxgate, because the SDK still obtains database table meta information from mxgate in gRPC, but the way to write data is switched to HTTP.
Write the mxgate configuration file mxgate_http.conf on the Master and start mxgate. In the example, the Master host name is mdw, and the code is as follows:
# Create the mxgate config file.
[mxadmin@mdw ~]$ mxgate config \
    --source http \
    --db-database demo \
    --target public.test_table_transfer \
    --time-format raw \
    --grpc-port 8087 \
    --format csv \
    > mxgate_http.conf

# Start mxgate
[mxadmin@mdw ~]$ mxgate start --config mxgate_http.conf Partitioned table "public.test_table_transfer"
Column | Type | Collation | Nullable | Default
--------+---------------------------------------------------------------------------------------------------------------------------------------------------------------------------------------------------------------------------------------------------------
ts | timestamp without time zone | | |
tag | integer | | not null |
c1 | double precision | | |
c2 | double precision | | |
c3 | double precision | | |
c4 | double precision | | |
c5 | text | | |
c6 | text | | |
c7 | text | | |
c8 | text | | |
Partition key: RANGE (ts)First, perform global initialization settings:
// Set the log level, default INFO.
MxLogger.loggerLevel(LoggerLevel.INFO);
// The log will be output to stdout by default. If you do not want to output, you can pass false in the following API.
MxLogger.enableStdout(true);
// The default log file path and naming format of SDK is /tmp/mxgate_sdk_java_2022-08-26_133403.log,
// Users can customize the file path and file name of the output log file.
MxLogger.writeToFile("/tmp/mxgate_sdk_java.log");Notes!
Only build once in a project. The relevant configuration can be performed before initializing the MxBuilder.MxBuilder builder = MxBuilder.newBuilder() .withDropAll(false) // 如果需用于测试,则可设置为 true,不发送数据给 mxgate,直接 drop;发送数据到 mxgate 需设置为 false .withCacheCapacity(100000) // 用于暂存 tuples 微批的 queue的大小 .withCacheEnqueueTimeout(2000) // 若queue满,tuples 存入 queue 的等待超时时间。若超时,会抛出IllegalStateException .withConcurrency(10) // 同时向 mxgate 写入数据的线程数量。 .withRequestTimeoutMillis(3000) // 每个线程每次数据写入请求的超时时间(毫秒)。 .withMaxRetryAttempts(3) // 每个线程每次写入请求遇到问题后的重试次数。 .withRetryWaitDurationMillis(3000) // 每次重试的时间间隔(当前的实现,每次重试的时间间隔是固定的)。 .withRequestType(RequestType.WithHTTP) // SDK 支持通过 HTTP 和 gRPC 两种方式向 mxgate post 数据,对应的配置为:RequestType.WithHTTP,RequestType.WithGRPC .withCircuitBreaker() // 使用内置熔断器。若失败率或者慢请求率达到阈值,则会开启,开启后持续30秒,暂停向 mxgate 发送数据,亦无法 append tuple .withMinimumNumberOfCalls(1) // 熔断器生效的最小请求数(要求 >= 1,默认 10) .withSlidingWindowSize(10) // 用以计算失败率的滑动窗口大小(要求 >= 1,默认 100) .withFailureRateThreshold(60.0f) // 失败率阈值(要求 >0 且 <= 100),若失败率达到阈值则会开启熔断器 .withSlowCallDurationThresholdMillis(1000) // 慢请求时长阈值(毫秒),超过该时长则认为是慢请求(注意该时长应小于请求超时时间) .withSlowCallRateThreshold(80.0f)// 慢请求阈值,若慢请求率达到阈值则会开启熔断器 // .withRequestAsync(true)// Turn on asynchronous mode to send data to mxgate (if you use this function to remove the comment content of this line) // .withConcurrency(20)// Usually, asynchronous mode only requires dozens of concurrency to achieve the same or even higher throughput as synchronous mode (such as using this function to remove the comment content of this line) // MxBuilder's builder mode has added the following API to adjust the concurrency of CSV parallel conversions (MxClient Group level) // .withCSVConstructionParallel(100)// (This function starts with v1.1.0, if you use it, just remove the comment content of this line) .build(); // MxBuilder has added a singleton API. After MxBuilder is successfully built, you can obtain the instance object of the globally unique singleton of MxBuilder at any location through the following API. There is no need for the user to manually write code to maintain the global reference of MxBuilder. // MxBuilder.instance();// (This function starts with v1.1.2, if you use it, just remove the comment content of this line)
// builder.getTupleCacheSize(); // Used to get the number of remaining Tuples in the Tuple cache inside the SDK in real time (if you use this function to remove the comment content of this line)
The connect method of Builder receives four parameters:
(1). The mxgate process provides the hostname (IP address) and port number where the specific service is located, which is used to receive data and database table meta information.
For example, for the HTTP method, it is `http://localhost:8086/`; for the gRPC method, it is `localhost:8087`
(2). schema.
(3). table name.
(4). callback. If the builder can successfully connect to mxgate, the onSuccess method will callback and return an MxClient instance for data writing. If the connection fails, onFailure will callback, and failureMsg will explain the reason for the failure.

The specific code is as follows. Remember to replace the port number, pattern name, and table name with the actual content.
// Asynchronous method (this feature is supported starting from v1.0.13) builder.connect("http://localhost:8086/", "localhost:8087", "public", "test_table", new ConnectionListener() { @Override public void onSuccess(MxClient client) { sendData(client); }
@Override
public void onFailure(String failureMsg) {

}
});
Through the onSuccess() callback function of ConnectionListener, you can get the MxClient instance, and then use the API provided by MxClient to implement the function of writing data to mxgate.// Synchronization method (this feature is supported starting from v1.0.13) MxClient client = builder.connect(httpHost, gRPCHost, schema, table);
// v1.1.0 improves the scalability of MxClient, and MxBuilder provides several new APIs // The MxClient obtained through this API belongs to a MxClient Group // You can freely define the concurrency parameters of MxClient Group Number, Tuples cache capability, and TuplesConsumer through these APIs. // MxClient client = builder.connectWithGroup(dataSendingHost, metadataHost, schema, table, 10);// (This function starts from v1.1.0, if you use to remove the comment content of this line) // MxClient client = builder.connectWithGroup(dataSendingHost, metadataHost, schema, table, 1, 1000, 3000, 10);// (This function starts with v1.1.0, if you use to remove the comment content of this line) // APIs starting with skip will skip the process of connecting to back-end services to obtain database table meta information when calling. // This type of MxClient can only obtain lightweight Tuples through generateEmptyTupleLite() // MxClient client = mxBuilder.skipConnectWithGroup(dataSendingHost, metadataHost, schema, table, delimiter, 1);// (This function starts with v1.1.0, if you use the comment content of this line, you can just remove the comment content) // MxClient client = mxBuilder.skipConnectWithGroup(dataSendingHost, metadataHost, schema, table, delimiter, 1, 1000, 3000, 1);// (This function starts with v1.1.0, if you use the comment content of this line, you can just remove the comment content)
> ***Notes!***
MxClient is thread-safe, but if used in concurrent multithreading, in order to ensure optimal performance, it is best to have a separate MxClient in each thread, that is, multiple MxClient instances are returned through MxBuilder multiple connects.
private void sendData(MxClient client) { if (client != null) { // MxClient will accumulate a batch of Tuples as a micro batch and send them to mxgate. // This API sets the waiting time accumulated for each microbatch, with a default of 2000 million seconds. // That is, each 2s will try to send a batch of data to mxgate if the 2s time period is // No data is written, no sending. client.withIntervalToFlushMillis(5000); // Set how many Tuple bytes accumulated to be sent as a microbatch, even if the time has not been reached // The set flush interval, the accumulated micro-batch bytes will also be sent if it reaches the number of micro-batch bytes. // The time of flush interval has reached, and the number of bytes that are not accumulated enough to be set will also be sent. client.withEnoughBytesToFlush(500); // Compared withEnoughBytesToFlush, when appendTuple // Performance is improved because it avoids calculating bytes // Depending on the specific use scenario, if withEnoughBytesToFlush // It can also meet the performance requirements, so each flush, the data volume will be more uniform. // withEnoughLinesToFlush will have higher priority than withEnoughBytesToFlush client.withEnoughLinesToFlush(10000); // MxClient has added the following API to adjust the number of Tuples for each CSV conversion subtask // For example, there are 10,000 Tuples in Flush at a time. Set BatchSize = 2000 through the following API // Then the CSV conversion of these 10,000 Tuples will be divided into 5 subtasks, each subtask handles 2,000 Tuples and executes concurrently. client.withCSVConstructionBatchSize(2000);//(此功能从 v1.1.0 开始支持) // Each MxClient has a private object pool // When using it, you need to set the size of the object pool according to the number of Tuples in each MxClient flush. // client.useTuplesPool(poolSize); // (If you use this function to remove the comment content of this line) // MxClient supports compression and needs to be used with mxgate v4.7.6 and higher // client.withCompress(); // (If you use this function to remove the comment content of this line) // For HTTP requests, base64 encoding can be used without using base64 encoding, gRPC needs to perform base64 encoding. // client.withBase64Encode4Compress(); // (If you use this function to remove the comment content of this line) // MxClient can register a DataPostListener, and the success and failure of each batch of data are sent. // They will all callback in onSuccess and onFailure. You can understand which Tuple writes succeed and which Tuple writes fail client.registerDataPostListener(new DataPostListener() { @Override public void onSuccess(Result result) { System.out.println(CUSTOMER_LOG_TAG + "Send tuples success: " + result.getMsg()); System.out.println(CUSTOMER_LOG_TAG + "Succeed lines onSuccess callback " + result.getSucceedLines()); }
        @Override
        public void onFailure(Result result) {
            // result.getErrorTuplesMap() key-value pair containing the line of error and the cause of the error Tuple -> String
            // Key is the wrong line, value is the reason for the error;
            for (Map.Entry<Tuple, String> entry : result.getErrorTuplesMap().entrySet()) {
                l.error(CUSTOMER_LOG_TAG + "error tuple of table={}, tuple={}, reason={}", entry.getKey().getTableName(), entry.getKey(), entry.getValue());
                for (Column c : entry.getKey().getColumns()) {
                    l.error(CUSTOMER_LOG_TAG + "error entry columns {} = {}", c.getColumnName(), c.getValue());
                }
            }
            System.out.println(result.getSuccessLines());
        }
    });
Return an empty Tuple object for assignment via MxClinet's generateEmptyTuple API.Tuple tuple1 = client.generateEmptyTuple(); Tuple tuple2 = client.generateEmptyTuple();
Assign a value to an empty Tuple in the form of Key -> Value. Key is the column name corresponding to the database table; Value is the value corresponding to this field. If some field values are allowed to be null or have default values, you can not add the value of the field, and the SDK will automatically fill in the default or empty values.
The meta information of the database tables obtained through this API is no longer maintained within the Tuple. It is a lighter-weight Tuple. Therefore, when calling MxClient.appendTuple() to append to MxClient, it eliminates the work of checking the internal data legitimacy of Tuple based on the database table meta information, so that the Tuple data can be flushed as fast as possible.// Tuple tuple = client.generateEmptyTupleLite();// (This function starts with v1.1.0, if you use it to remove the comment content of this line)
>***Notes!***
When performing the add column operation to this lightweight Tuple, you need to manually maintain the order of the `addColumn() key -> value` pairs to ensure that the order corresponds to the order of columns in the database table.

For example, the data table column order is as follows:
Column | Type | Collation | Nullable | Default --------+--------------------------------------------------------------------------------------------------------------------------------------------------------------------------------------------------------------------------------------------------------- ts | timestamp without time zone | | | tag | integer | | not null | c1 | double precision | | | c2 | double precision | | | c3 | double precision | | | c4 | double precision | | | c5 | text | | | c6 | text | | | c7 | text | | | c8 | text | | |
Then the order of adding columns must be consistent with the order of columns in the database table. In this example, the following is: tuple1.addColumn("ts", "2022-05-18 16:30:06");
tuple1.addColumn("tag", 102020030);
tuple1.addColumn("c1", 1.1);
tuple1.addColumn("c2", 2.2);
tuple1.addColumn("c3", 3.3);
tuple1.addColumn("c4", 4.4);
tuple1.addColumn("c5", "中文字符测试-1");
tuple1.addColumn("c6", "lTxFCVLwcDTKbNbjau_c6");
tuple1.addColumn("c7", "lTxFCVLwcDTKbNbjau_c7");
tuple1.addColumn("c8", "lTxFCVLwcDTKbNbjau_c8");
tuple2.addColumn("ts", "2022-05-18 16:30:06");
tuple2.addColumn("tag", 102020030);
tuple2.addColumn("c1", 1.1);
tuple2.addColumn("c2", 2.2);
tuple2.addColumn("c3", 3.3);
tuple2.addColumn("c4", 4.4);
tuple2.addColumn("c5", "中文字符测试-2");
tuple2.addColumn("c6", "lTxFCVLwcDTKbNbjau_c26");
tuple2.addColumn("c7", "lTxFCVLwcDTKbNbjau_c27");
tuple2.addColumn("c8", "lTxFCVLwcDTKbNbjau_c28");Finally, add the assigned Tuple append to MxClient.client.appendTuples(tuple1, tuple2);
> ***Notes!***
MxClient provides multiple APIs, which can Append one Tuple at a time, Append multiple Tuples at a time, or a Tuples List. For example: `client.appendTuple();`, `client.appendTupleList();`; you can also call the flush() method of MxClient to manually send data, no matter how many Tuple data is written at this time, such as `client.flush();`.

- Send data synchronously using MxClient
Synchronous sending means synchronous sending Tuple to mxgate for easier subsequent processing (such as submitting Kafka offset).
Tuple tuple1 = client.generateEmptyTuple(); tuple1.addColumn("ts", "2022-05-18 16:30:06"); tuple1.addColumn("tag", 102020030); tuple1.addColumn("c1", 1.1); tuple1.addColumn("c2", 2.2); tuple1.addColumn("c3", 3.3); tuple1.addColumn("c4", 4.4); tuple1.addColumn("c5", "lTxFCVLwcDTKbNbjau_c5"); tuple1.addColumn("c6", "lTxFCVLwcDTKbNbjau_c6"); tuple1.addColumn("c7", "lTxFCVLwcDTKbNbjau_c7"); tuple1.addColumn("c8", "lTxFCVLwcDTKbNbjau_c8");
// appendTupleBlocking will return the return value of boolean type
// true: MxClient is already full of the set bytes size, and you can send a request
// false: The set bytes size has not been fully written yet
try {
if (client.appendTupleBlocking(tuple1)) {
l.info("append tuples enough");
// Manual trigger tuples flush
client.flushBlocking();
}
// If the flushBlocking throws an exception as follows, it means that the entire batch of Tuples cannot be written to mxgate, and the caller can handle the exception accordingly
} catch (AllTuplesFailException e) {
l.error("Tuples fail and catch the exception return.", e);
for (Map.Entry<Tuple, String> entry : result.getErrorTuplesMap().entrySet()) {
l.error(CUSTOMER_LOG_TAG + "error tuple of table={}, tuple={}, reason={}", entry.getKey().getTableName(), entry.getKey(), entry.getValue());
for (Column c : entry.getKey().getColumns()) {
l.error(CUSTOMER_LOG_TAG + "error entry columns {} = {}", c.getColumnName(), c.getValue());
}
}
// If the flushBlocking throws an exception as follows, it means that some Tuples cannot be written to mxgate, and the caller can handle the exception accordingly
} catch (PartiallyTuplesFailException e) {
for (Map.Entry<Tuple, String> entry : result.getErrorTuplesMap().entrySet()) {
l.error(CUSTOMER_LOG_TAG + "error tuple of table={}, tuple={}, reason={}", entry.getKey().getTableName(), entry.getKey(), entry.getValue());
for (Column c : entry.getKey().getColumns()) {
l.error(CUSTOMER_LOG_TAG + "error entry columns {} = {}", c.getColumnName(), c.getValue());
}
}
}
#### 3.1.2 MatrixGate HTTP API Java Exampleimport java.io.BufferedReader; import java.io.DataOutputStream; import java.io.InputStreamReader; import java.net.HttpURLConnection; import java.net.URL;
public class MxgateExample { public static void main(String[] args) throws Exception { MxgateExample http = new MxgateExample(); http.sendingPostRequest(); }
// HTTP Post request
private void sendingPostRequest() throws Exception {
    // mxgate listens on port 8086 of localhost
    String url = "http://localhost:8086/";
    URL obj = new URL(url);
    HttpURLConnection con = (HttpURLConnection) obj.openConnection();

    // Setting basic post request
    con.setRequestMethod("POST");
    con.setRequestProperty("Content-Type","text/plain");
    String postJsonData = "public.testtable\n1603777821|1|101|201|301\n1603777822|2|102|202|302\n1603777823|3|103|203|303";

    con.setDoOutput(true);
    DataOutputStream wr = new DataOutputStream(con.getOutputStream());
    // When the data is in Chinese, it can be encoded by postJsonData.getBytes("UTF-8")
    wr.write(postJsonData.toString().getBytes("UTF-8"));
    wr.flush();
    wr.close();

    int responseCode = con.getResponseCode();
    System.out.println("Sending 'POST' request to URL : " + url);
    System.out.println("Post Data : " + postJsonData);
    System.out.println("Response Code : " + responseCode);

    BufferedReader in = new BufferedReader(new InputStreamReader(con.getInputStream()));
    String output;
    StringBuffer response = new StringBuffer();

    while ((output = in.readLine()) != null) {
        response.append(output);
    }
    in.close();

    System.out.println(response.toString());
}
}
<a name="python"><br/></a>
### 3.2 MatrixGate HTTP API Python Example
import http.client
class MxgateExample(object): def init(self):
    self.url = "localhost:8086"

    self.postData = "public.testtable\n/" \
                    "1603777821|1|101|201|301\n/" \
                    "1603777822|2|102|202|302\n/" \
                    "1603777823|3|103|203|303"
    self.headers = {"Content-Type": "text/plain"}

# HTTP Post request
def sending_post_request(self):

    conn = http.client.HTTPConnection(self.url)
    conn.request("POST", "/", self.postData, self.headers)

    response = conn.getresponse()
    response_code = response.getcode()
    print(f"Sending 'POST' request to URL : {self.url}")
    print(f"Post Data : {self.postData}")
    print(f"Response Code : {response_code}")

    output = response.read()
    print(output)
if name == 'main': gate_post = MxgateExample() gate_post.sending_post_request()
<a name="C#"><br/></a>
### 3.3 MatrixGate HTTP API C# Example
> It is recommended to use the C# Core development environment for developing code
using System; using System.IO; using System.Net; using System.Text;
namespace HttpPostTest { class Program { static void Main(string[] args) { var url = "http://10.13.2.177:8086/"; var txt = "public.dest\n2021-01-01 00:00:00,1,a1\n2021-01-01 00:00:00,2,a2\n2021-01-01 00:00:00,3,a3";
       HttpPost(url,txt);
    }
public static string HttpPost(string url, string content){ string result = ""; HttpWebRequest req = (HttpWebRequest)WebRequest.Create(url); req.Method = "POST"; req.ContentType = "text/plain";
#region Add Post parameters
byte[] data = Encoding.UTF8.GetBytes(content);
req.ContentLength = data.Length;
using (Stream reqStream = req.GetRequestStream()){
    reqStream.Write(data, 0, data.Length);
    reqStream.Close();
}
#endregion

HttpWebResponse resp = (HttpWebResponse)req.GetResponse();
Stream stream = resp.GetResponseStream();
//Get the response content
using (StreamReader reader = new StreamReader(stream, Encoding.UTF8)){
    result = reader.ReadToEnd();
    }
    return result;
}
} }
> If you encounter the problem of error when serving connection ***** body size exceeds the given limit, increase the max-body-bytes under mxgate.conf

### 3.4 MatrixGate HTTP API Golang Example
package main
import ( "bytes" "net/http" )
func PostDataToServer(URL string) error {
data := public.testtable 1603777821|1|101|201|301 1603777822|2|102|202|302 1603777823|3|103|203|303
resp, err := http.Post(URL, "application/text", bytes.NewBuffer([]byte(data)))
if err != nil {
return err
}
if resp.StatusCode != 200 {
// Deal with the response body.
return nil
}
// Deal with the response body.
return nil}
func main() { err := PostDataToServer("http://127.0.0.1:8086") if err != nil{ panic(err) }
}
<a name="special_type"><br/></a>
## 4 MatrixGate Loading Special Types
### 4.1 Example of MatrixGate loading CSV files
- Create table csvtable in demo database.
demo=# CREATE TABLE csvtable (time TIMESTAMP WITH TIME ZONE, tagid INT, c1 INT, c2 INT, c3 INT) DISTRIBUTED BY (tagid);
- Edit the data load file data.csv, the content is as follows:1603777821|1|101|201|301 1603777822|2|102|202|302 1603777823|3|103|203|303
- Start mxgate, specify the source parameter to stdin, the target table is an existing csvtable, and the loading parallelism is 2. In the example, the host is mdw.[mxadmin@mdw ~]$ mxgate \ --source stdin \ --db-database demo \ --db-master-host 127.0.0.1 \ --db-master-port 5432 \ --db-user mxadmin \ --time-format unix-second \ --delimiter "|" \ --target csvtable \ --parallel 2 < data.csv
- Connect to the database to query whether the data is loaded successfully.demo=# SELECT * FROM csvtable ; time | tagid | c1 | c2 | c3 -----------------------+-------+-------------------------------------------------------------------------------------------------- 2020-10-27 05:50:23+08 | 3 | 103 | 203 | 303 2020-10-27 05:50:22+08 | 2 | 102 | 202 | 302 2020-10-27 05:50:21+08 | 1 | 101 | 201 | 301
(3 rows)
### 4.2 Example of MatrixGate loading JSON fields

#### 4.2.1 JSON
- Create table.
demo=# CREATE TABLE json_test(id int, j json);
- Create data files.
 `~/json.csv`
1|"{""a"":10, ""b"":""xyz""}"
- load
Here we use the stdin mode as an example, and the other modes are the same.
The key is `--format csv`.
[mxadmin@mdw ~]$ mxgate \ --source stdin \ --db-database postgres \ --db-master-host 127.0.0.1 \ --db-master-port 7000 \ --db-user mxadmin \ --time-format raw \ --format csv \ --delimiter "|" \ --target json_test < ~/json.csv
- View loading data.demo=# SELECT * FROM json_test; id | j ----+----------------------------------------------------------------------------------------------------------------------------- 1 | {"a":10, "b":"xyz"} (1 row)
#### 4.2.2 JSON array

- Create table.
demo=# CREATE TABLE json_array_test(id int, j _json);
- Create data files
 `~/json_array.csv`.
1|"{""{\""a\"":10, \""b\"":\""xyz\""}"",""{\""c\"": 10}""}"
- Load mxgate.[mxadmin@mdw ~]$ mxgate \ --source stdin \ --db-database postgres \ --db-master-host 127.0.0.1 \ --db-master-port 7000 \ --db-user mxadmin \ --time-format raw \ --format csv \ --delimiter "|" \ --target json_array_test < ~/json_array.csv
- verify.demo=# SELECT * FROM json_array_test ; id | j ----+----------------------------------------------------------------------------------------------------------------------------- 1 | {"{\"a\":10, \"b\":\"xyz\"}","{\"c\": 10}"} (1 row)
> ***Notes!***
Because the JSON column contains special characters such as quotes, the --format parameter of mxgate must be CSV.

<a name="watch"><br/></a>
## 5 Observe mxgate operation indicators

`watch` is a subcommand of mxgate that uses a series of indicators to describe the operation of mxgate daemon.
There are two modes of `watch`:
- Real-time observation mode, print gate's metrics every 3 seconds in a format similar to sar.
- Historical Observation Mode, you can specify any time period, any time period (such as every hour yesterday, every day last month, every month last year) to statistically import speed.

### 5.1 Real-time observation
[mxadmin@mdw ~]$ mxgate watch
The running indicators of mxgate will be collected every three seconds, and the output results are as follows Time WCount ICount WSpeed/s ISpeed/s WBandWidth MB/S BlocakItems2022-04-28 15:20:58 14478858 14527011 2598081 2627887 2395 0 2022-04-28 15:21:01 22231035 22633254 2584059 2702081 2222 0 2022-04-28 15:21:04 30494310 30500874 2754425 2622540 3551 0 2022-04-28 15:21:07 38004210 38032956 2503300 2510694 2862 0 2022-04-28 15:21:10 46188696 46298223 2728162 2755089 2227 0 ...
The --info parameter can be used to obtain the description of each indicator above.[mxadmin@mdw ~]$ mxgate watch --info
By default, only speed indicators will be output, and the time indicator can be observed through the --watch-lateency parameter to analyze problems.[mxadmin@mdw ~]$ mxgate watch --watch-latency
### 5.2 Historical data observation[mxadmin@mdw ~]$ mxgate watch --history
The average speed per hour in 24 hours as of the current time will be calculated, and the output result is as follows TIME RANGE | SPEED/S | BANDWIDTH MB/S | BLOCK ITEMS2022-04-28 16:00:00-2022-04-28 17:00:00 | 2208010 | 1254.48 | 0 2022-04-28 17:00:00-2022-04-28 18:00:00 | 1157920 | 1327.00 | 0 2022-04-28 18:00:00-2022-04-28 19:00:00 | 2228666 | 2162.32 | 0 2022-04-28 19:00:00-2022-04-28 20:00:00 | 1371092 | 2881.30 | 0 2022-04-28 20:00:00-2022-04-28 21:00:00 | 1575320 | 2608.20 | 0
Among them, SPEED/S, BANDWIDTH MB/S represents the imported entry speed and import bandwidth (MB/s in units),
BLOCK ITEMS represents the amount of data blocking in mxgate. This value will rise when the database consumption speed cannot keep up with the production speed of data sources (http, kafka, etc.).

You can add `--watch-start`, `--watch-end`, `--watch-duration` parameters to control the time interval and period of observation historical data.
For example
[mxadmin@mdw ~]$ mxgate watch --history --watch-start '2022-03-27 00:00:00' --watch-end '2022-04-27 00:00:00' --watch-duration '168h'
Average import speeds per week (every 168h) from March 27 to April 27
Among them, `--watch-duration` supports three units: `h`` `m`` `s`.

<a name="instrumentation"><br/></a>
### 5.3 Data insertion full process observation [**Experimental features**, supported since v4.8.2]
>***Notes!***
Experimental features are features that exist in a specific version but are not officially released. They will undergo syntax or implementation changes or directly delete without prior notice. Please use them with caution.

YMatrix supports the use of the `--instrumentation (-I)` parameter to more conveniently locate data writing problems or performance bottlenecks. When this parameter is turned on, the time-consuming process from the start of insertion to the task submission is printed in the mxgate log.

The complete instrumentation of one insertion is roughly as follows:
2023-04-26:02:51:43.679 xxx-[INFO]:-[Writer.Instrumentation] start_insert_txn [slotid:7] [insert_seq:123] 2023-04-26:02:51:43.683 xxx-[INFO]:-[Writer.Instrumentation] wait_singleconn [slotid:7] [insert_seq:123] [cost: 4ms] [seg:0] [ssid:13346] [seg_cnt:2] 2023-04-26:02:51:43.683 xxx-[INFO]:-[Writer.Instrumentation] wait_singleconn [slotid:7] [insert_seq:123] [cost: 4ms] [seg:1] [ssid:13346] [seg_cnt:2] 2023-04-26:02:51:44.730 xxx-[INFO]:-[Writer.Instrumentation] wait_allconn [slotid:7] [insert_seq:123] [cost:1051ms] 2023-04-26:02:51:44.747 xxx-[INFO]:-[Writer.Instrumentation] wait_flow [slotid:7] [insert_seq:123] [cost: 17ms] [seg:1] [ssid:13346] [seg_cnt:2] 2023-04-26:02:51:44.747 xxx-[INFO]:-[Writer.Instrumentation] write_header [slotid:7] [insert_seq:123] [cost: 0ms] [seg:1] [ssid:13346] [seg_cnt:2] [bytes:5] 2023-04-26:02:51:44.747 xxx-[INFO]:-[Writer.Instrumentation] write_body [slotid:7] [insert_seq:123] [cost: 0ms] [seg:1] [ssid:13346] [seg_cnt:2] [bytes:45] 2023-04-26:02:51:44.831 xxx-[INFO]:-[Writer.Instrumentation] write_eof [slotid:7] [insert_seq:123] [cost: 0ms] [seg:1] [ssid:13346] [seg_cnt:2] 2023-04-26:02:51:44.831 xxx-[INFO]:-[Writer.Instrumentation] write_eof [slotid:7] [insert_seq:123] [cost: 0ms] [seg:0] [ssid:13346] [seg_cnt:2] 2023-04-26:02:51:44.832 xxx-[INFO]:-[Writer.Instrumentation] wait_insertdone [slotid:7] [insert_seq:123] [cost: 1ms] [rows:17] 2023-04-26:02:51:44.836 xxx-[INFO]:-[Writer.Instrumentation] commit [slotid:7] [insert_seq:123] [cost: 3ms] [rows:17] 2023-04-26:02:51:44.836 xxx-[INFO]:-[Writer.Instrumentation] complete_insert_txn [slotid:7] [insert_seq:123]
This log contains the following key information:
- `INSERT` Start time: `start_insert_txn`
- Wait for Segment Connection time: `wait_singleconn`
- The time to start dispatching for all segments is connected to the slot (Slot) and the time to start dispatching: `wait_allconn`
- Wait for upstream data time: `wait_flow`
- Time to write to each piece of data: `write_header` (write to the data header) / `write_body` (write to the actual content of the data) / `write_eof` (write to the end of the data)
- Time taken from EOF to the end of insertion: `wait_insertdone`
- Submission execution time: `commit`
- The end time of this insertion: `complete_insert_txn`

You can add it on the mxgate startup parameter (or modify this parameter in the configuration file). Examples are as follows:

Close observations of the insertion process.
$ mxgate start --instrumentation disable
Open observation of slot 0 (Slot).$ mxgate start --instrumentation single
Turn on all Slot observations.$ mxgate start --instrumentation all
>***Notes!***
`--instrumentation` For detailed sub-parameter information, please refer to [Command Line Parameters] (/doc/4.8/tools/mxgate/feature#instrumentation).
<a name="non-stop_update_parameters"><br/></a>
## 6 Update parallel writing related parameters without shutting down
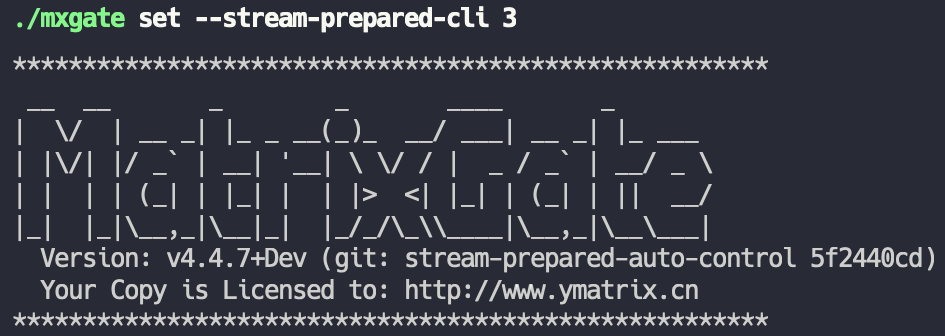
mxgate supports modifying the relevant parameters of parallel loading without stopping the run: "interval" and "stream-prepared". "interval" represents the working time for each write connection from mxgate to the database table, and "stream-prepared" represents the number of active write connections. In mxgate logic, there is only one write connection for the same database table to perform the task of writing data at the same time. Therefore, each database table needs to have multiple connections to continuously perform its own write tasks in different time intervals, thereby ensuring high-speed and efficient writing of data. In this process, you can use the "interval" parameter to adjust the working time of each write connection, thereby improving the write rate of data and improving load performance in a targeted manner. Specific usage examples are as follows:
- `mxgate set --stream-prepared-cli 3` Set the number of write connections per table to 3
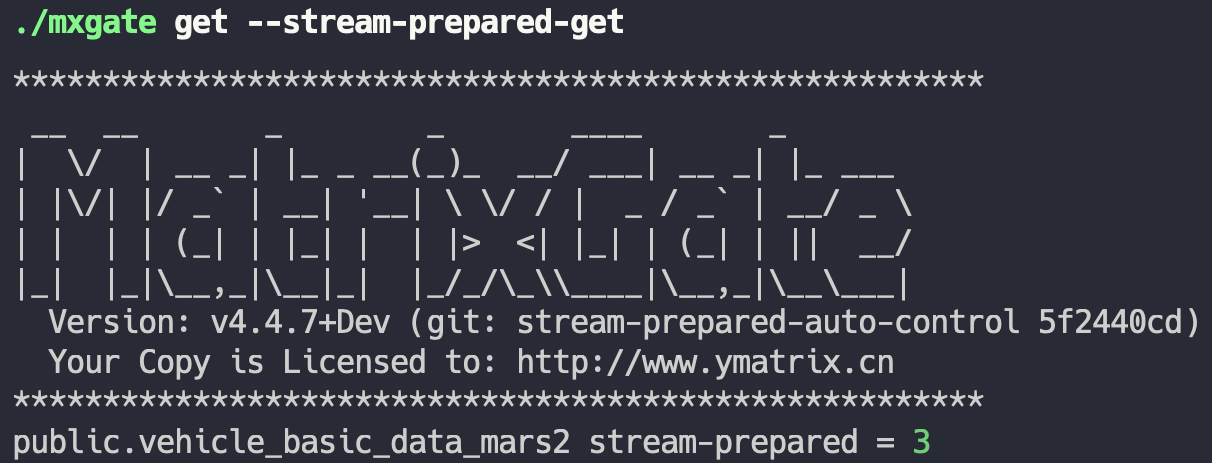
- `mxgate get --stream-prepared-get` Get the number of active write connections per table
- `mxgate set --job-interval 200` Set the time interval for write connections of all tables to 200ms
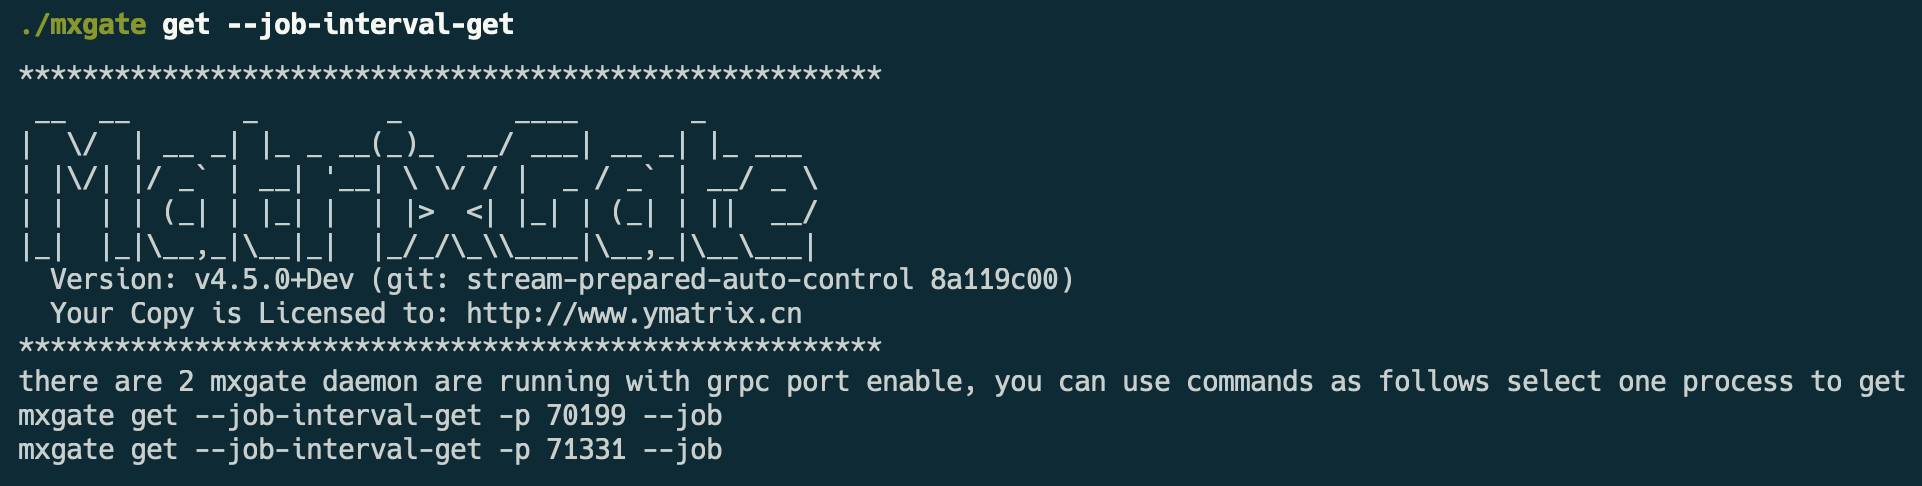
- `mxgate get --job-interval-get` Gets the current time interval for write connections to all tables
> ***Notes!***
For the above parameters, if you want to set or get the number of write connections or working hours for a specific table, then add `--job <name>` after the above command. Each task (job) corresponds to a database table. The job parameter structure consists of a schema name and a table name, which means that if your specific table is called test_table and the schema name is public, then you need to add `--job public.test_table` after the existing command.
<a name="non-stop_update_table"><br/></a>
## 7 Update table structure without shutting down
During the data loading process, you may suddenly find that driven by changing time series data sources, the previously set table structure is no longer applicable to the current scenario, and then there is a need to modify the table structure, which can be met by mxgate. This section will explain how mxgate performs a series of operations such as pausing data writing, reloading modified database table meta information, and restoring data writing without shutting down. The specific steps are as follows:
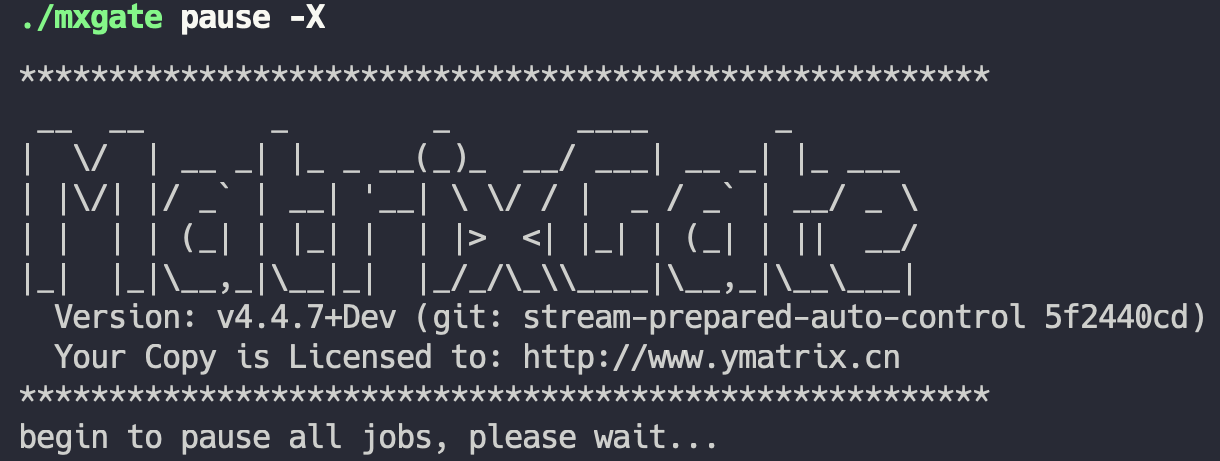
* First, use the command `mxgate pause -X` to interrupt the write connection of all tables, preparing to modify the database table structure. Where the `-X` parameter is necessary, it will help interrupt the connection between mxgate and the database. If the connection is not interrupted, the database table cannot be modified. In addition to `-X`, use the `-S` parameter to make the pause mission synchronously wait for all connection interrupts to complete before returning.
* Secondly, after interrupting all write connections to the corresponding table, you can perform the modification of the structure of the database table corresponding to the database, such as adding several columns, deleting several columns, deleting existing tables, and recreating a new table with the same name.> ***Notes!***
The reconstructed table structure can be different, but the "table name" must be consistent.
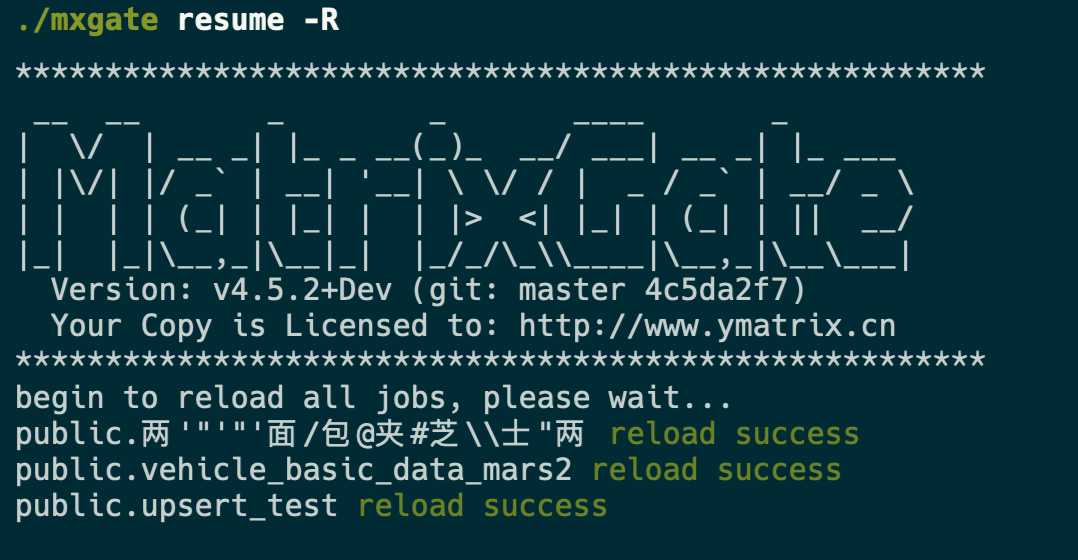
* Finally, use the command `mxgate resume -R` to restore write connections to all tables and overload meta information of the data table. Where the `-R` parameter is required, `resume` and `-R` will combine to complete the reload operation.
* In particular, when multiple mxgate processes run at the same time, the `-p` parameter is required to represent the process number of the corresponding mxgate process, and all the above commands are the same.
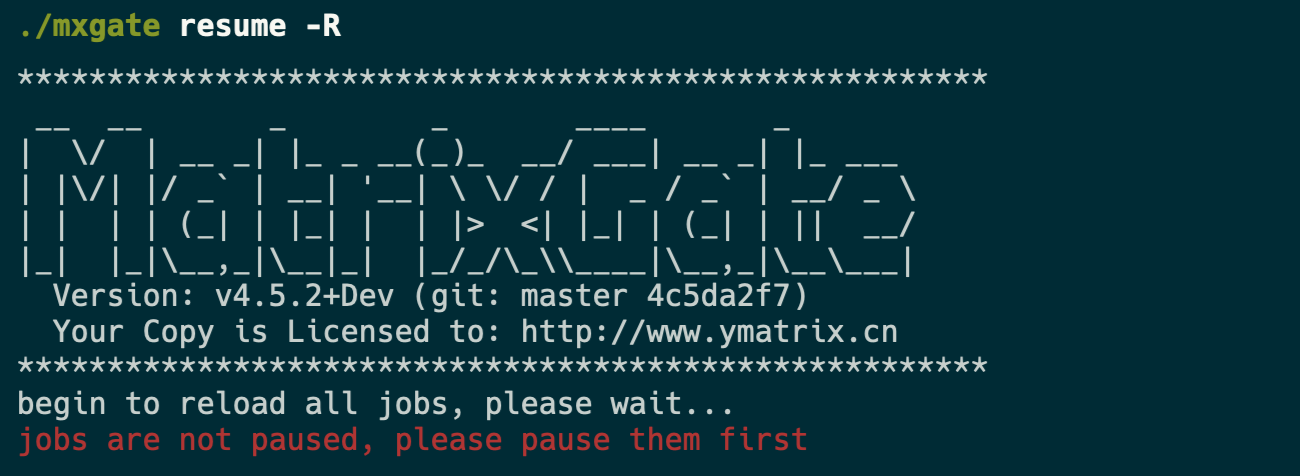
> ***Notes!***
The prerequisite for executing the overloaded command is that all write connections to the corresponding table of mxgate must be suspended first, otherwise the following error will occur:
<a name="log_level"><br/></a>
## 8 Non-stop update log level
Sometimes we need to turn on the debug log of mxgate to observe some key information, but turning on or off the debug log requires restarting mxgate, which is not conducive to positioning problems. Therefore, YMatrix provides the ability to dynamically change the mxgate log level:
* When gate is running, use the command `mxgate set --log-level VERBOSE` to enable the `VERBOSE` level log with relatively complete information or `mxgate set --log-level DEBUG` to enable the `DEBUG` level log with the most complete information. When you do not need to observe the debug log, you can use `mxgate set --log-level INFO` to restore the log level to `INFO`.