Apache Kafka is an open source distributed event streaming platform. It can be regarded as a message system that reads and writes streaming data to help publish and subscribe to messages; it can also be used to write scalable stream processing applications to deal with real-time response scenarios; it can also be connected to the database to safely store streaming data in a distributed, replica backup, and fault-tolerant cluster. It can be said that the "event flow" it produces is the "central nerve" of information data transmission.
If you are planning to use Kafka to write data to your YMatrix cluster, please do not miss this document. The YMatrix database supports Kafka seamless connection function, which can continuously and automatically import Kafka data into YMatrix tables and supports graphical interface operations. The data formats currently connected can be CSV and JSON. We will use the simplest example to introduce how to use the YMatrix management platform to access Kafka data.
First of all, you need to build a healthy Kafka environment, refer to the official guide Kafka Quickstart.
Now that you have set up the Kafka environment on the server, you can enter it through the following command or other methods.
$ cd packages/kafka_2.13-3.2.0Then start the Kafka service and create a test topic (Topic), with the default port number 9092.
$ bin/kafka-topics.sh --create --topic csv_test --bootstrap-server localhost:9092Then write several test data in stripes, ending with ctrl-c:
$ bin/kafka-console-producer.sh --topic csv_test --bootstrap-server localhost:9092
>1,Beijing,123.05,true,1651043583,1651043583123,1651043583123456
>2,Shanghai,112.95,true,1651043583,1651043583123,1651043583123456
>3,Shenzhen,100.0,false,1651043583,1651043583123,1651043583123456
>4,Guangxi,88.5,false,1651043583,1651043583123,1651043583123456
>^C
Through the above command, 4 pieces of data are written to the newly created csv_test, which are 4 comma-segmented CSV lines. After the preparation work is completed, the following will introduce how to create a Kafka data stream to import data.
Enter the IP of the machine where MatrixGate is located (the default is the IP of the master node) and port number:
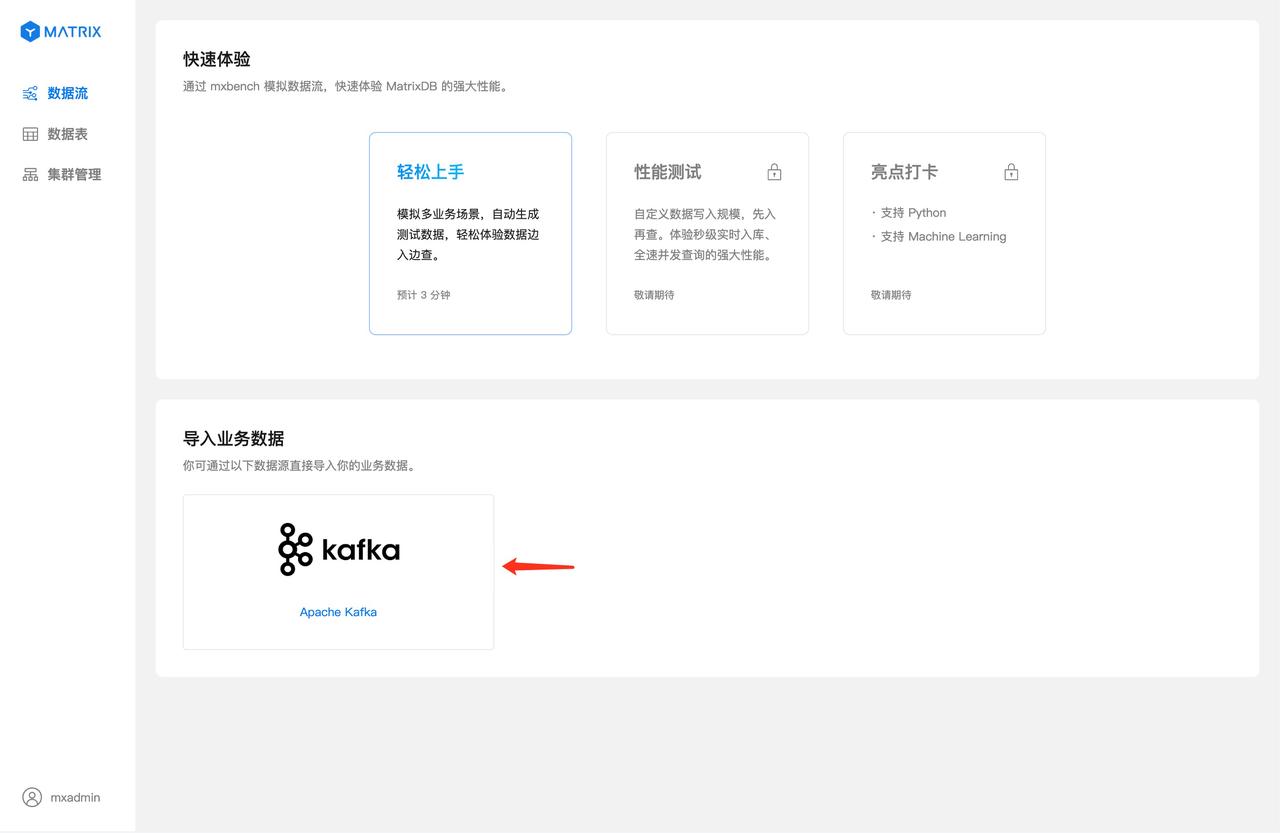
http://<IP>:8240After successfully logging in, enter the main interface and select Kafka data source. First, use the CSV file as an example to illustrate the steps.
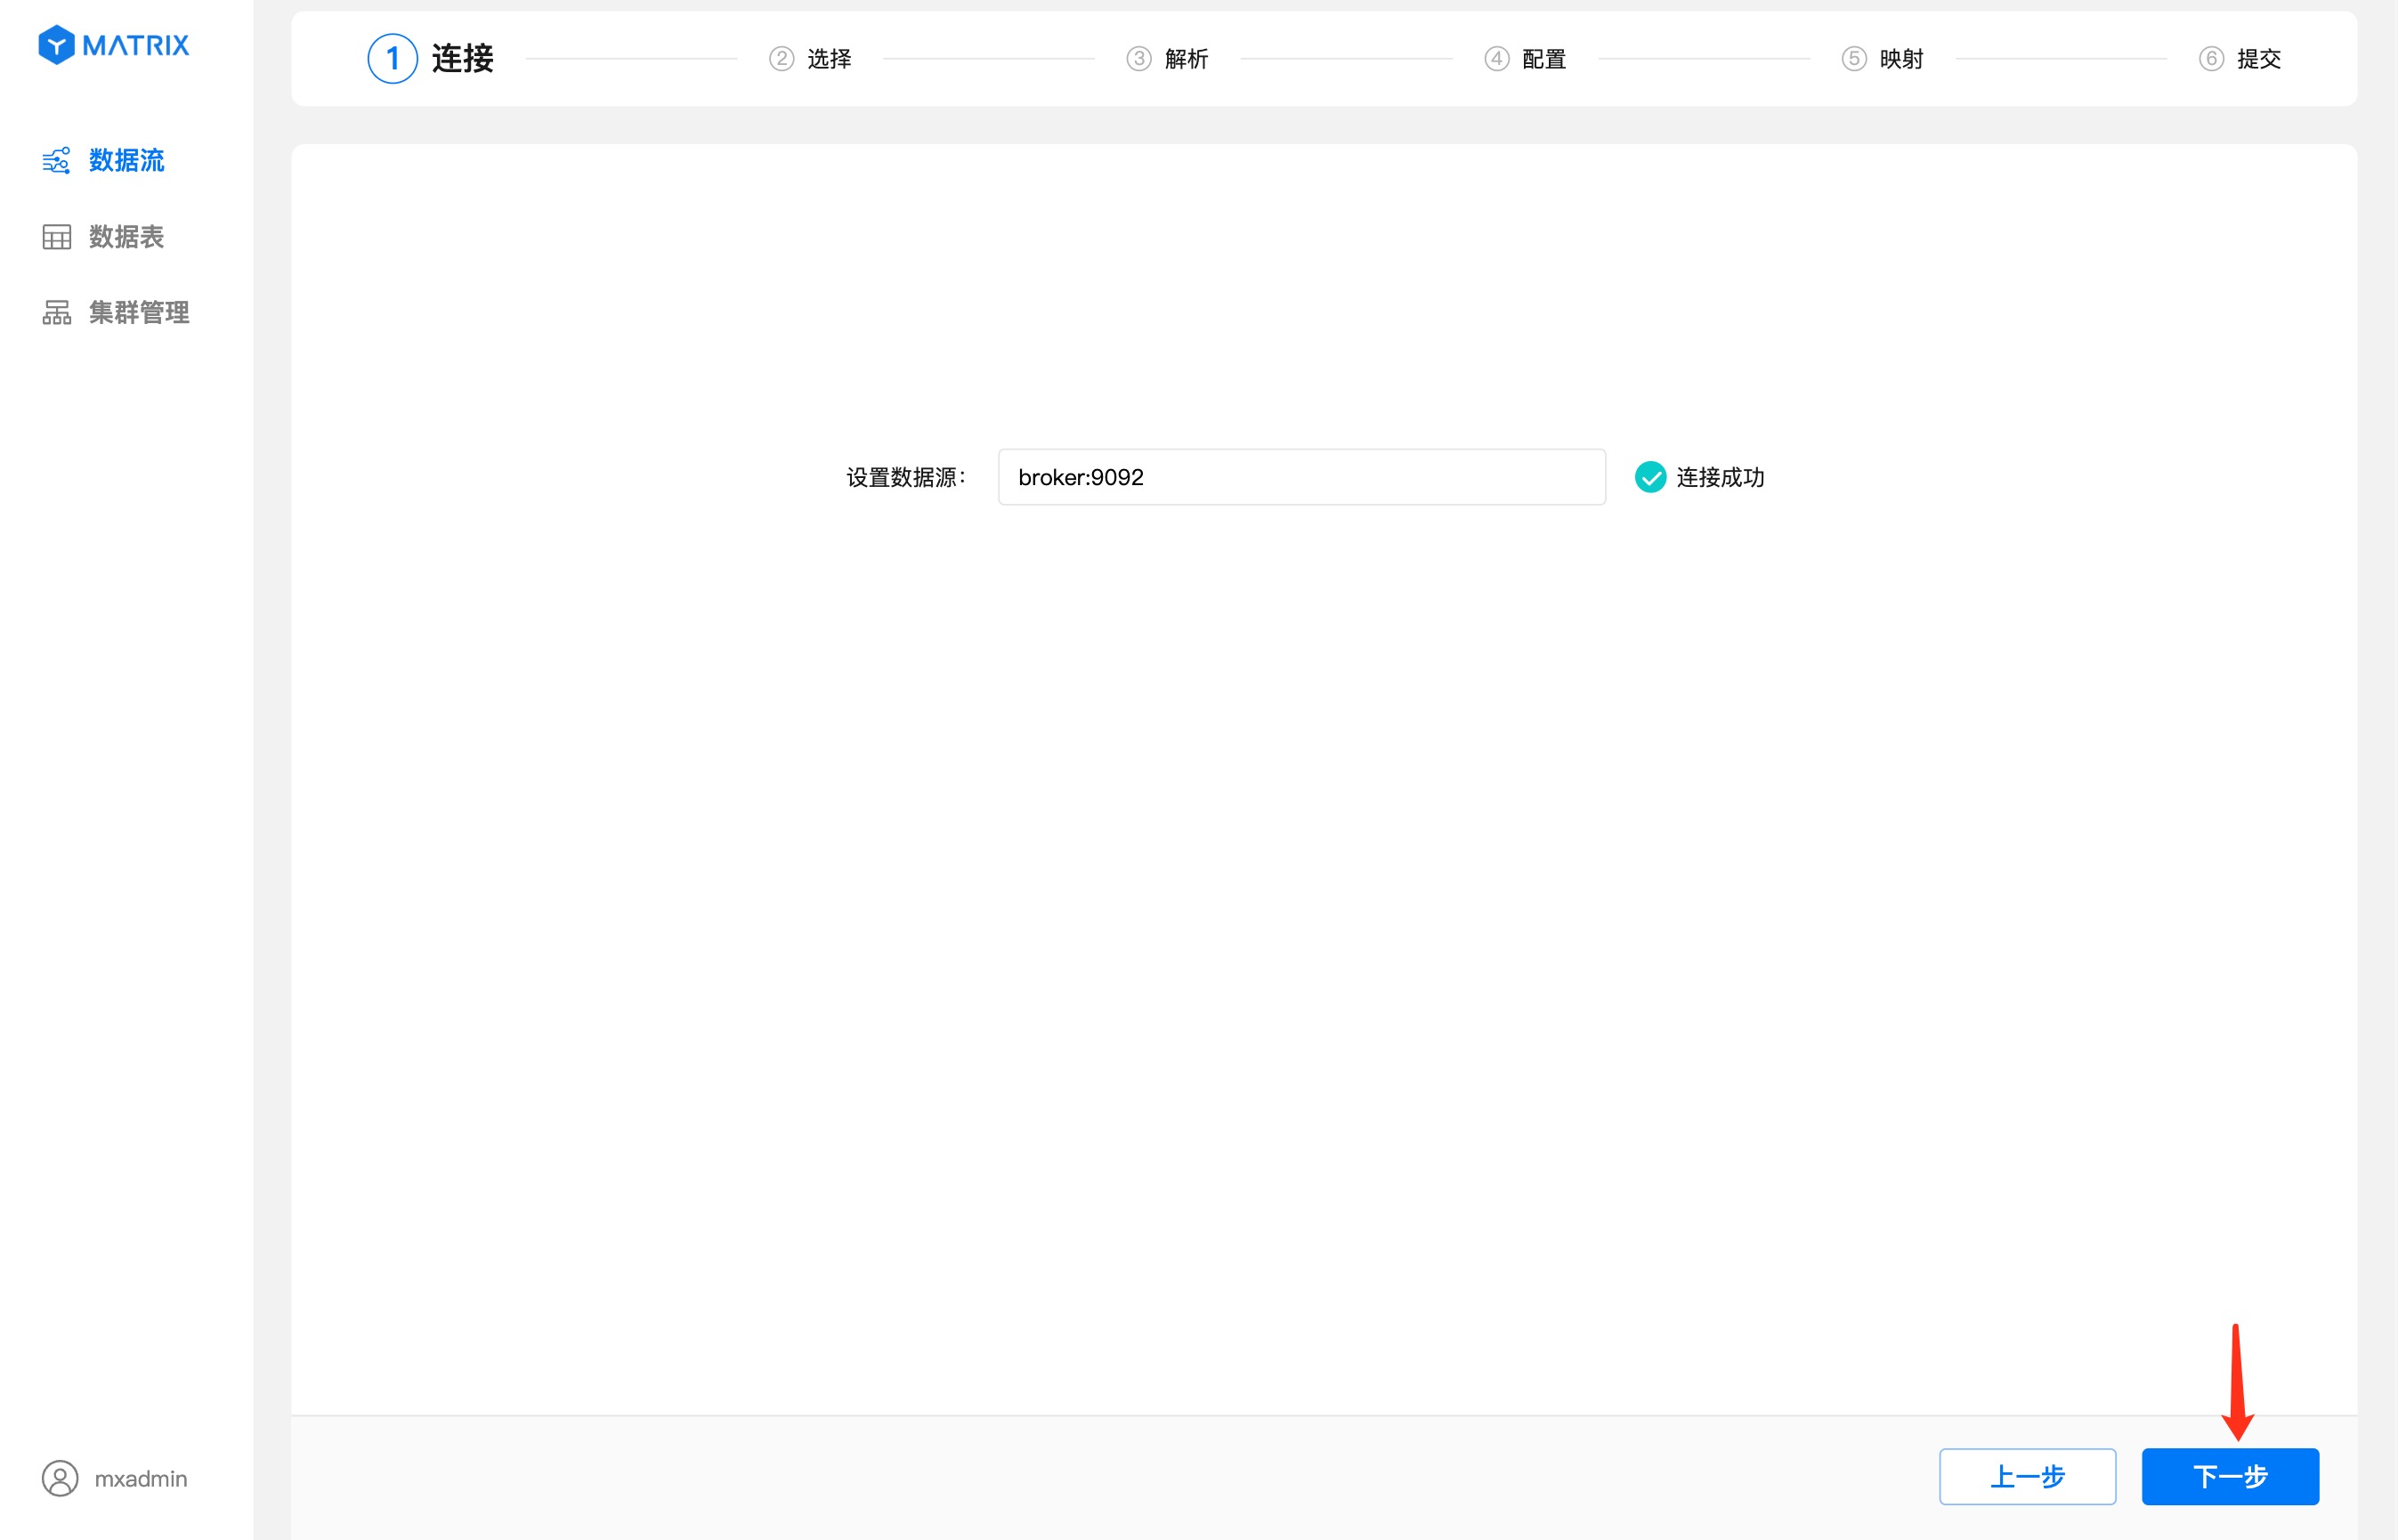
Enter the Kafka broker address in the data source. After the connection is successful, click the "Next" button. If there are multiple URLs, you need to split them with commas.
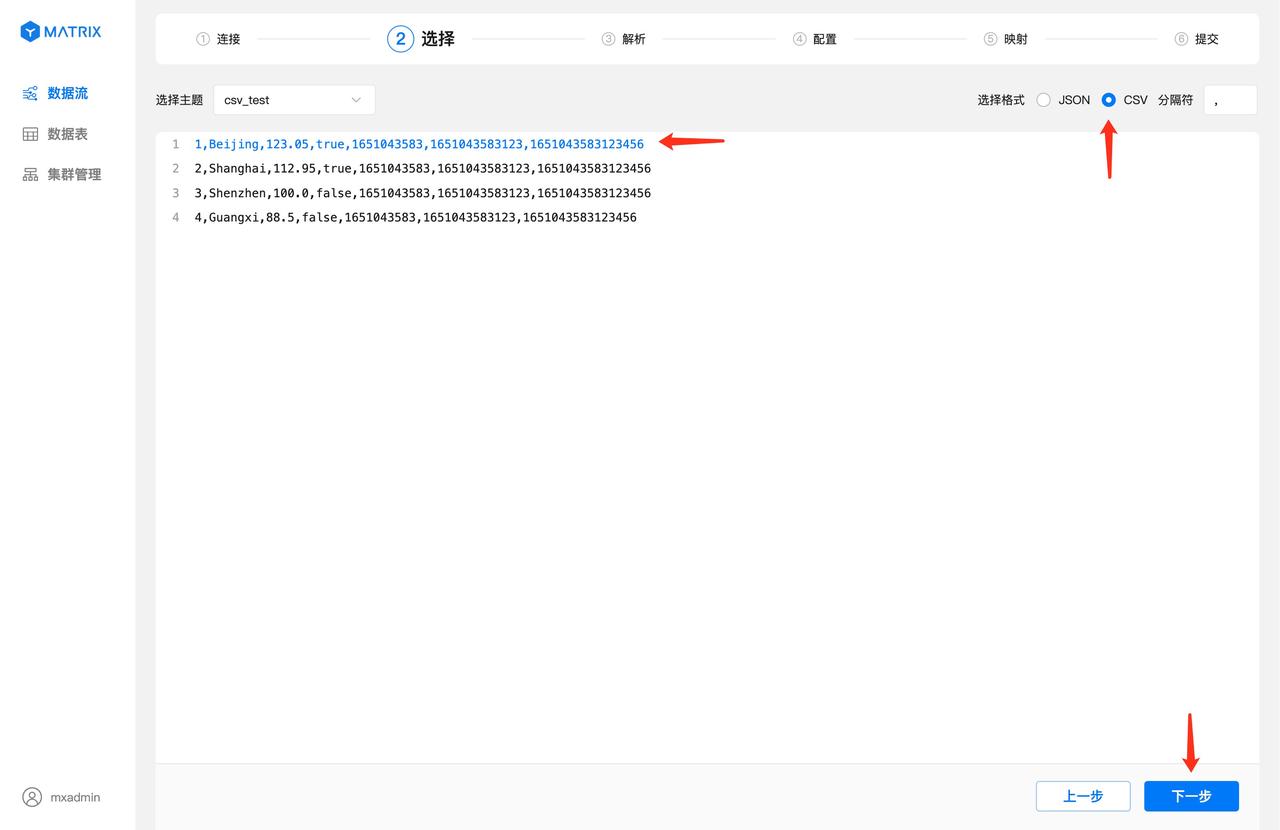
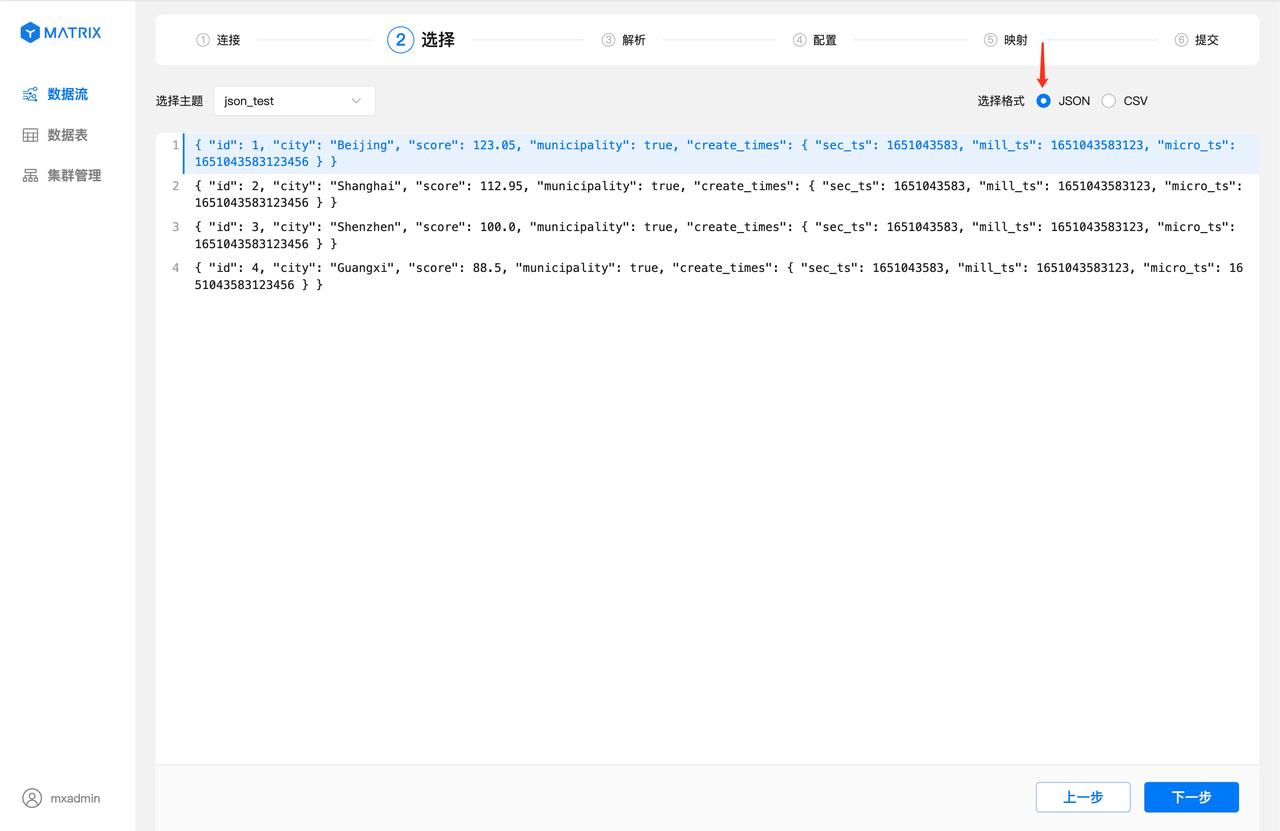
Select the csv_test you just created on the topic. After selecting it, you will see the data list in the topic.
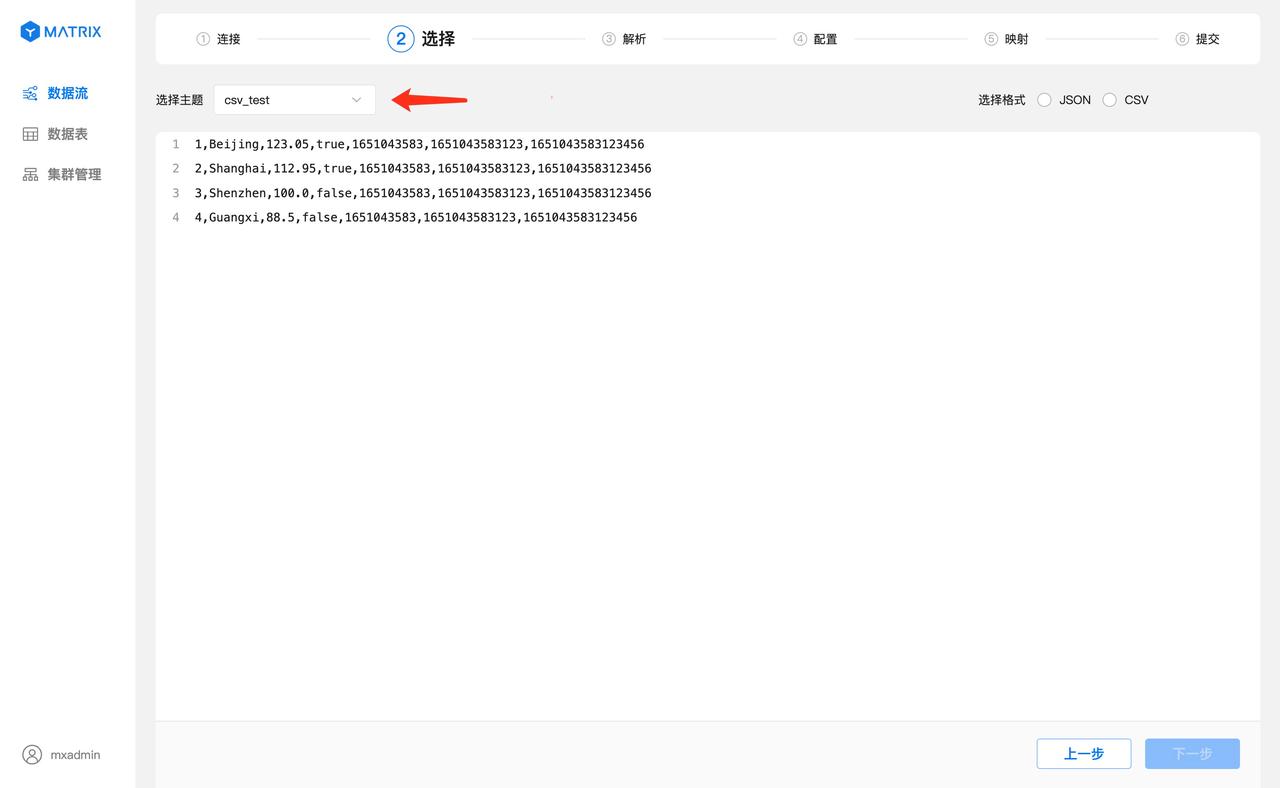
Select one data as the sample data for parsing and mapping, and then select the CSV data format. At this time, the separator used for the data will be automatically parsed based on the sample data, and click the "Next" button.
Analyze the sample data and data format selected in the previous step. The field column displays the index number of each field after the CSV data is separated by a delimiter, and the value column displays the value corresponding to each index number. After confirming that the resolution is correct, click the "Next" button.

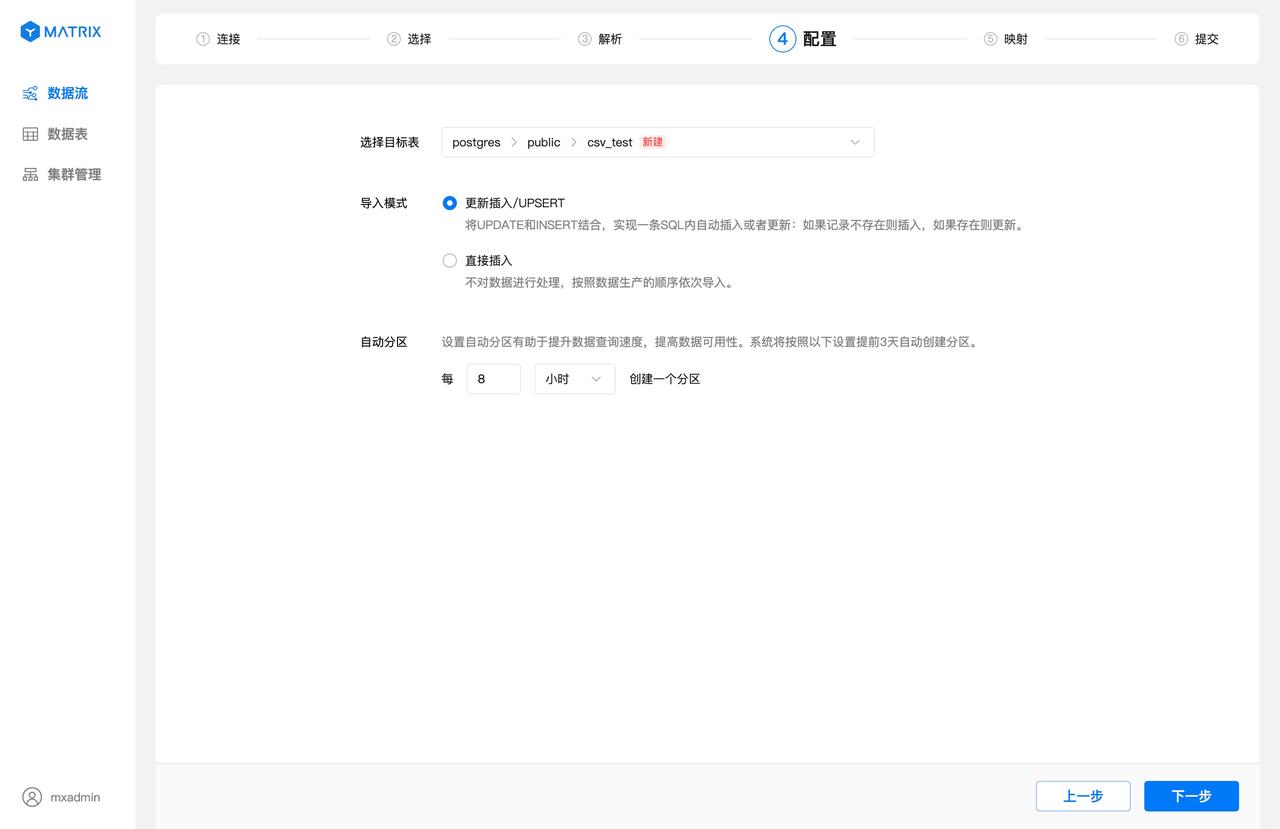
When importing the target table, you will use a new table by default, the database will use postgres by default, the mode will use public by default, and the table name will be the same as the Kafka topic by default, and the default is csv_test here.
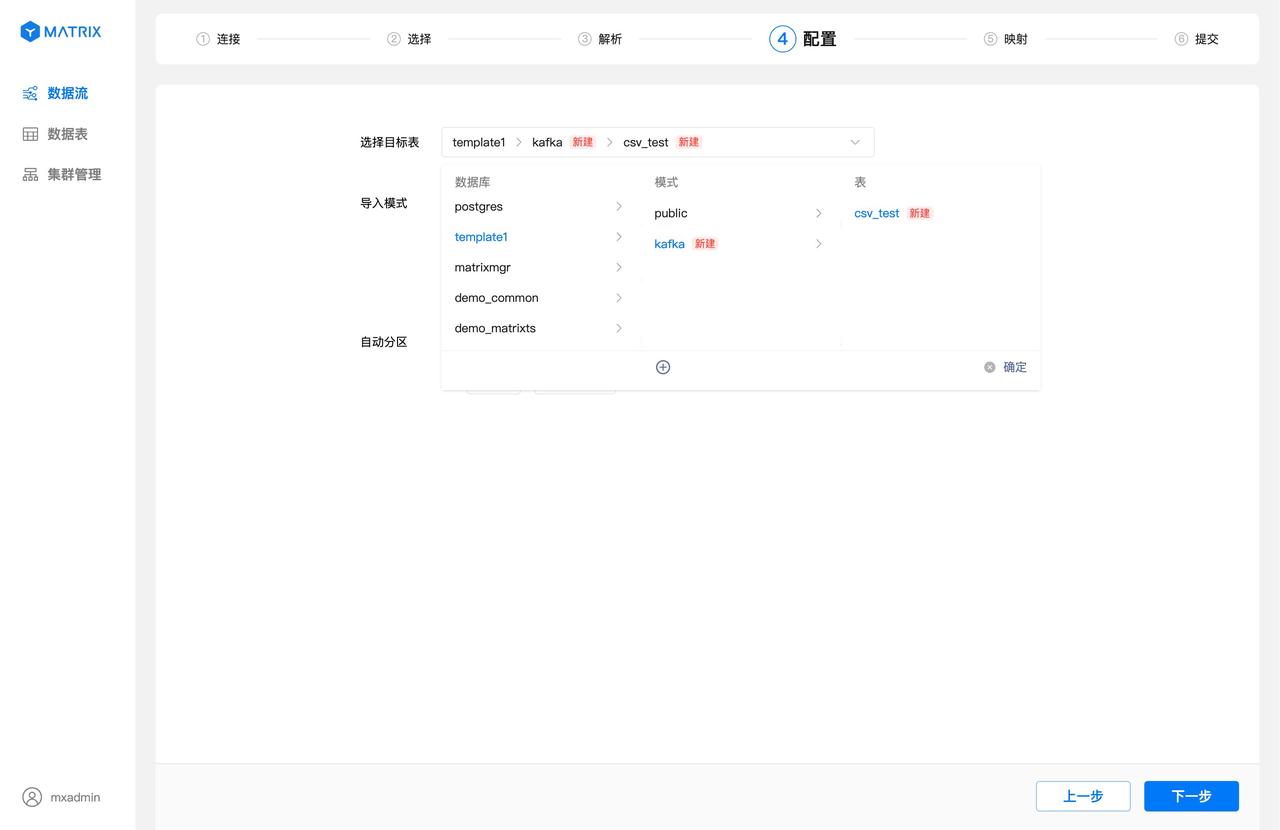
Click the target table selection box to select the database, schema, table name, or create a new schema and table name.
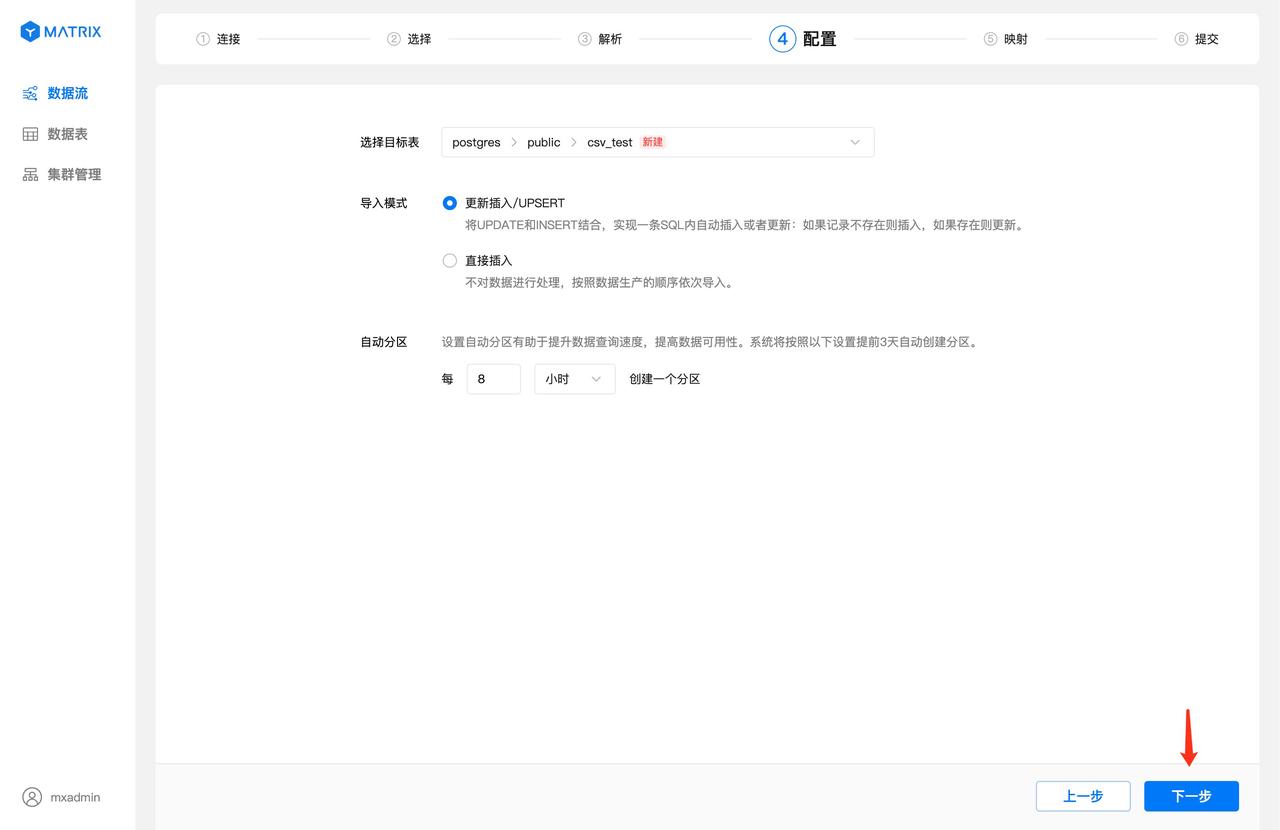
After selecting the import mode and configuring the automatic partitioning policy, click the "Next" button.
Notes!
Tables created using graphical interfaces use the MARS3 storage engine by default. For more information, please see MARS3
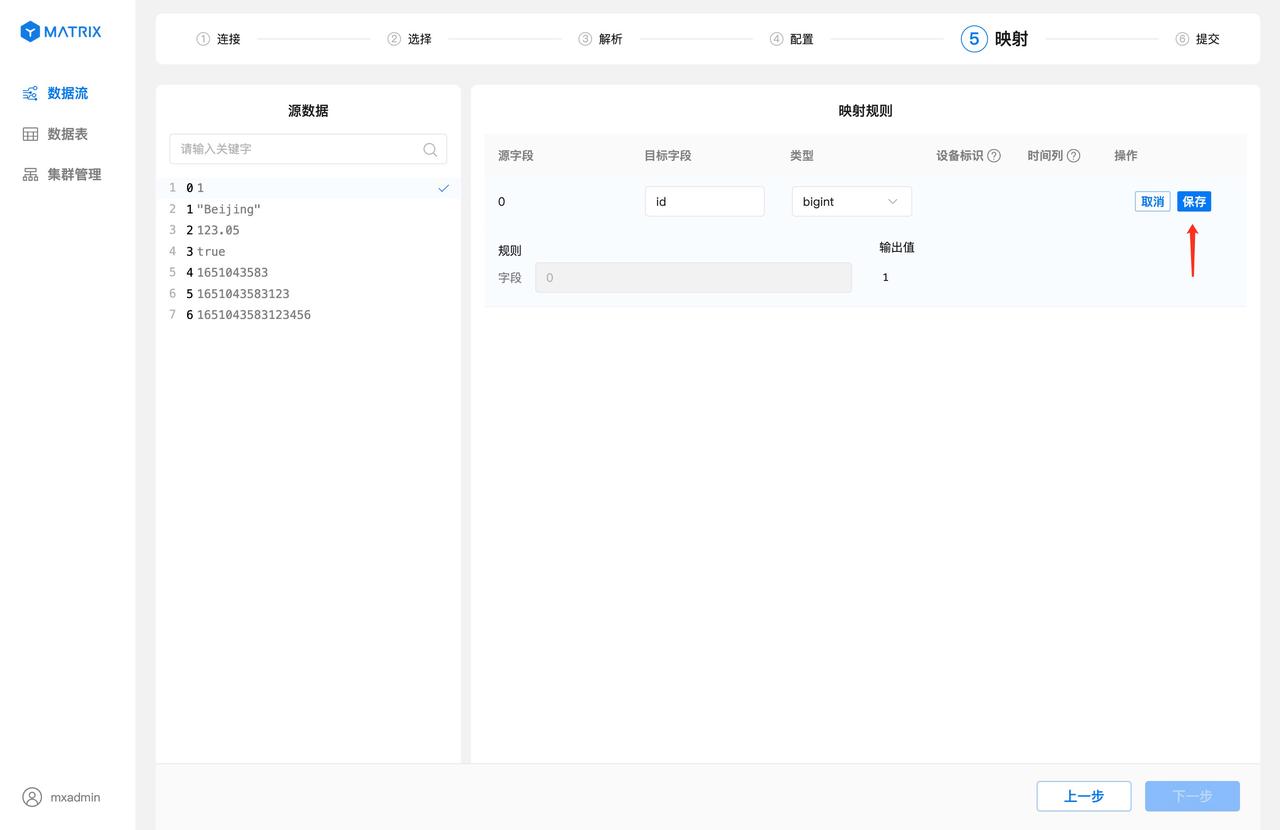
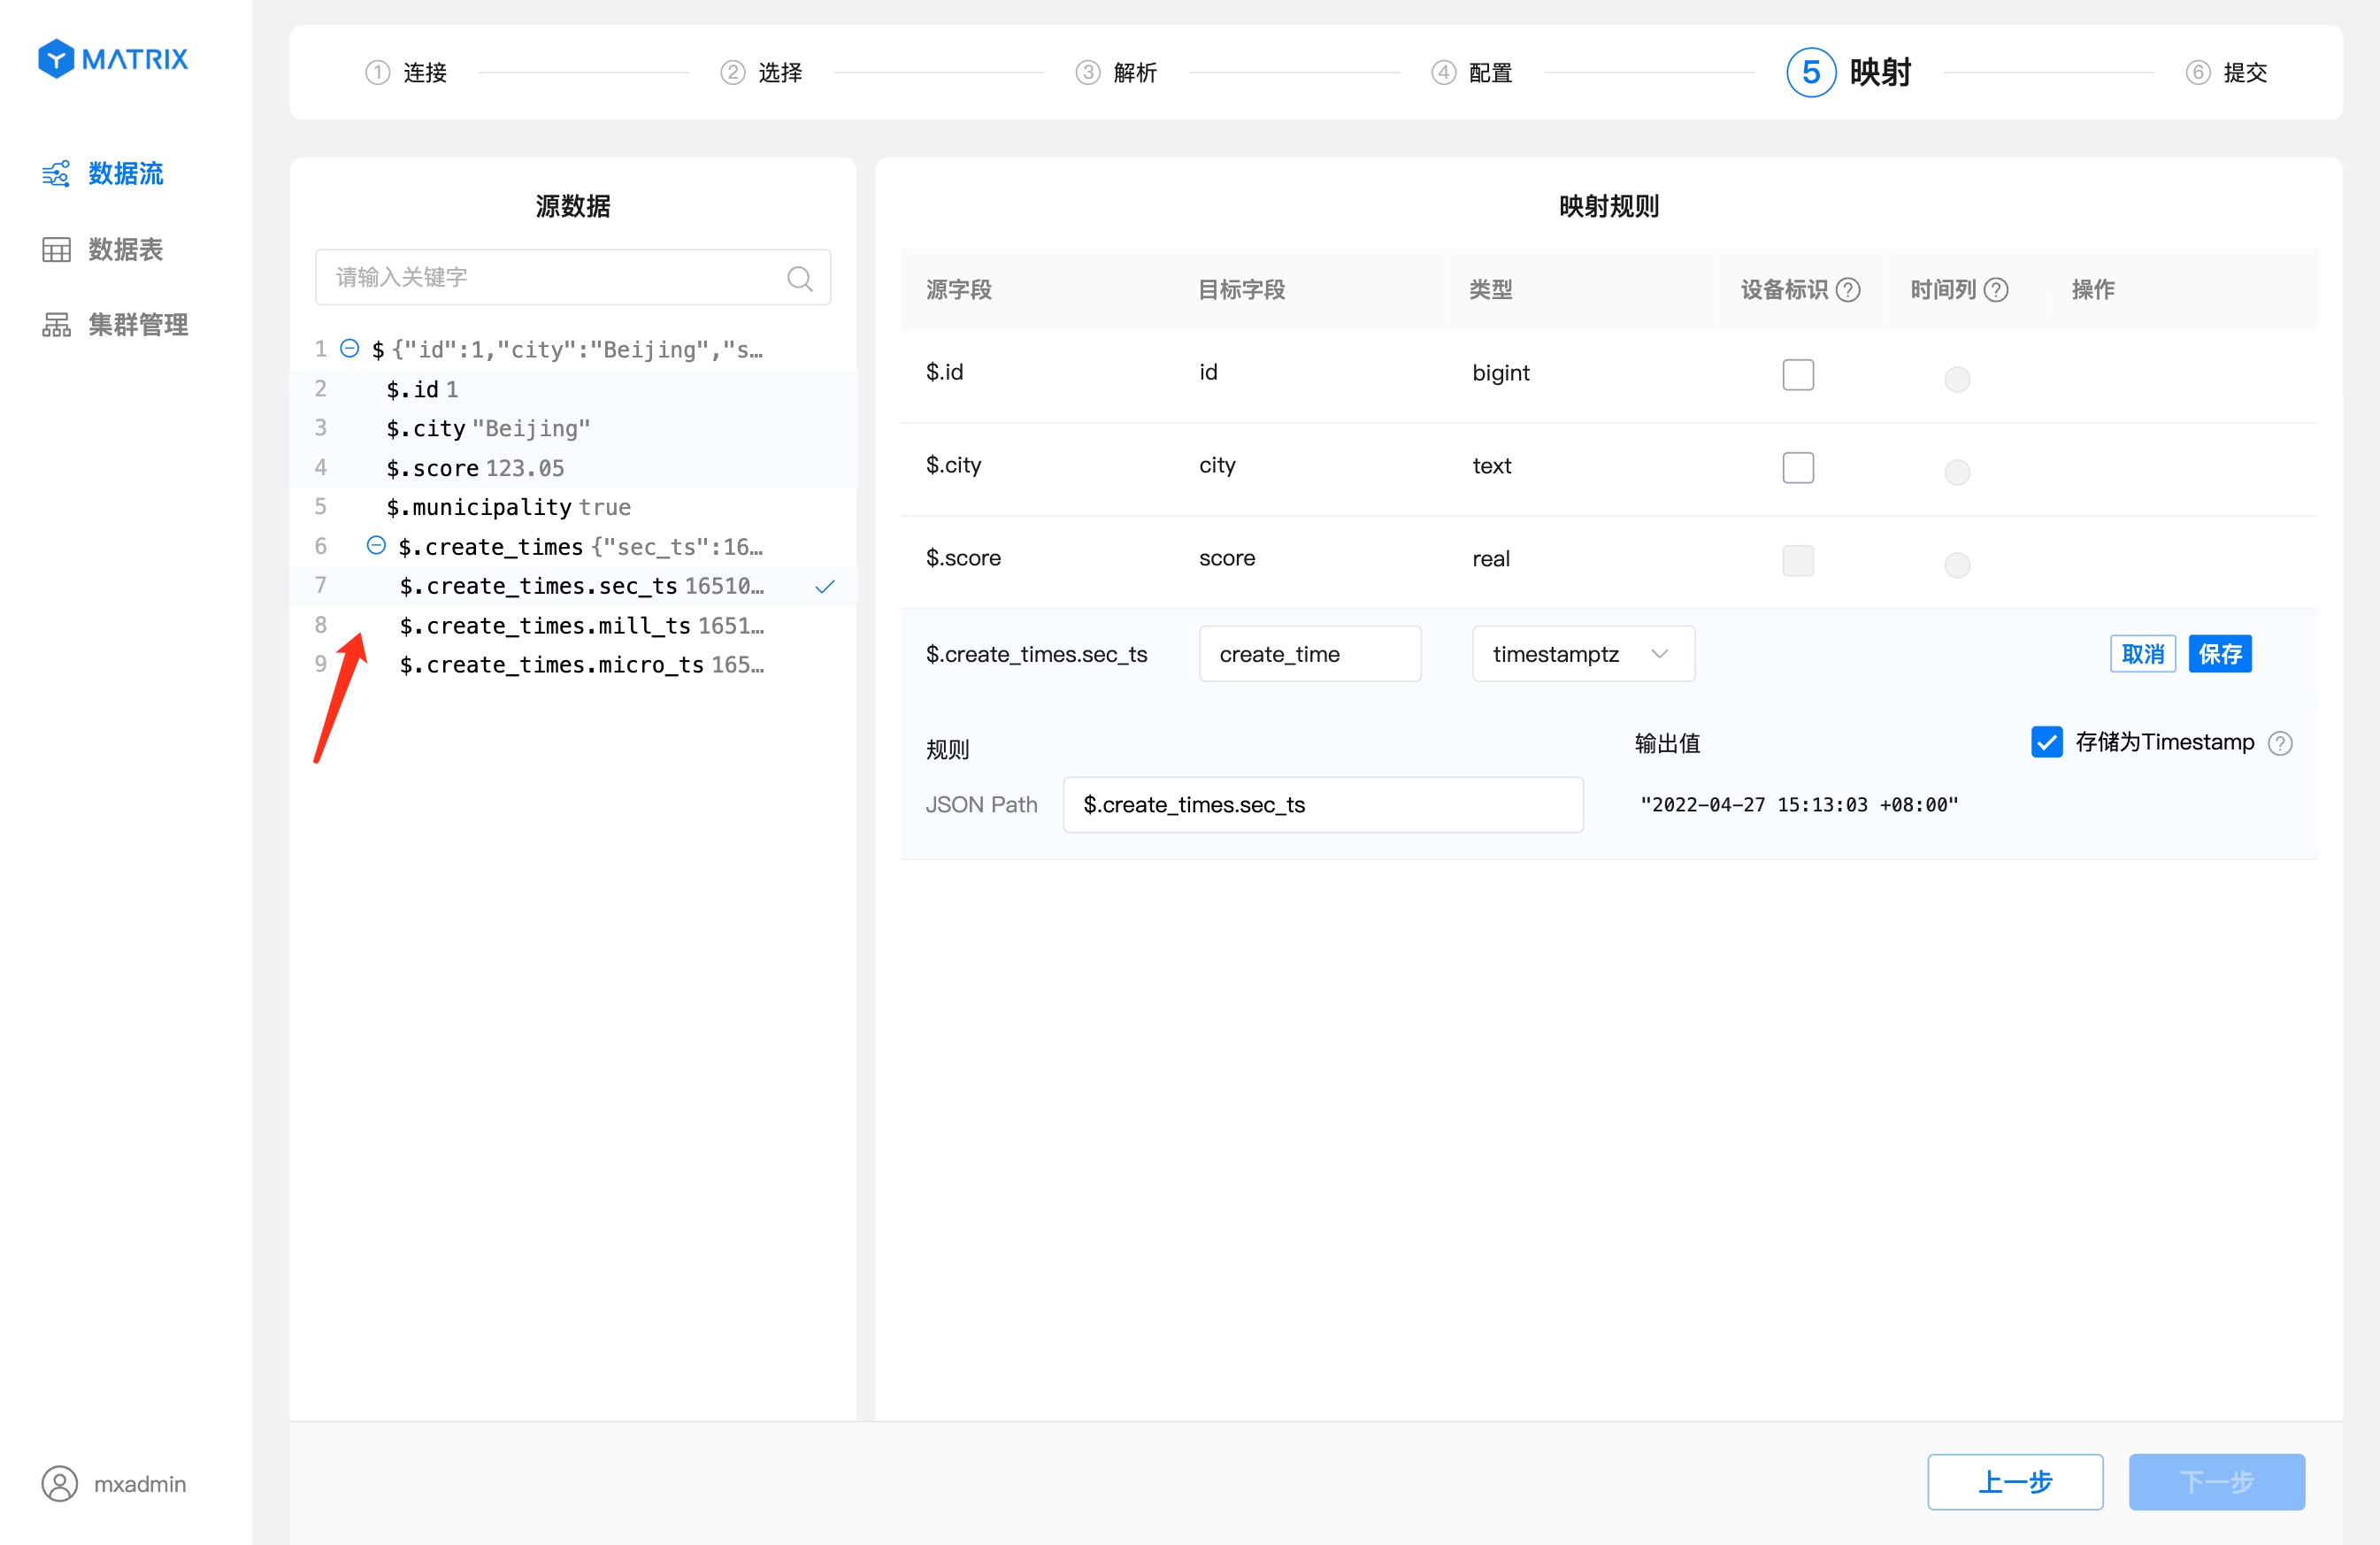
The map page maps the source data field to the target table field. First select the source data field, then set the target field-related information in the mapping rules. After setting it, click Save to create a mapping rule.
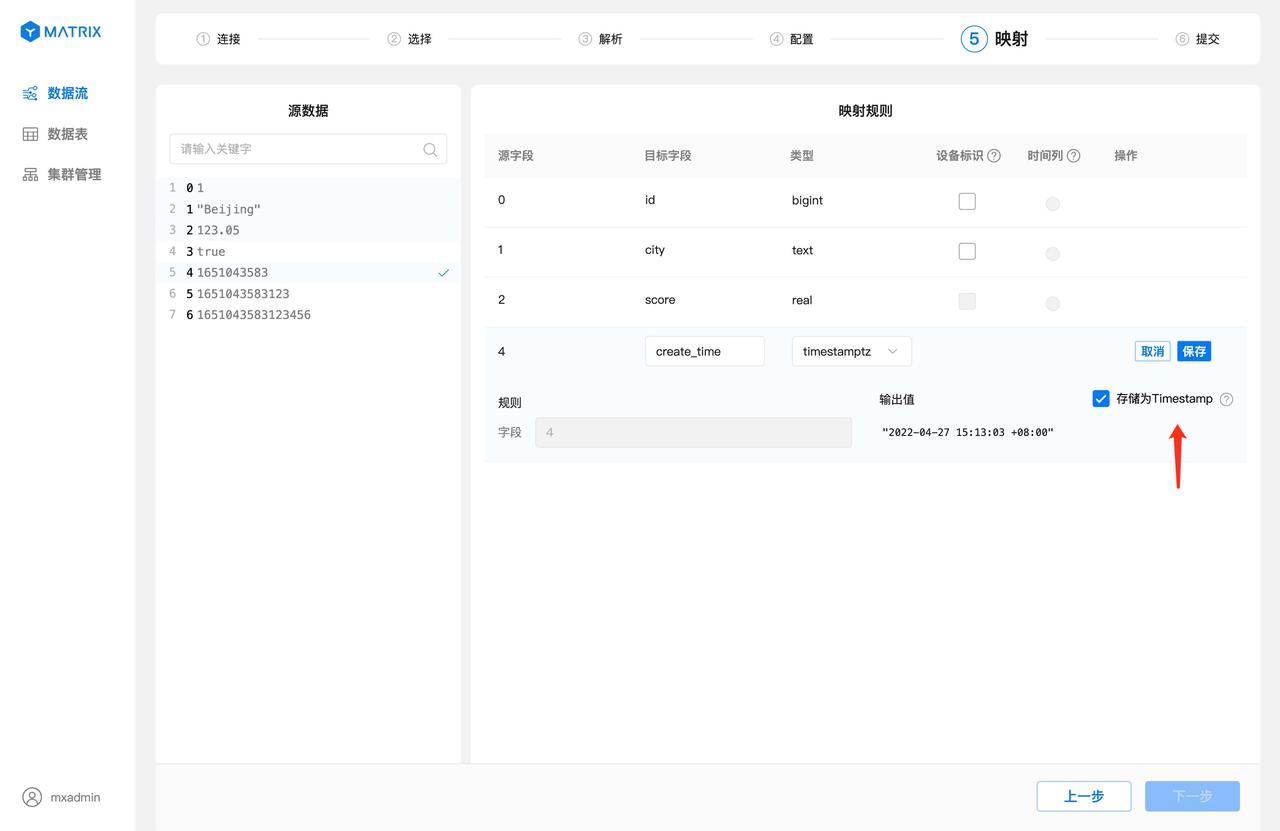
In particular, when the source field value is UNIX timestamp and the target field type is selected as timestamptz, the timestamp format conversion check box is displayed on the right side of the output value. The default is selected, and the output value result is automatically converted to the timestamptz format of the database.
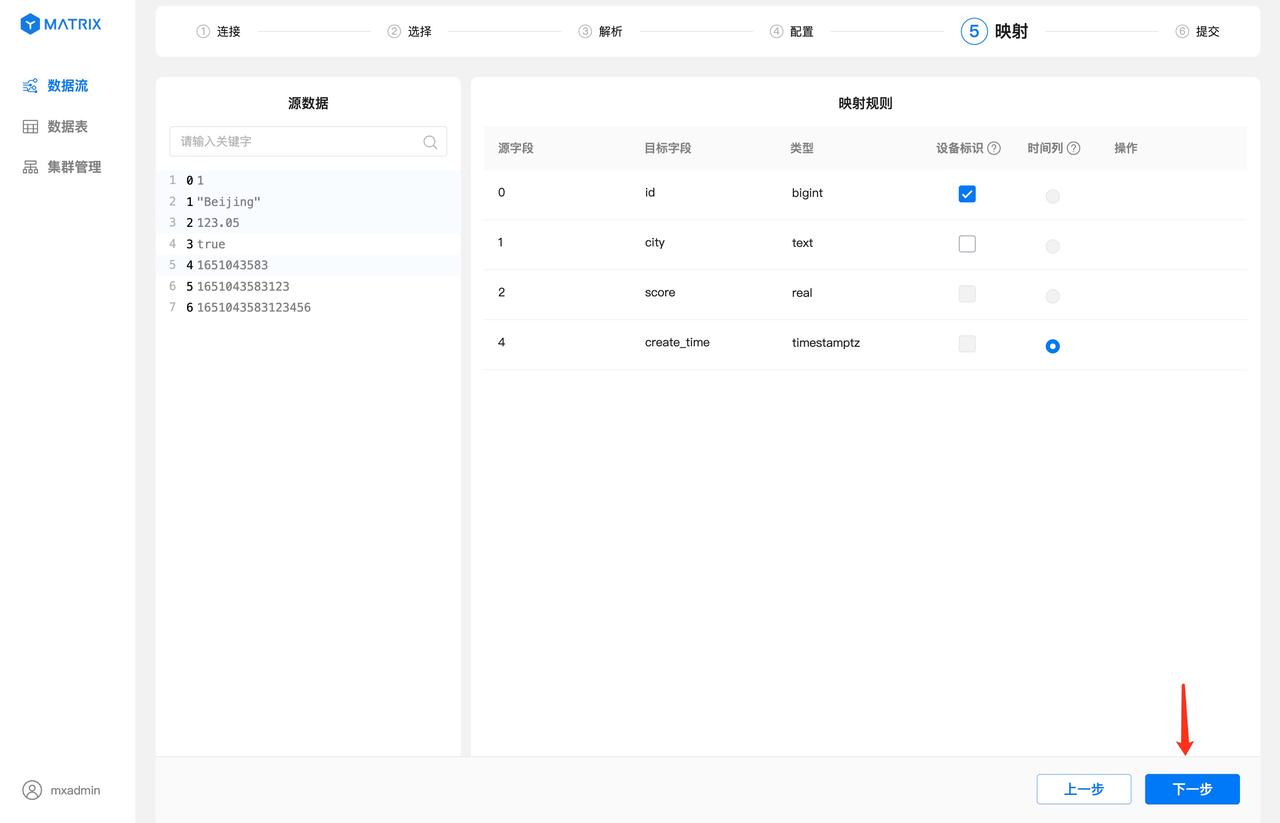
After the mapping rules are saved, you also need to select "Device ID" and "Time Column". "Device Identification" selects fields or combinations of fields in which the target table has unique constraints, and "Time Column" selects fields with the target table type timestamptz. After the selection is complete, click the "Next" button.
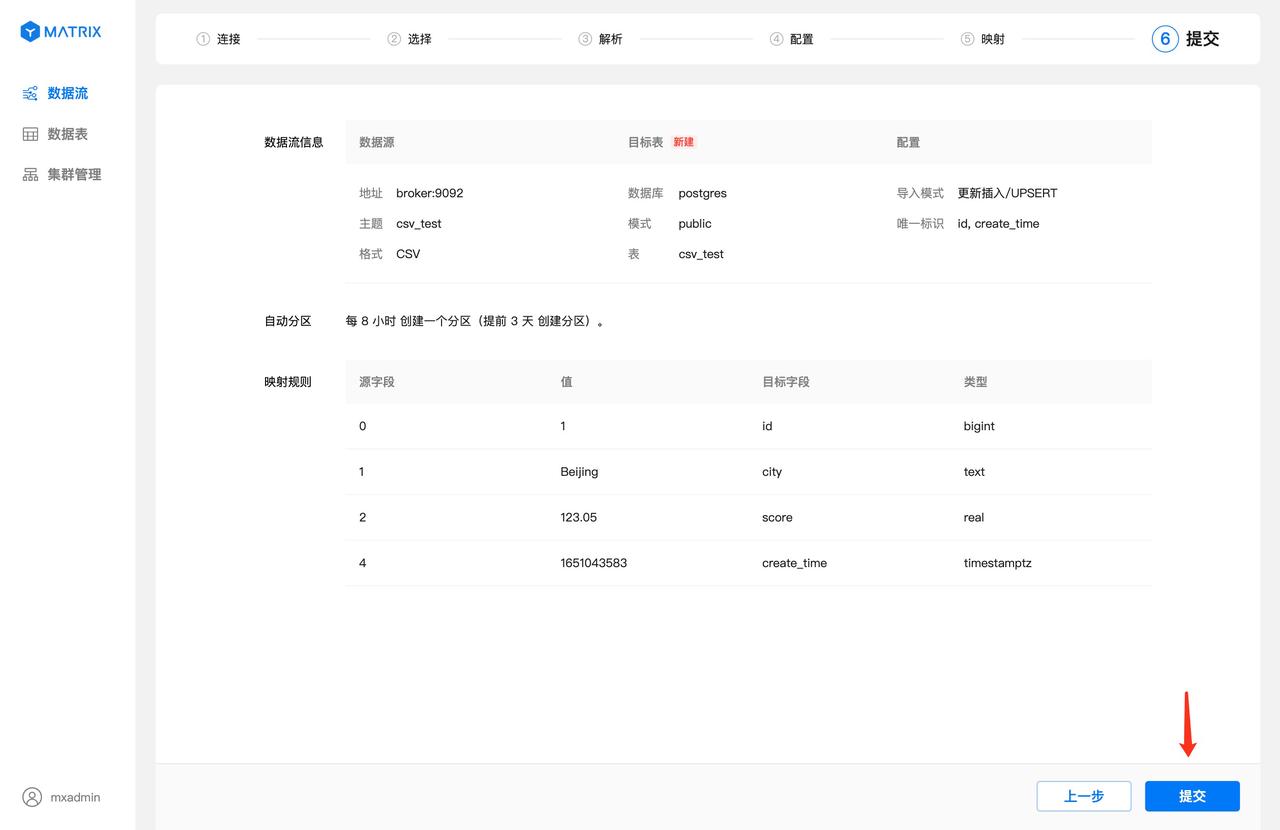
The page displays all configuration information of the data stream, and the unique identification of the target table is composed of "device ID + time column". After confirming the information, click the "Submit" button.
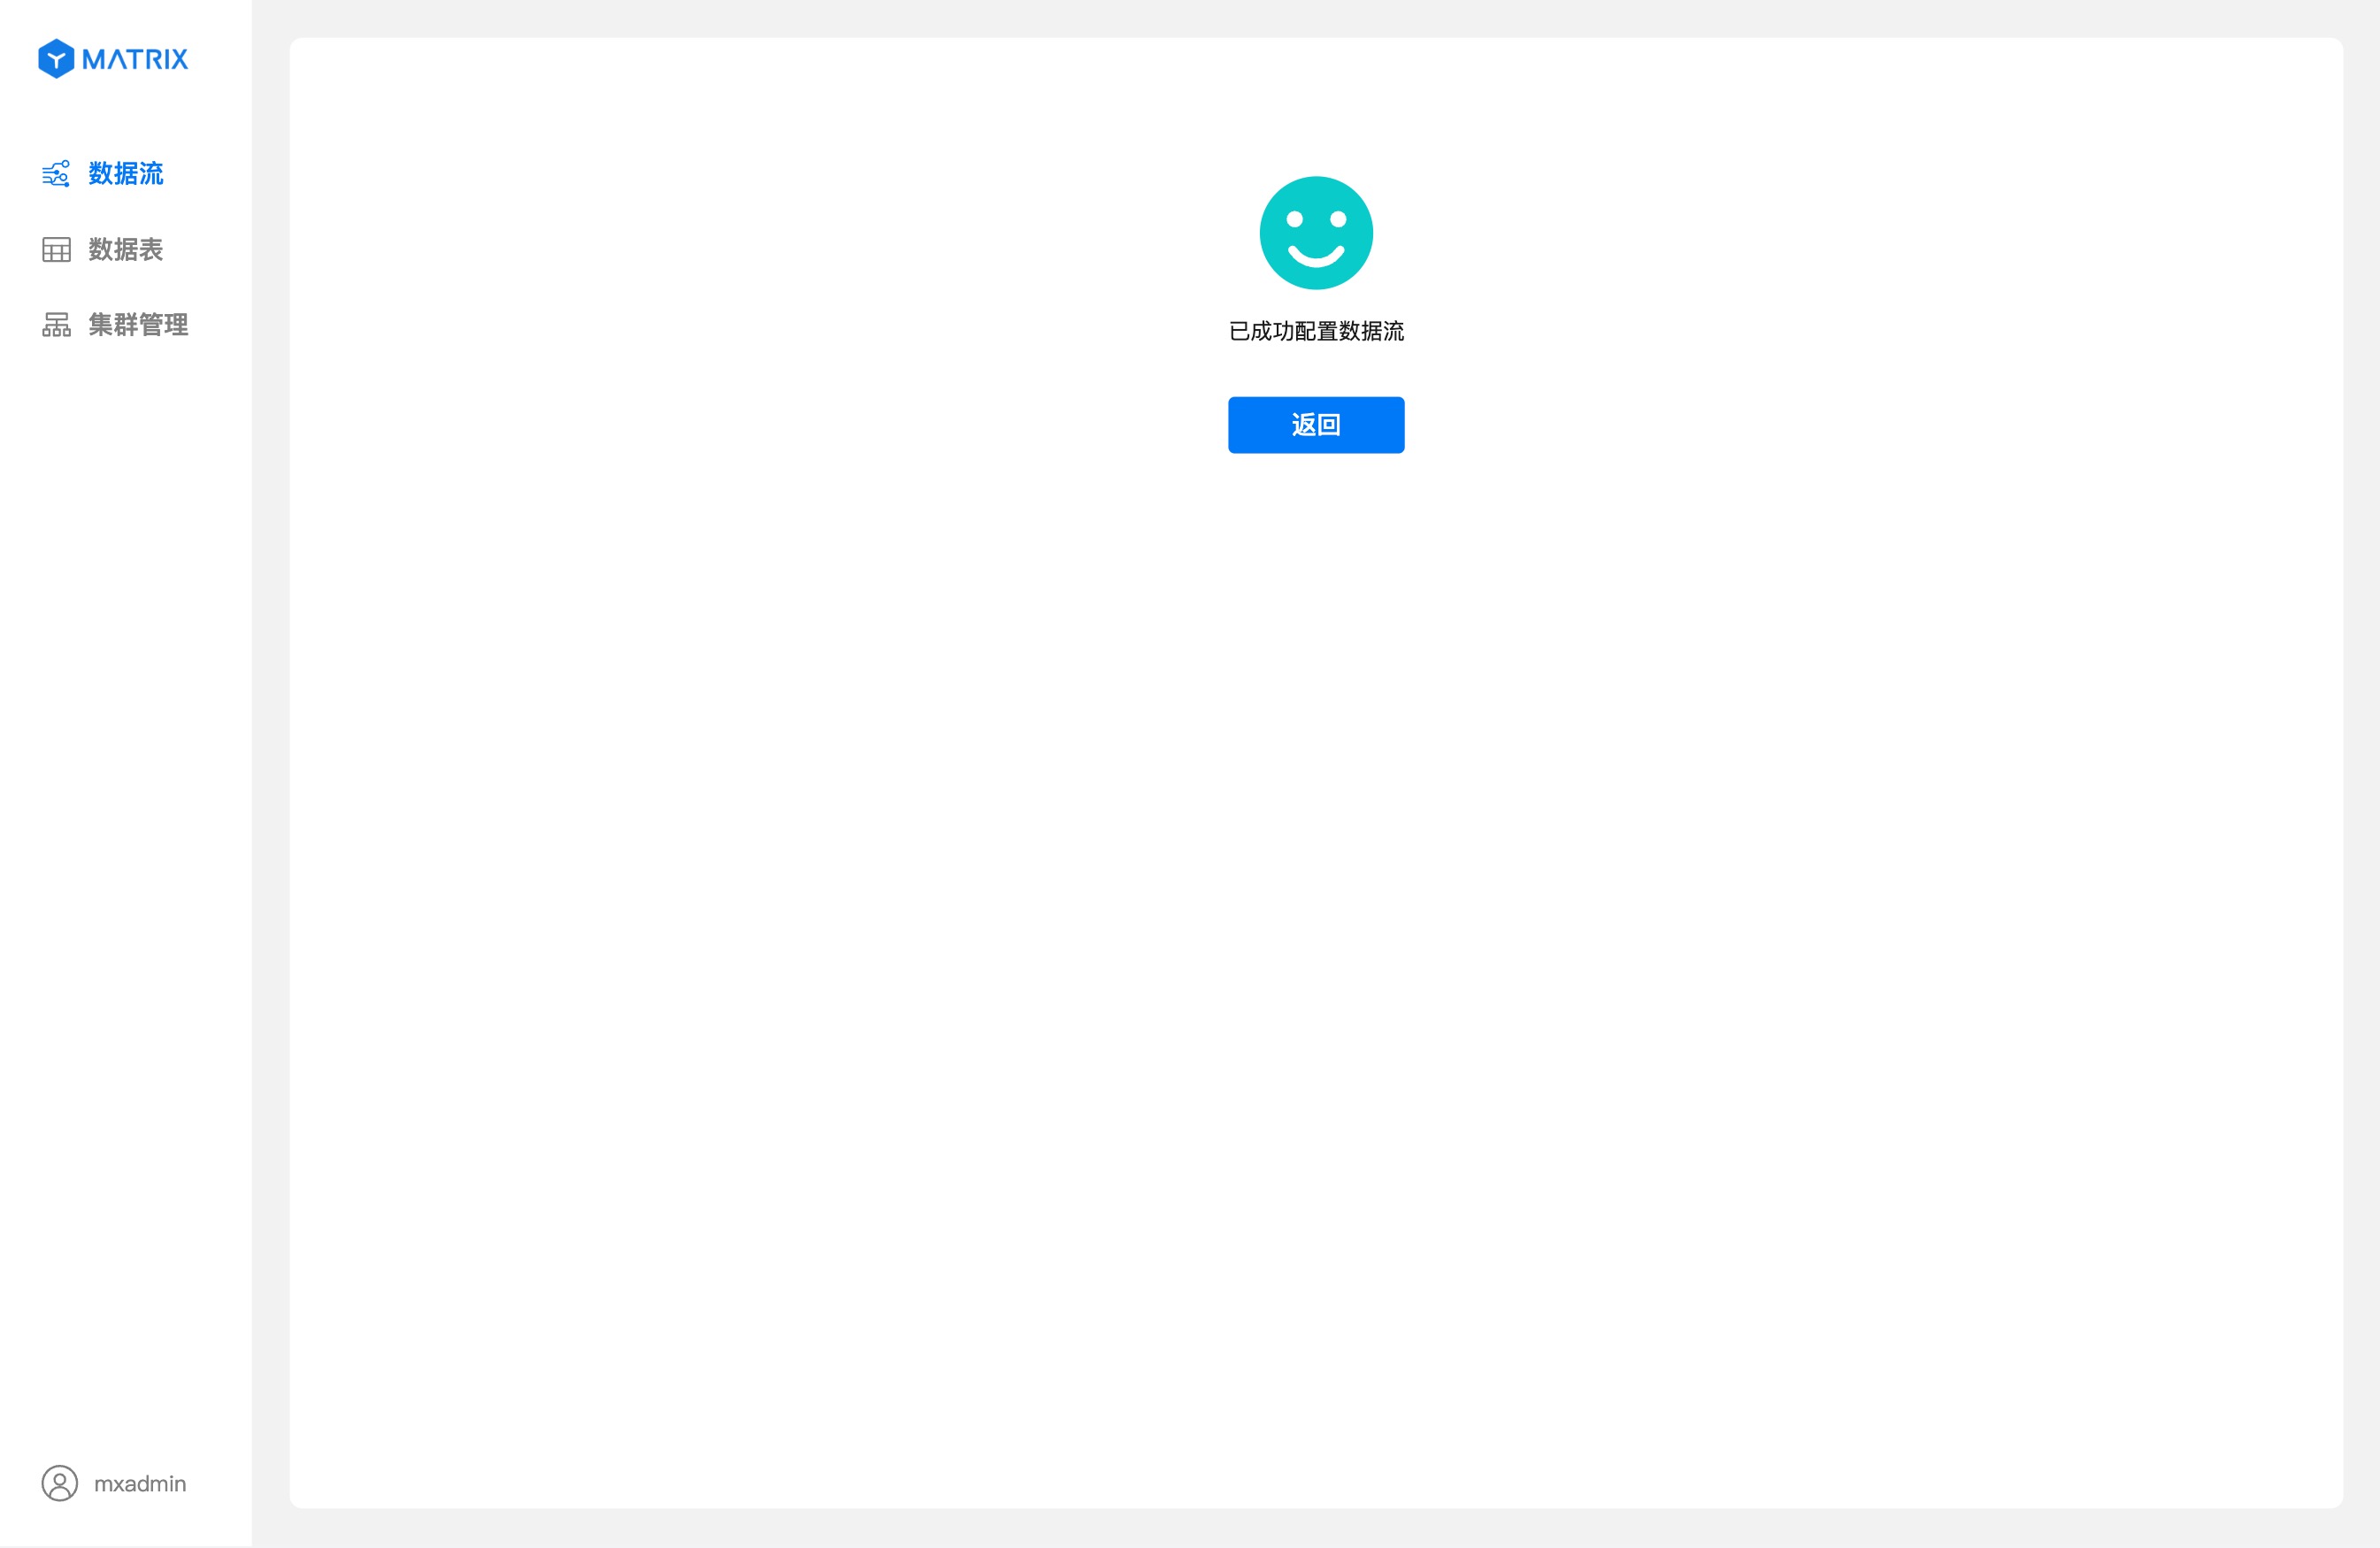
After the submission is successful, you will enter the creation success prompt page. At this point, the Kafka data flow has been successfully created.
The creation process of JSON format data streams has some minor differences from the CSV format data streams.
$ symbol, the . plus the column name is indexed, and the index rules refer to JSONPath.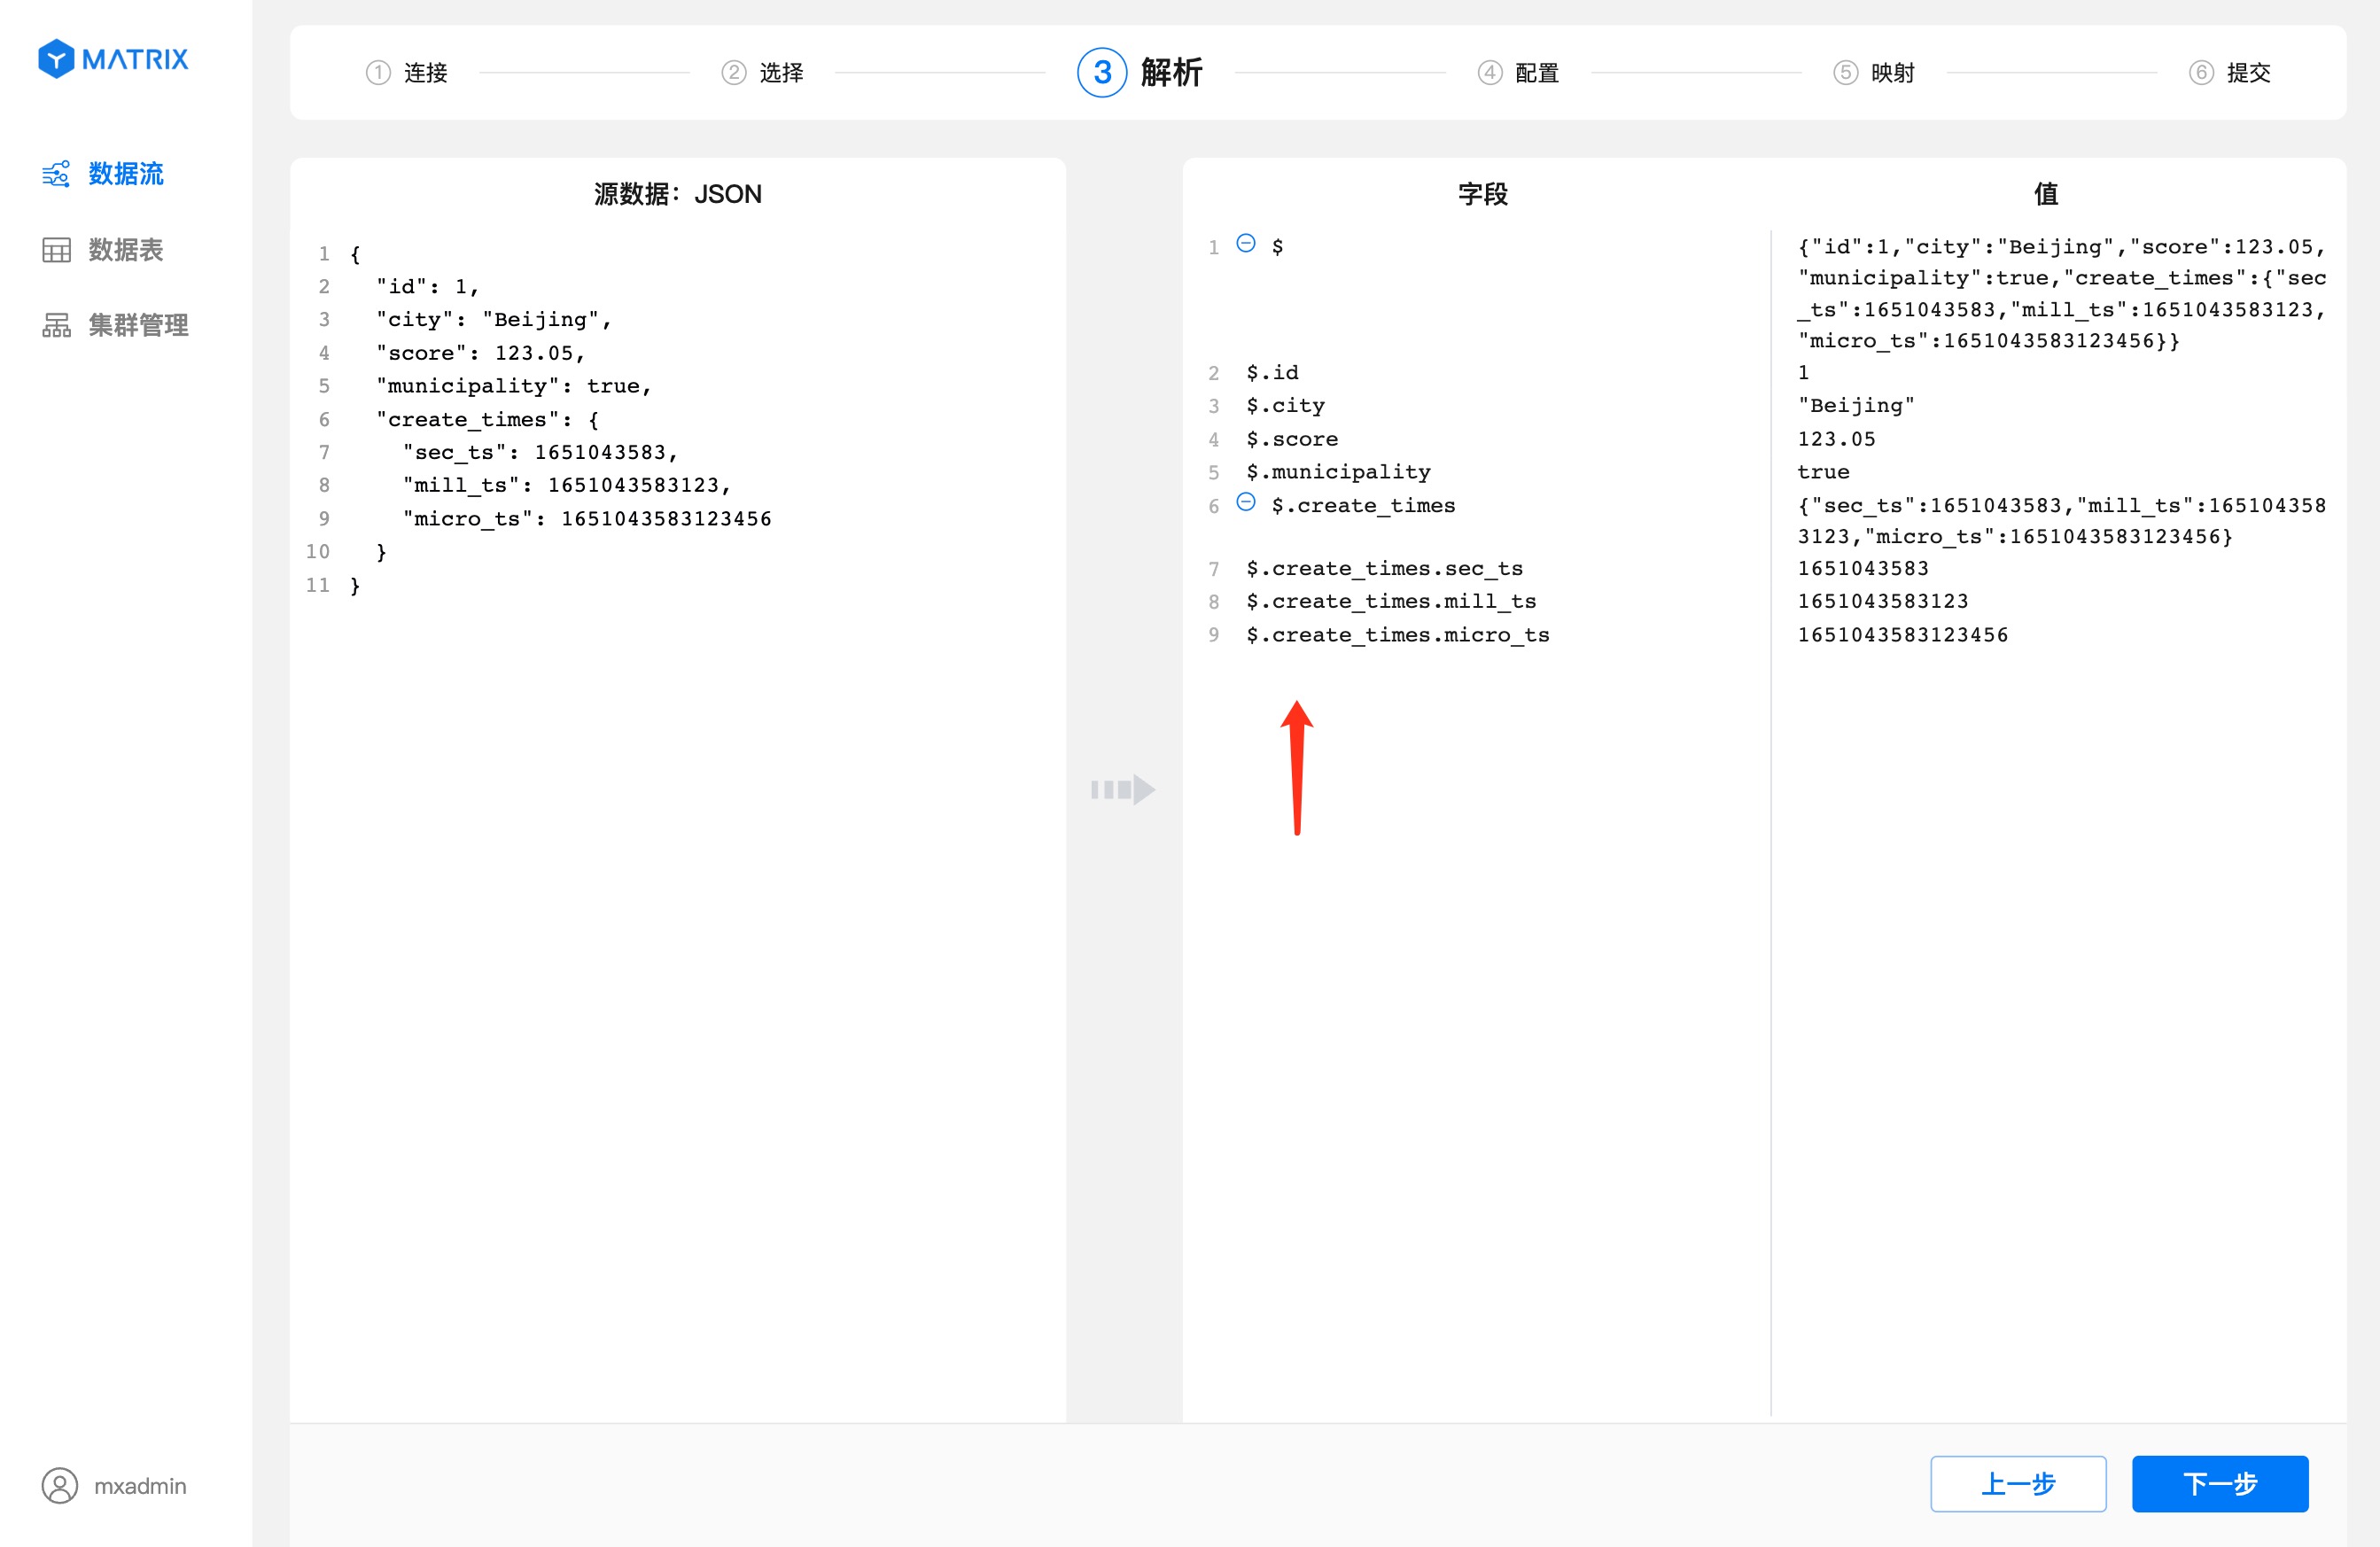
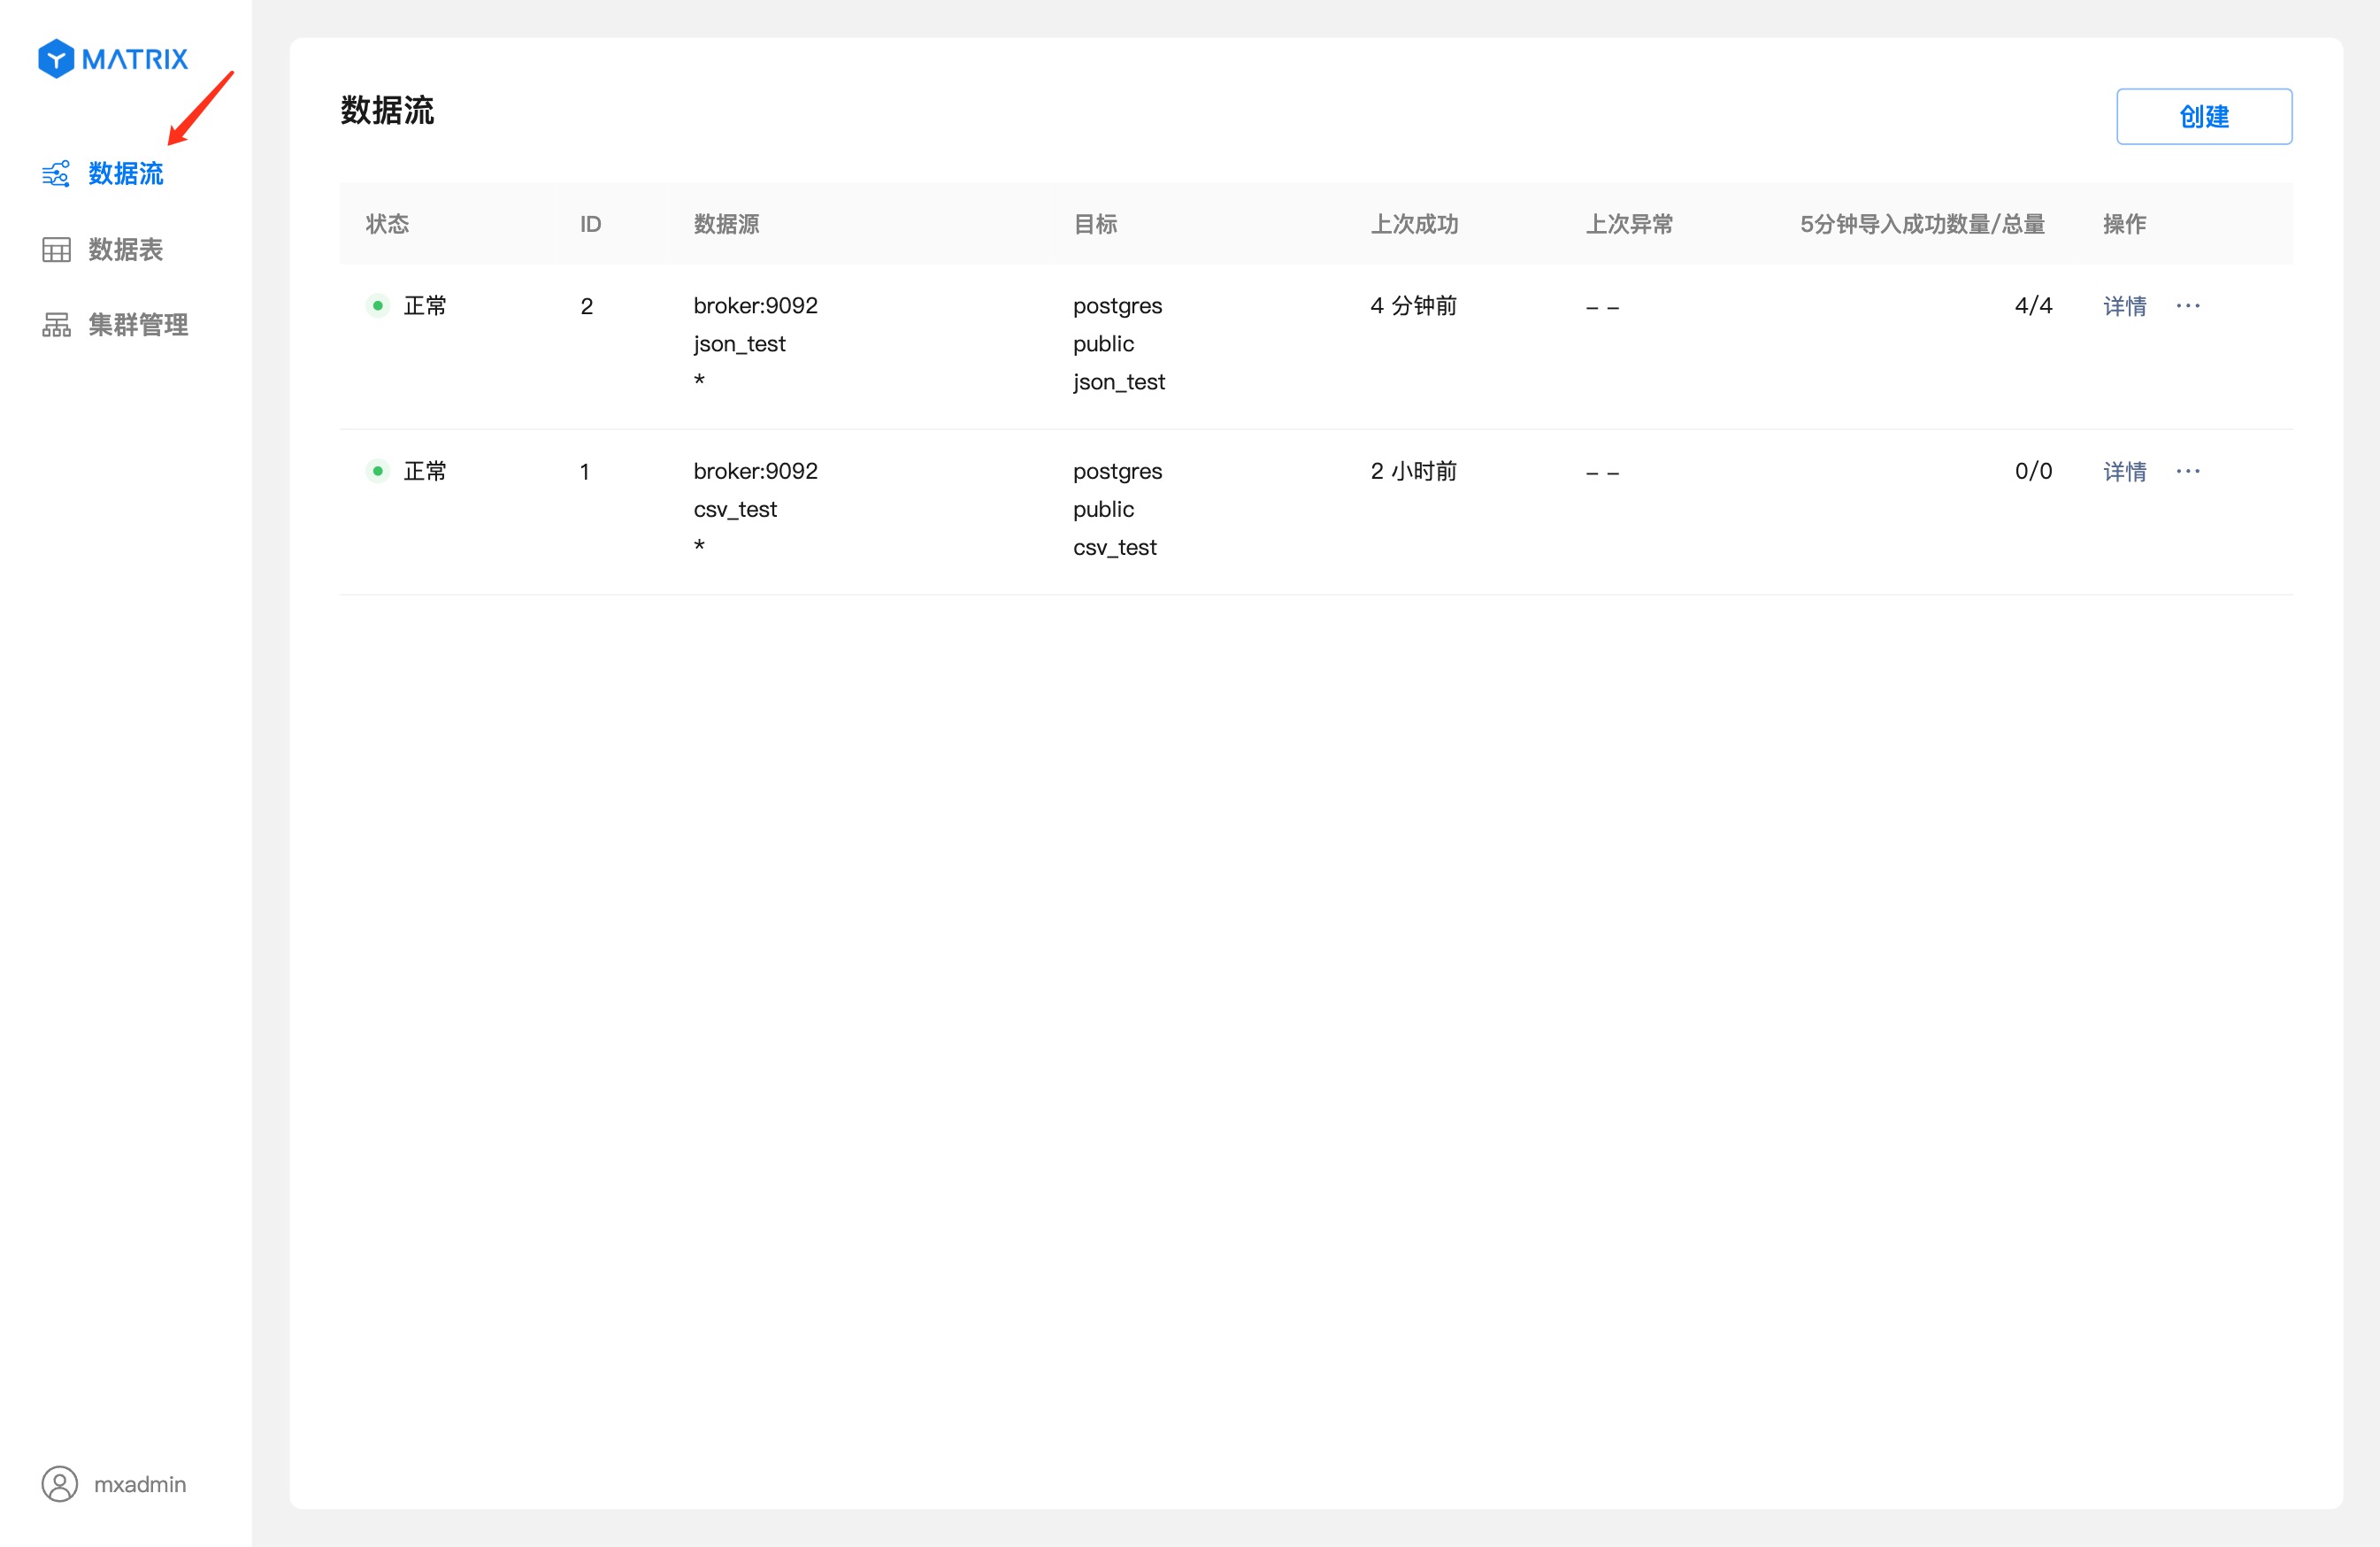
The Kafka data flow list is displayed on the home page of the "Data Stream" menu bar. Click the "Data Stream" menu item on the right to return to the data flow home page.
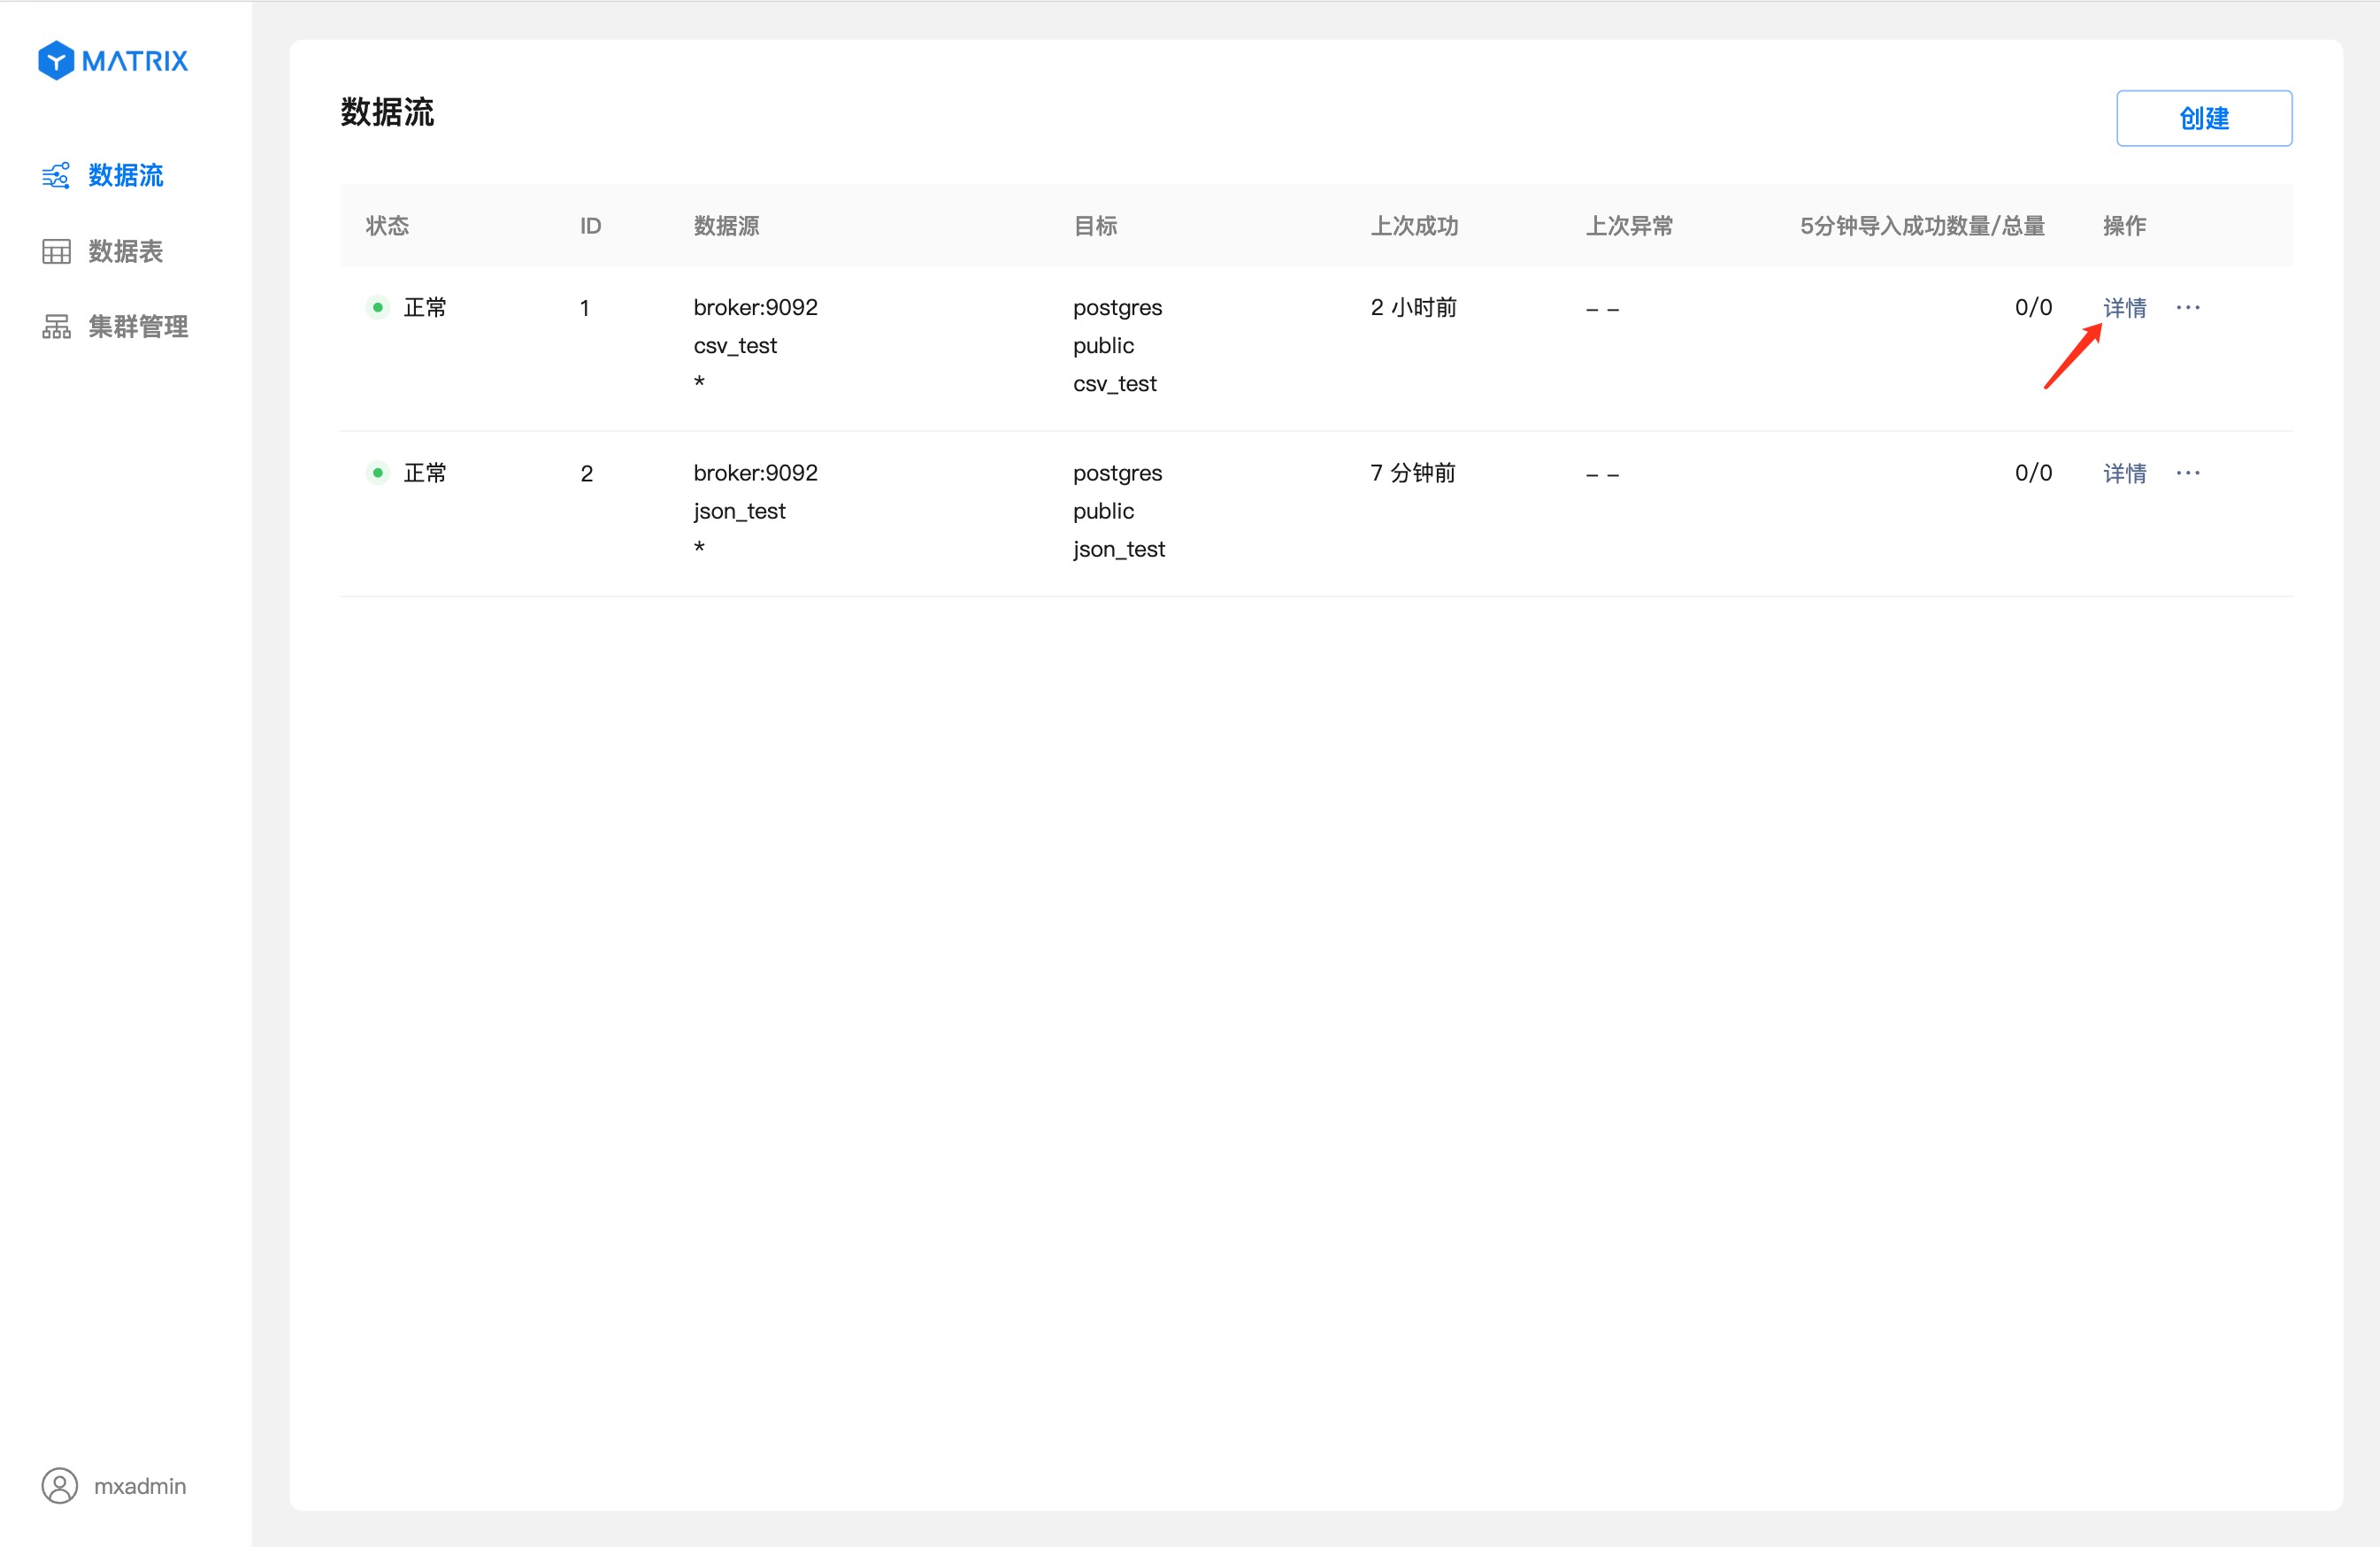
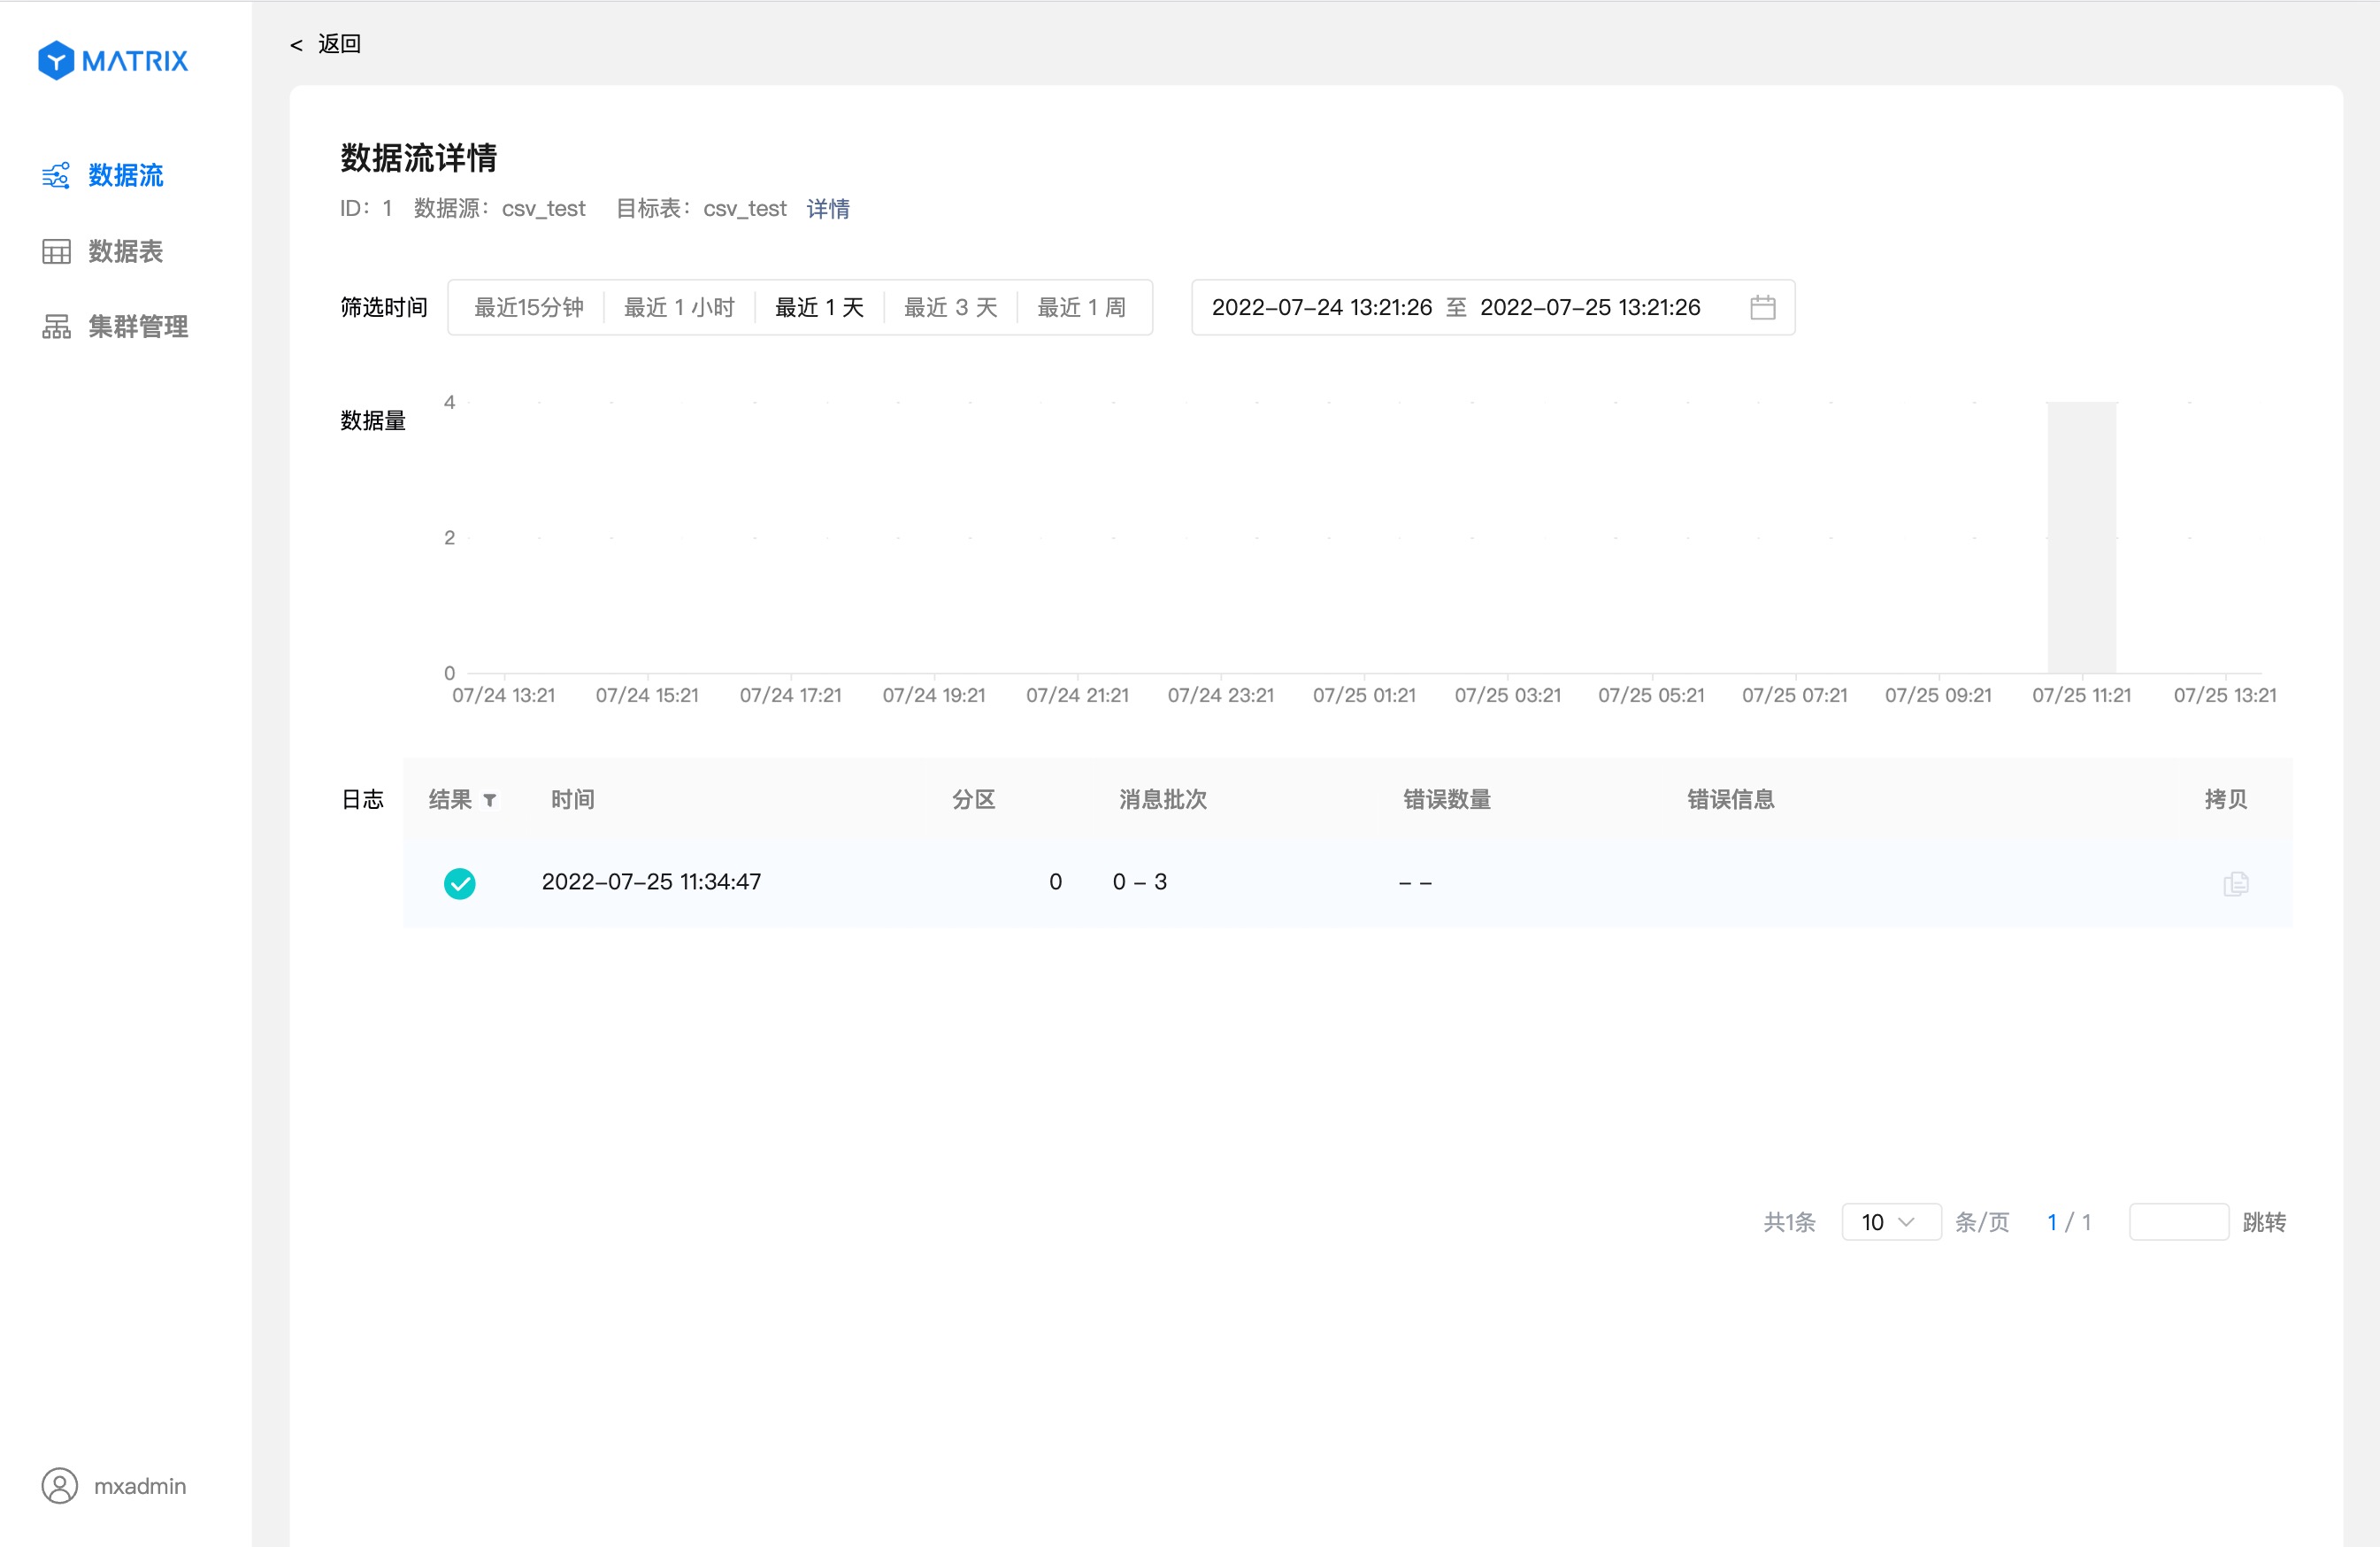
Click "Details" to enter the data flow details page.
The details page displays detailed information about the running status of the data stream.
If you want to verify that the data stream is correctly imported into the database, you can log in to the database through the command line and enter the SQL below to verify.
postgres=# SELECT * FROM csv_test ORDER BY id;
 id |   city   | score  |      create_time
----+-----------------------------------------------------------------------------------------------------------------------------
  1 | Beijing  | 123.05 | 2022-04-27 07:13:03+00
  2 | Shanghai | 112.95 | 2022-04-27 07:13:03+00
  3 | Shenzhen |    100 | 2022-04-27 07:13:03+00
  4 | Guangxi  |   88.5 | 2022-04-27 07:13:03+00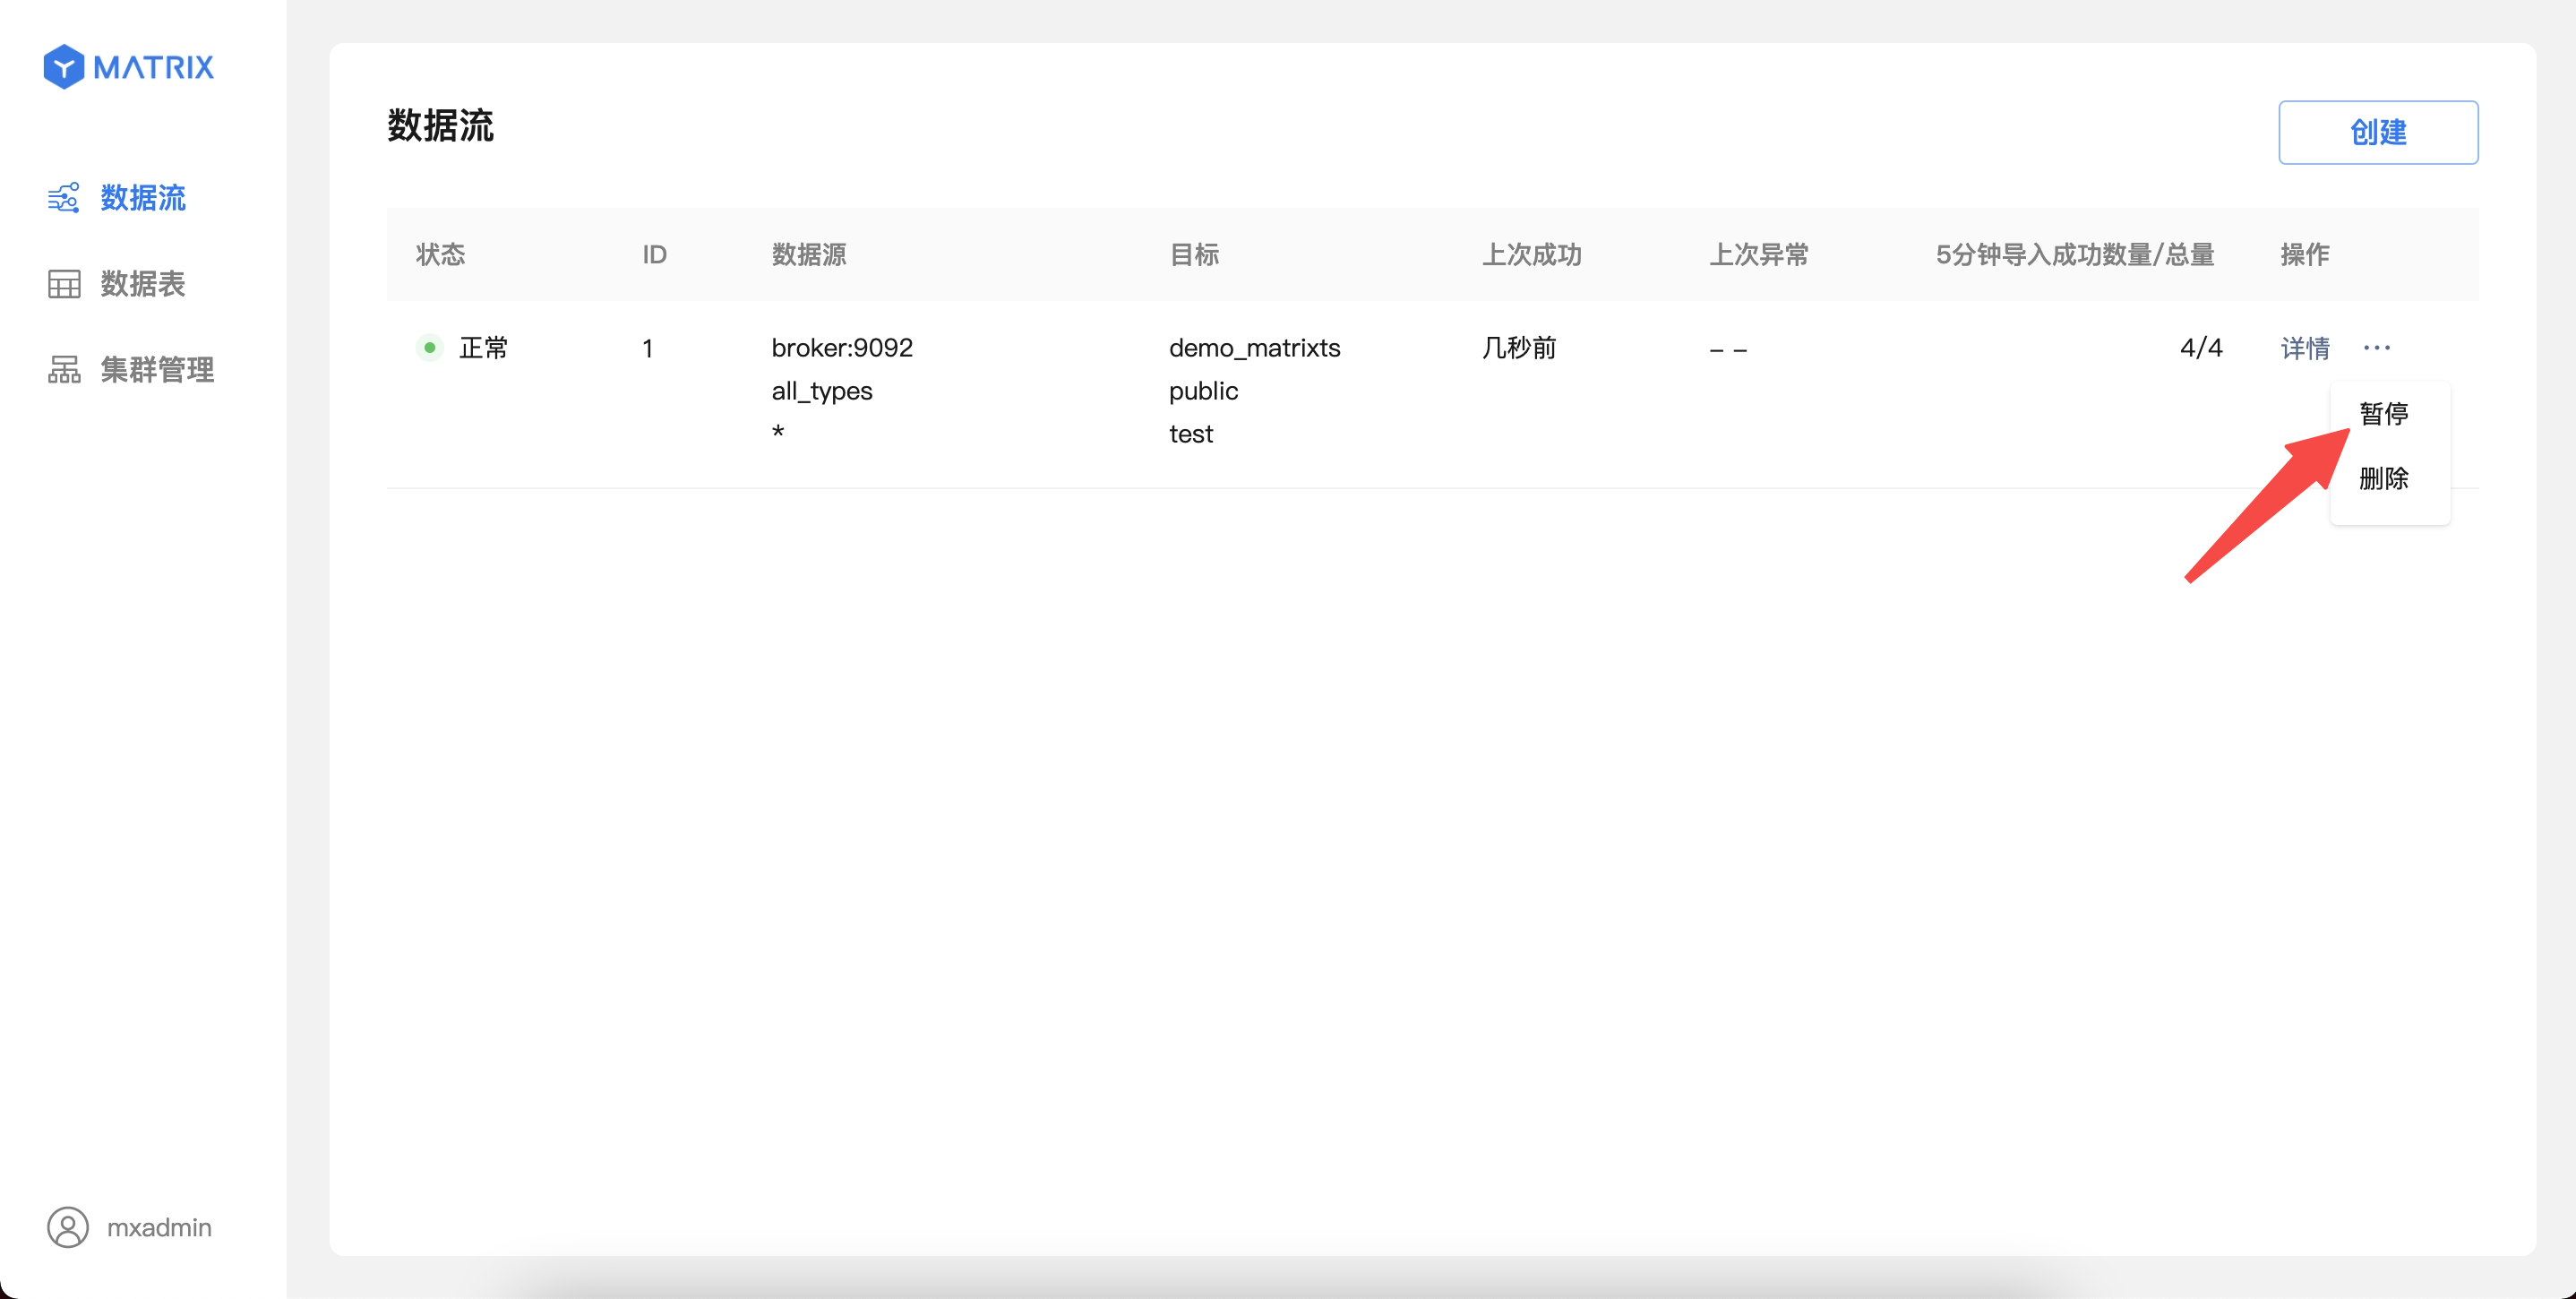
(4 rows)When you create Kafka data streams using the YMatrix graphical interface, the data is continuously imported into YMatrix. At this time, if you want to temporarily pause the import of Kafka data due to service debugging or other reasons, you can also operate directly in the graphical interface.
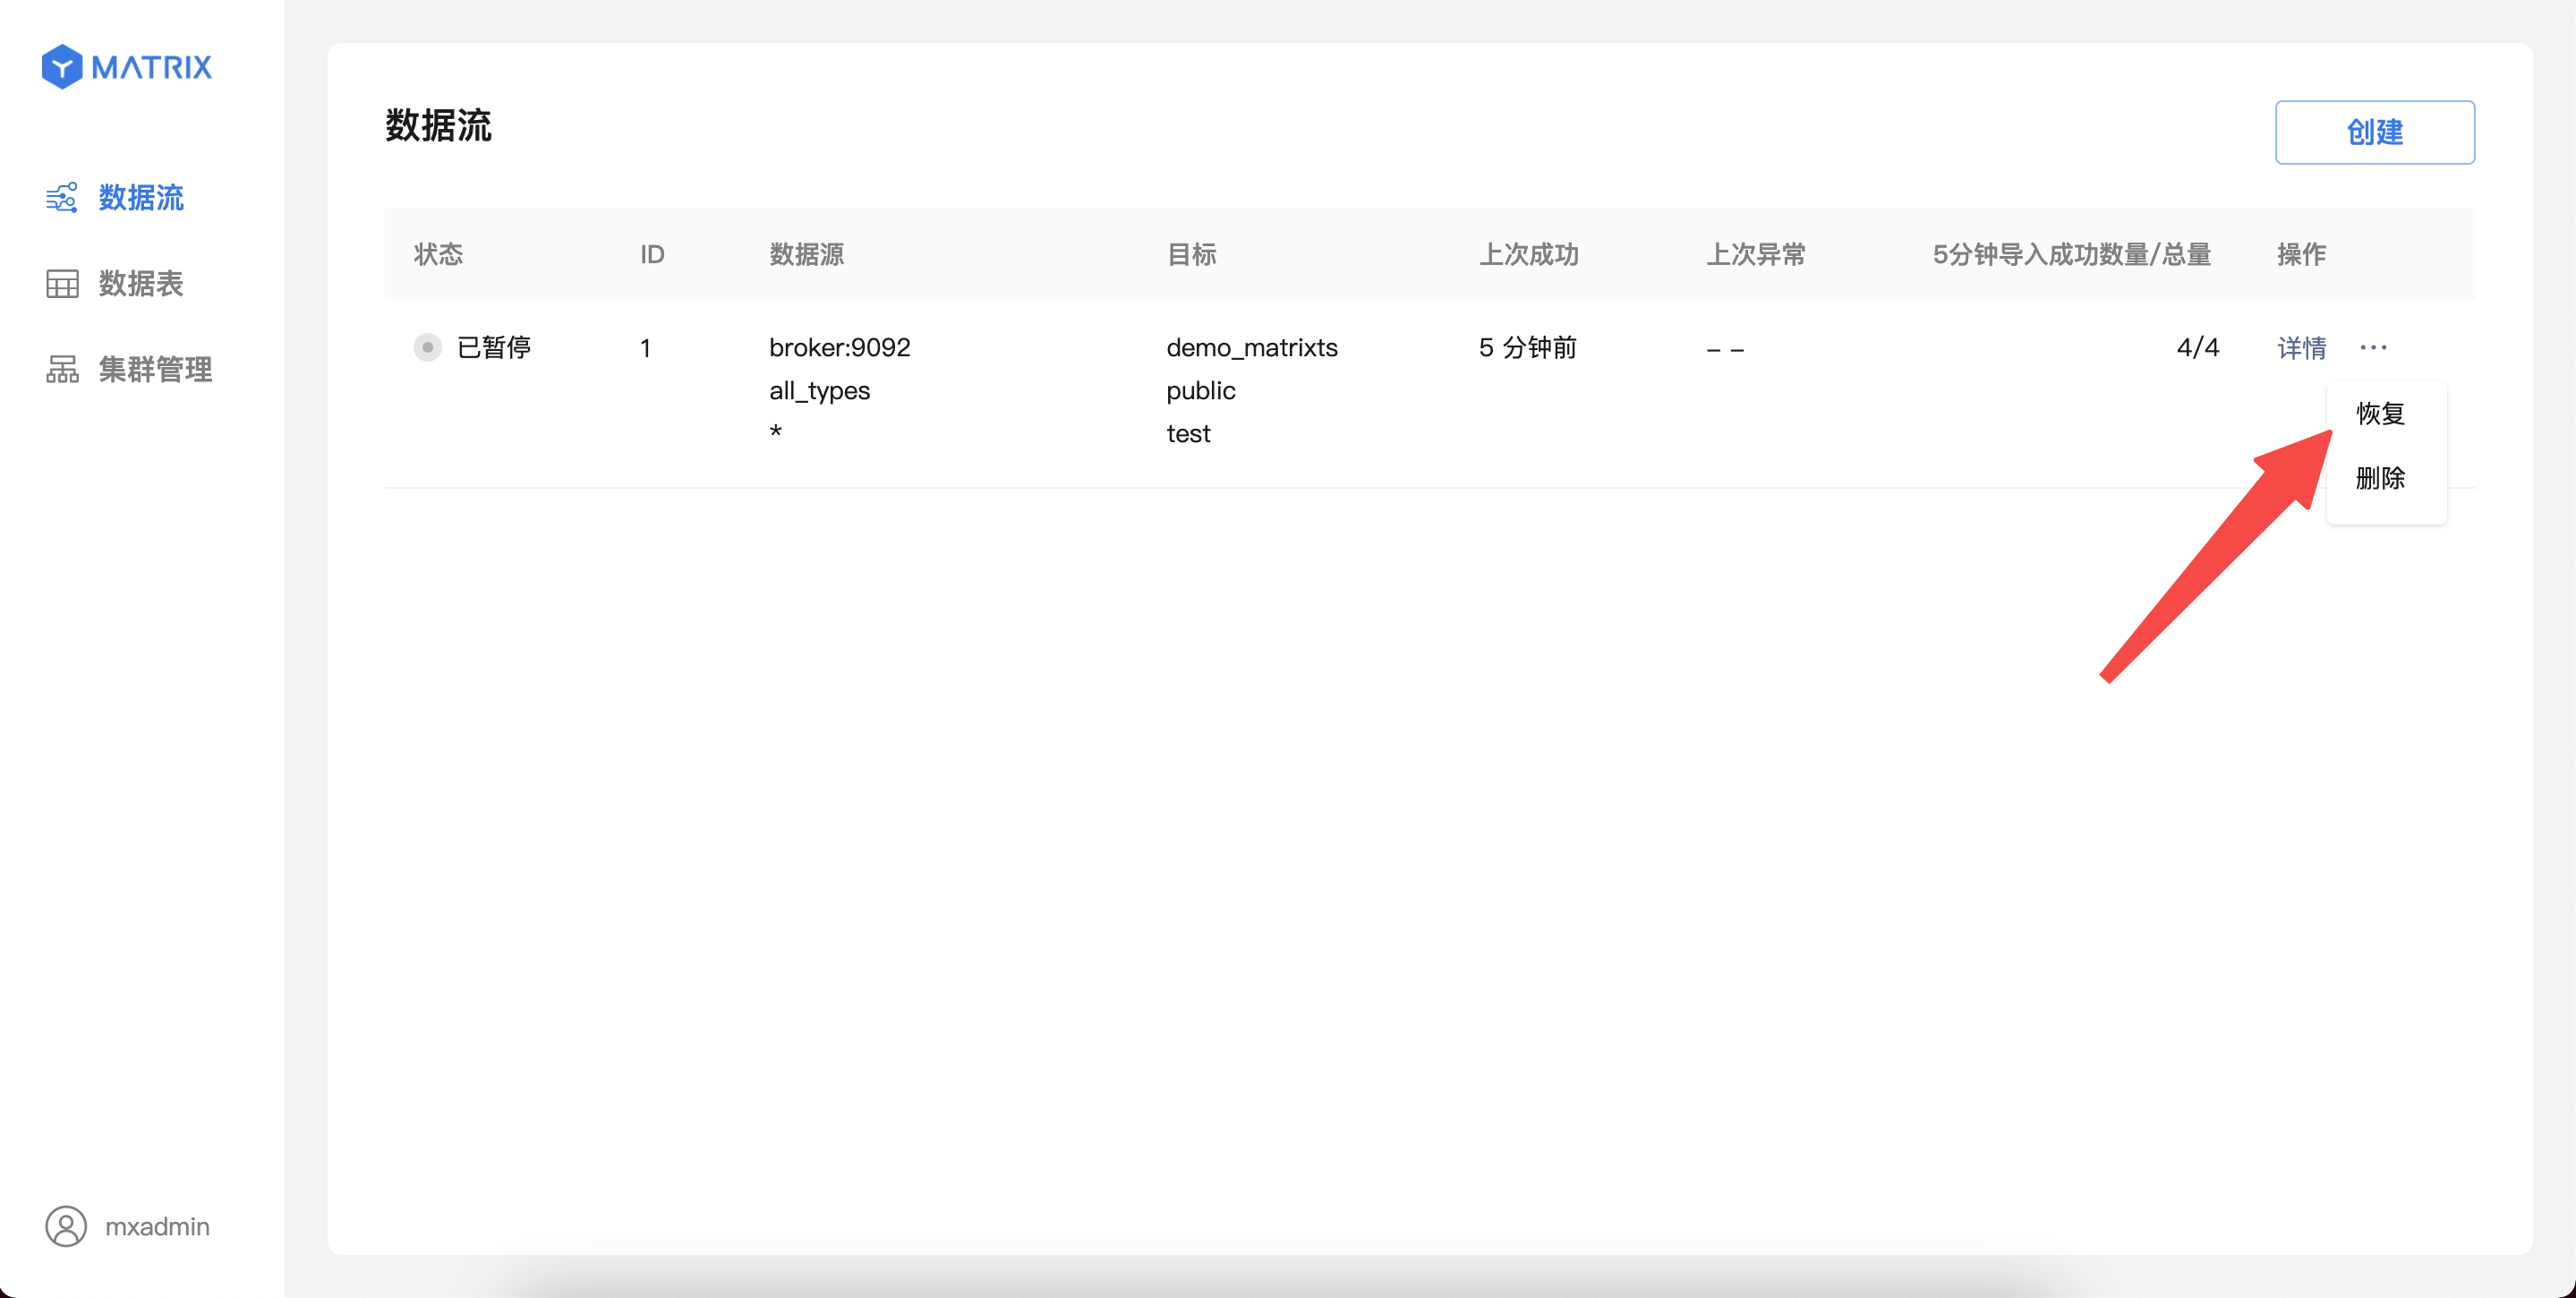
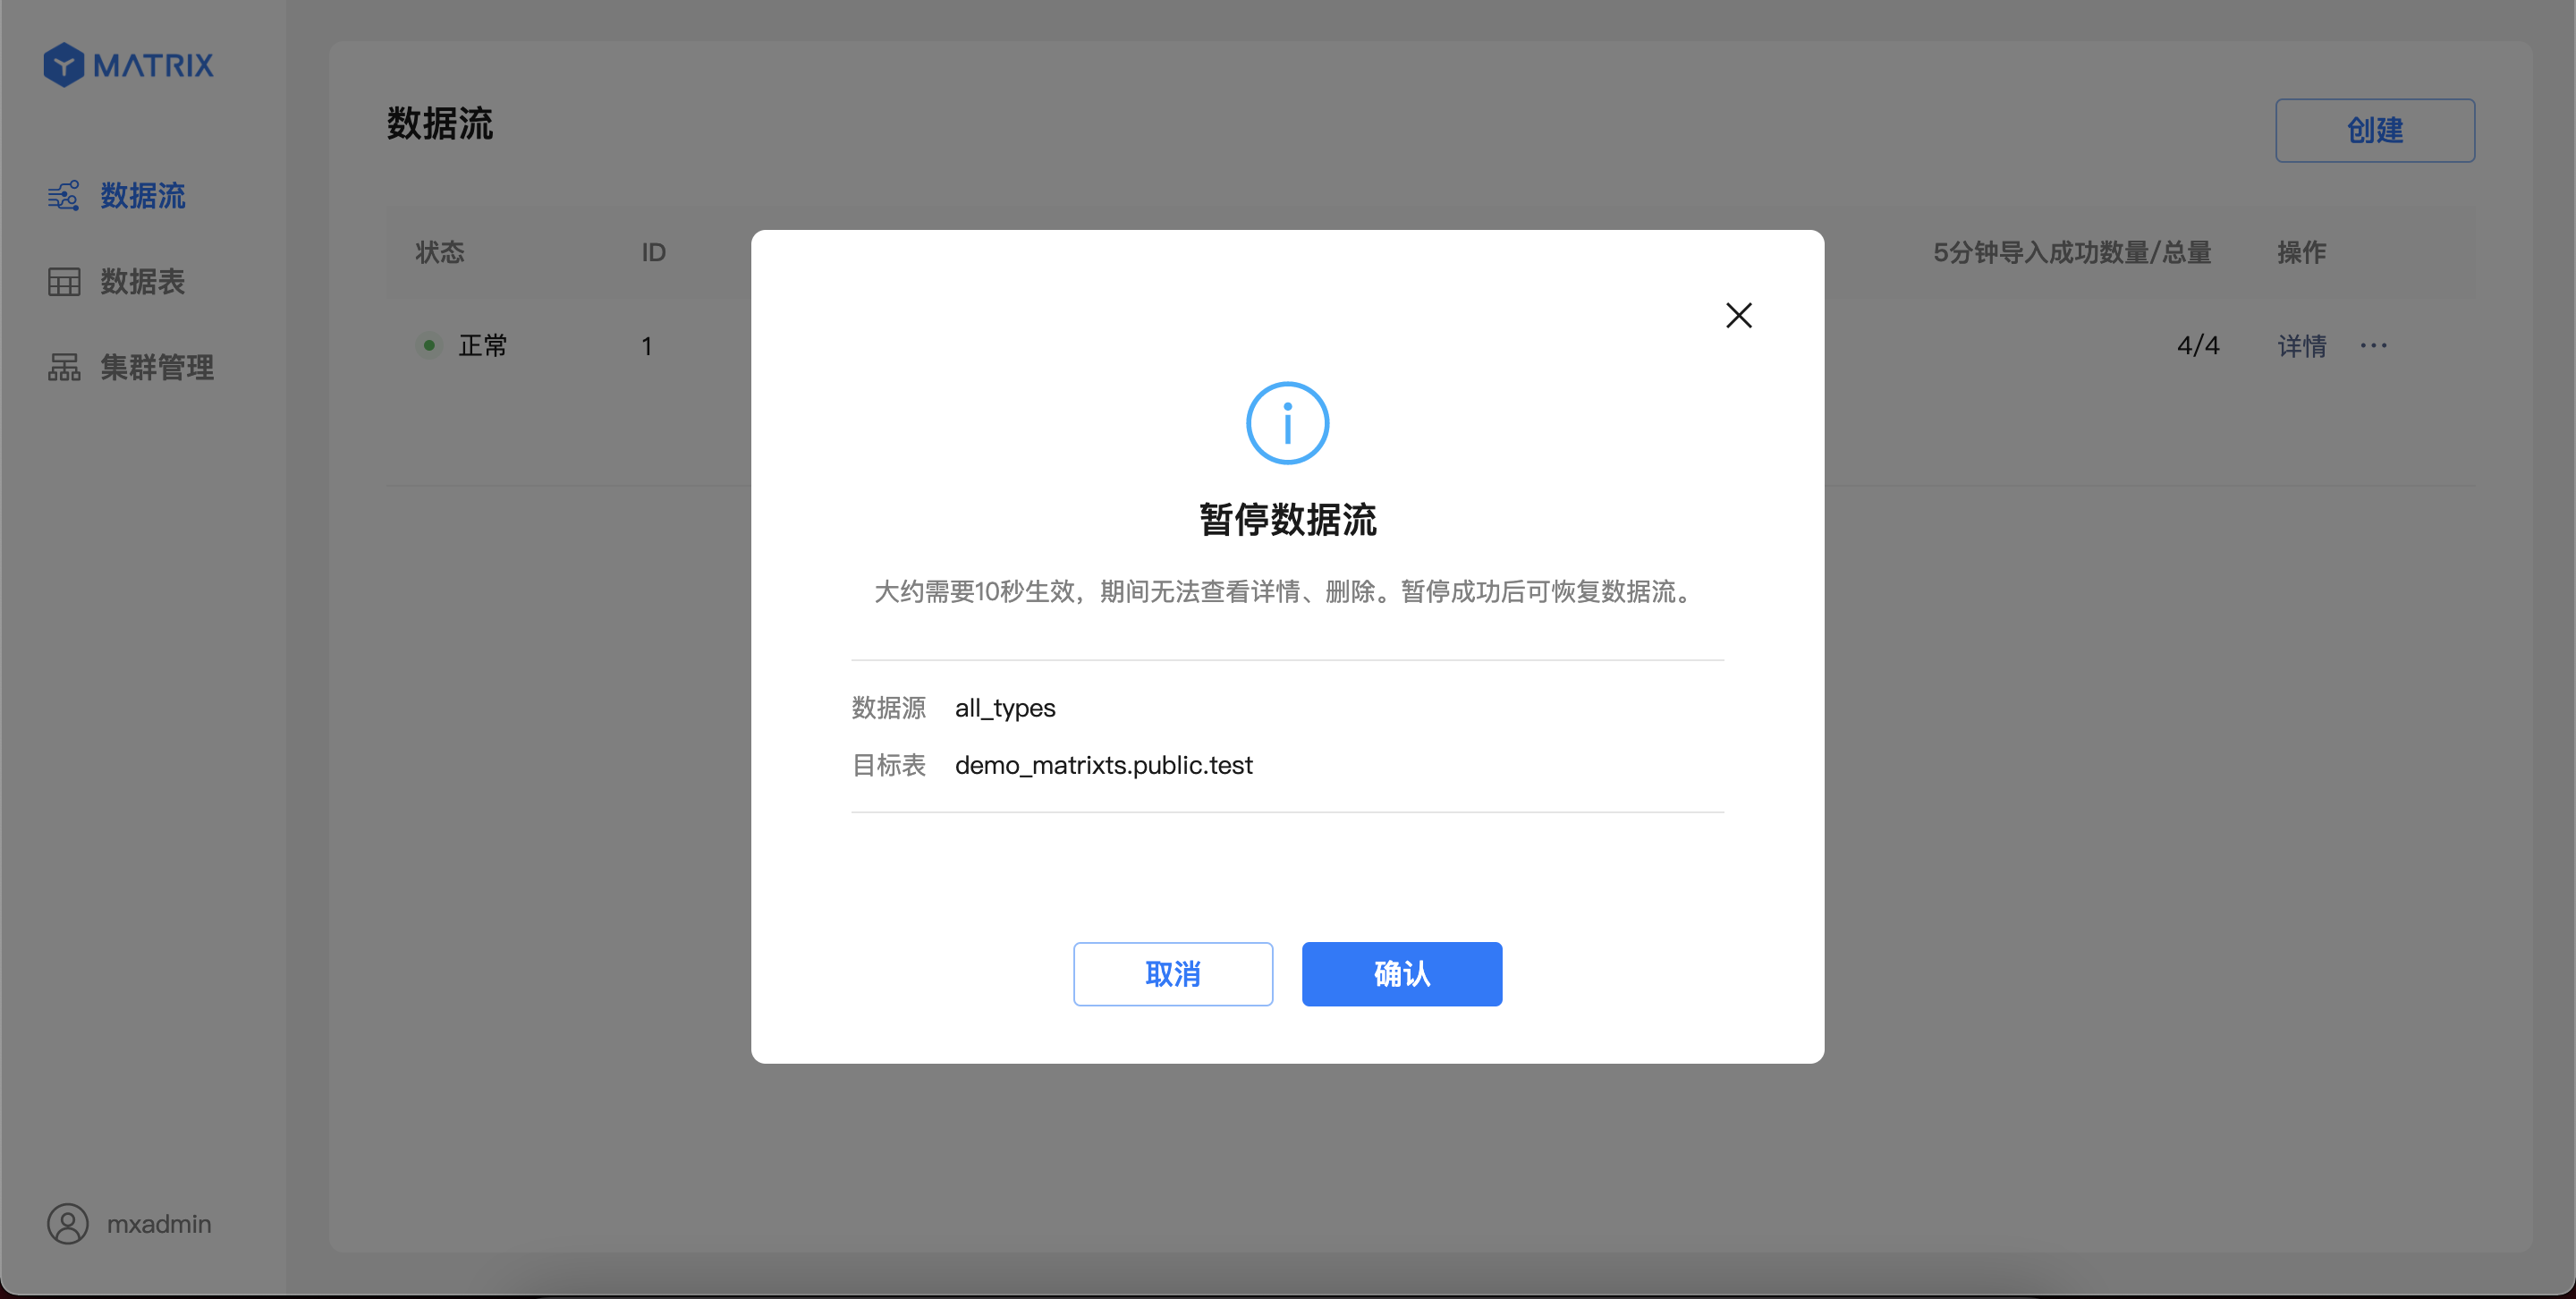
For running Kafka data streams, data import can be paused from the list page operation entry.
Notes!
The pause operation may take 1-10 seconds to take effect, and no other operations can be performed on the data stream; after the pause operation is completed, the Kafka data will be stopped importing, and the status will be switched to "Paused".
For Kafka data streams in the "Paused" state, data imports can be restored from the list page operation portal. After confirming the operation, the data stream will be immediately restored to import; the page will resume displaying the latest import information after up to 5 seconds.