Cluster Deployment
Data Model
Data Writing
Data Query
SQL Reference
Maintenance and Monitoring
Tool Guide
Troubleshooting
The previous introduction to the strategies for creating partition table templates and creating automated partition management, which are all implemented manually by calling UDF. Starting from 4.3, MatrixDB has added graphical partition management functions, so that commonly used partition operations in production environments can be completed through the UI.
First, create a partition table:
CREATE TABLE disk(
time timestamp with time zone,
tag_id int,
read float,
write float
)
Distributed by (tag_id)
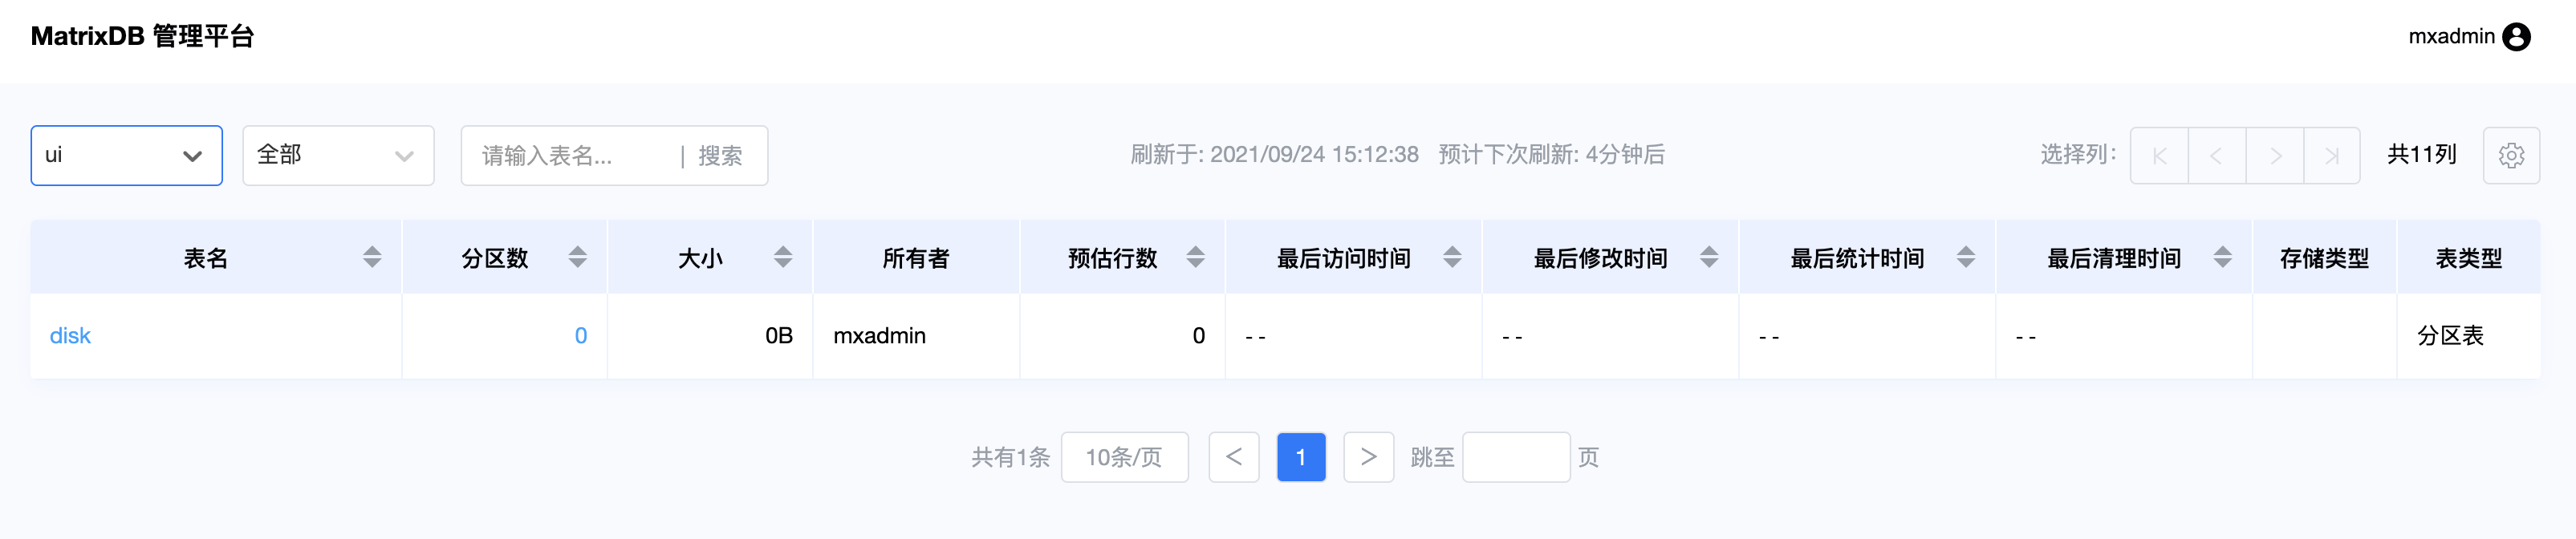
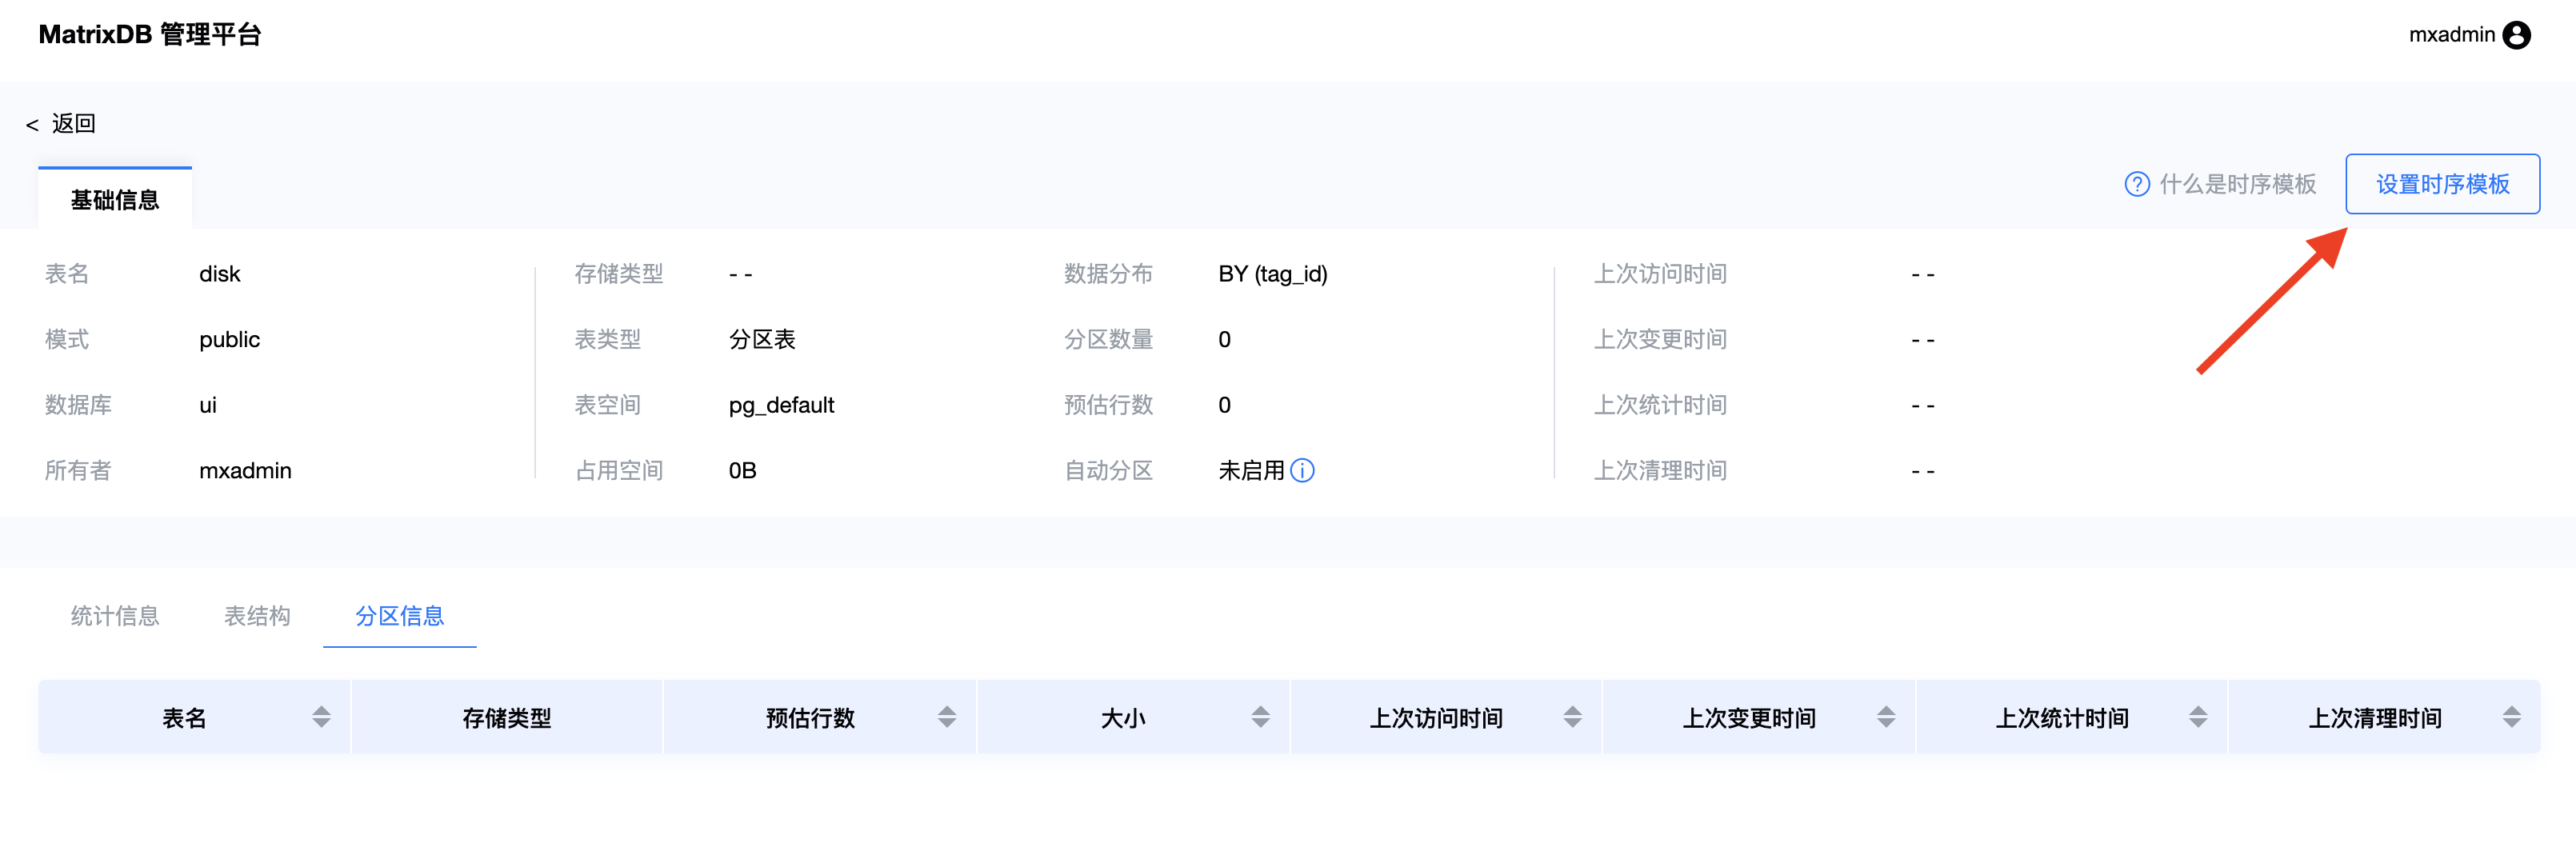
Partition by range(time);After a few minutes, you can see the partition table in the data table, and there are no subpartitions yet. Click the Partition Number link to enter the Partition Management page.
Then click "Set timing template":
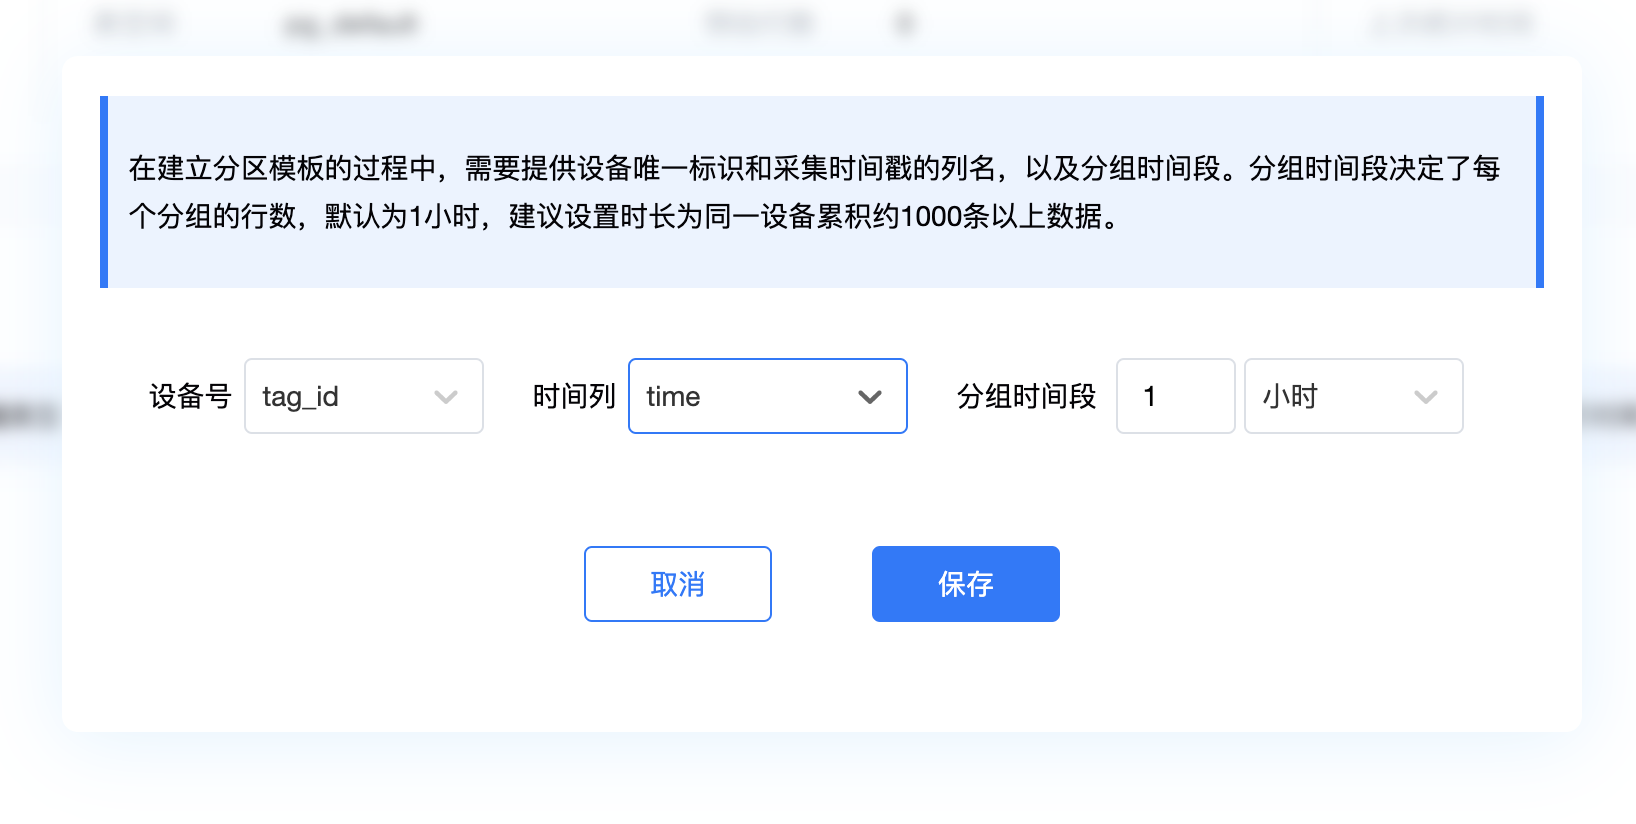
Set tagkey, timekey, and timebucket for partition tables:
The operation of automated partition management also supports graphicalization and supports mars_time_series policy, including the following 3 actions:
The "Partition Creation in advance" section will be enabled by default. You can set the partition span and the time for partition creation in advance:
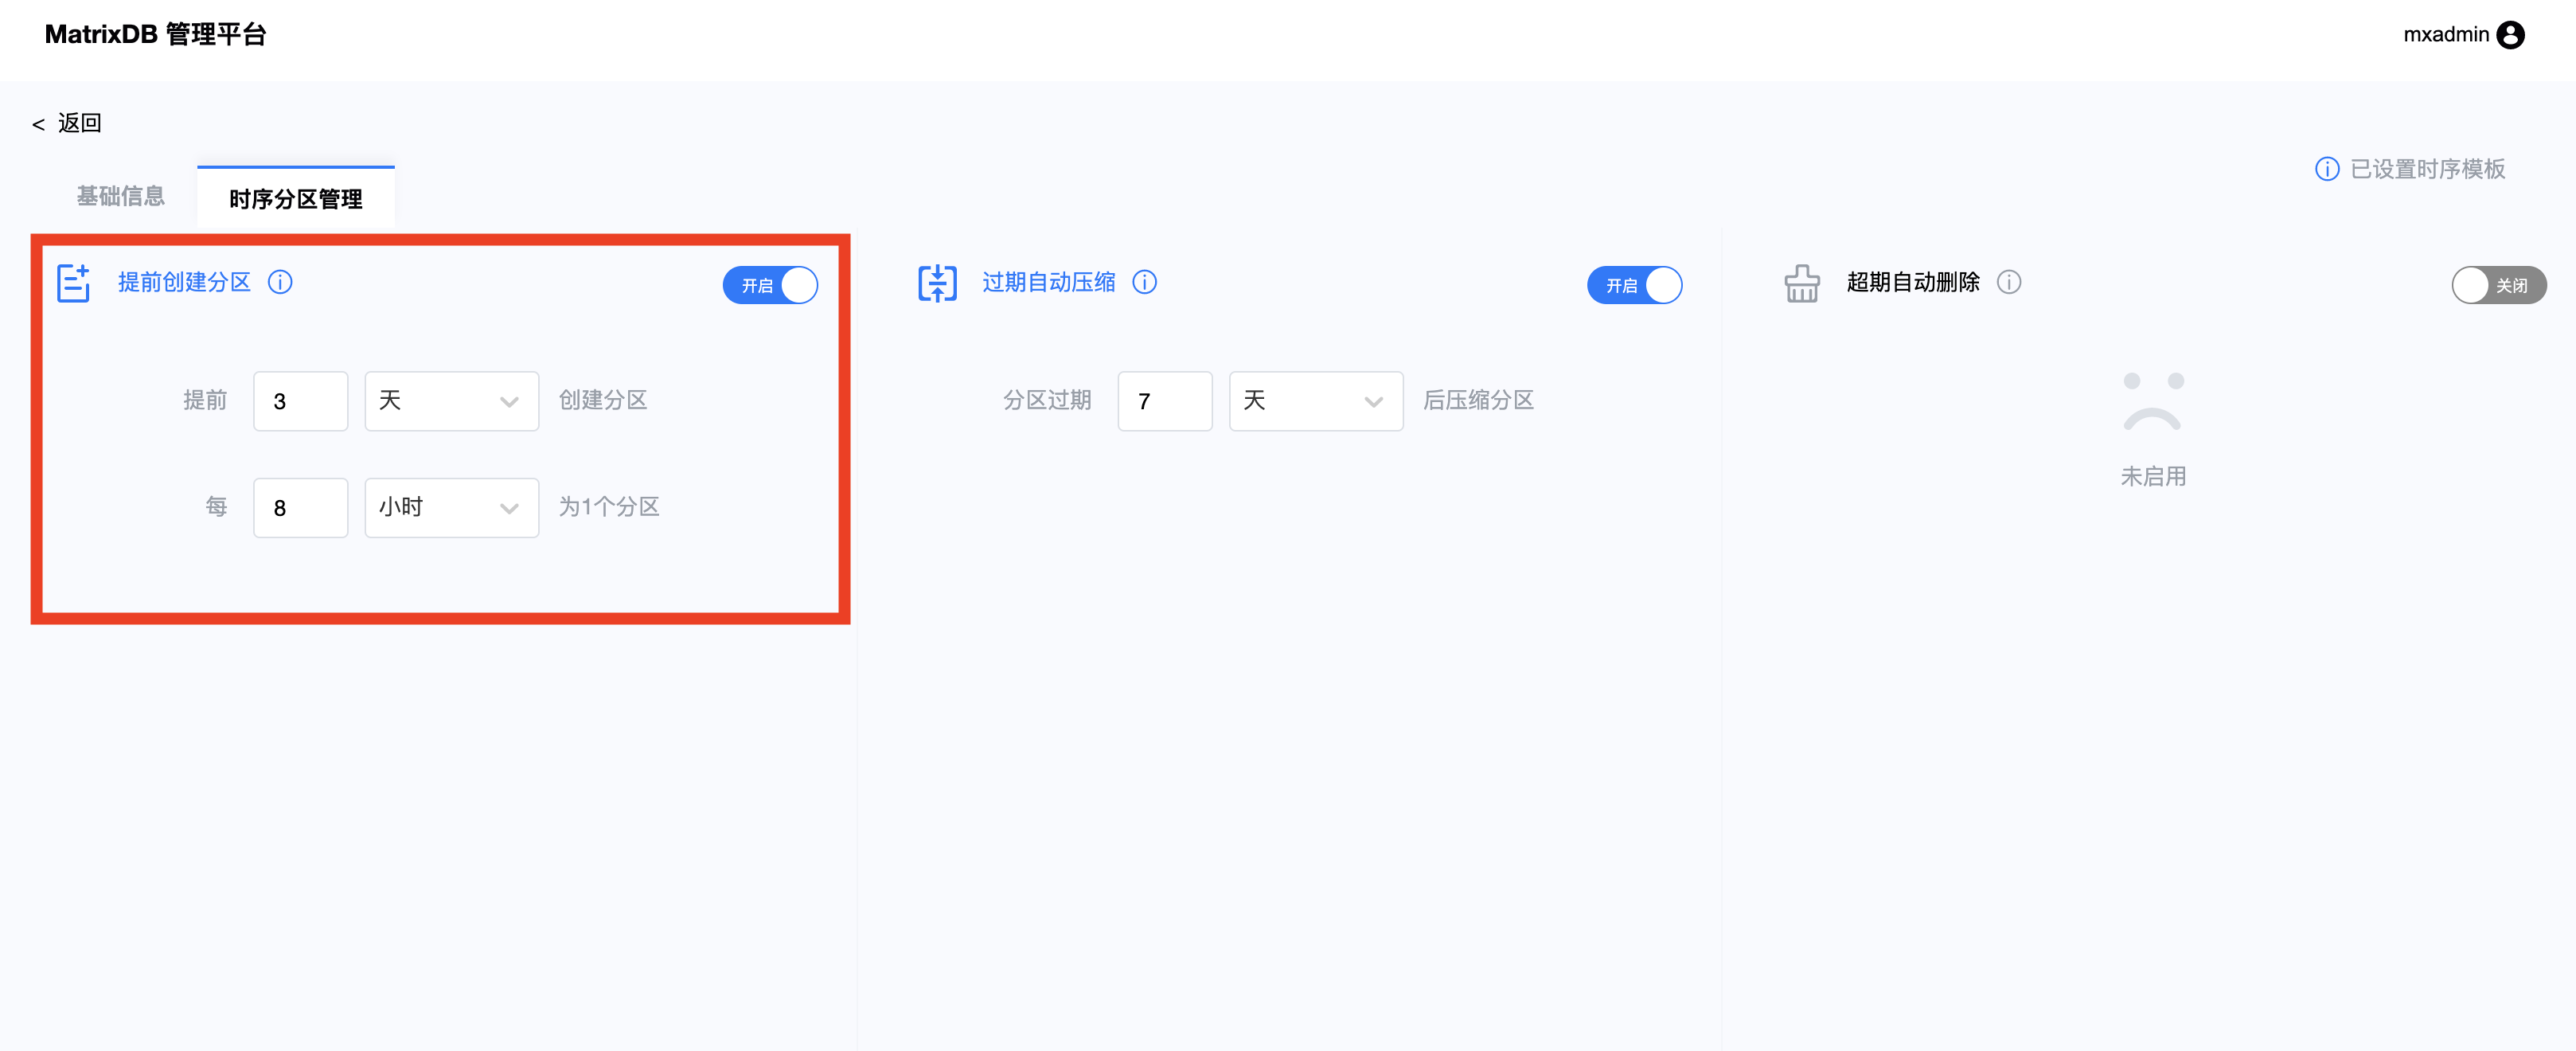
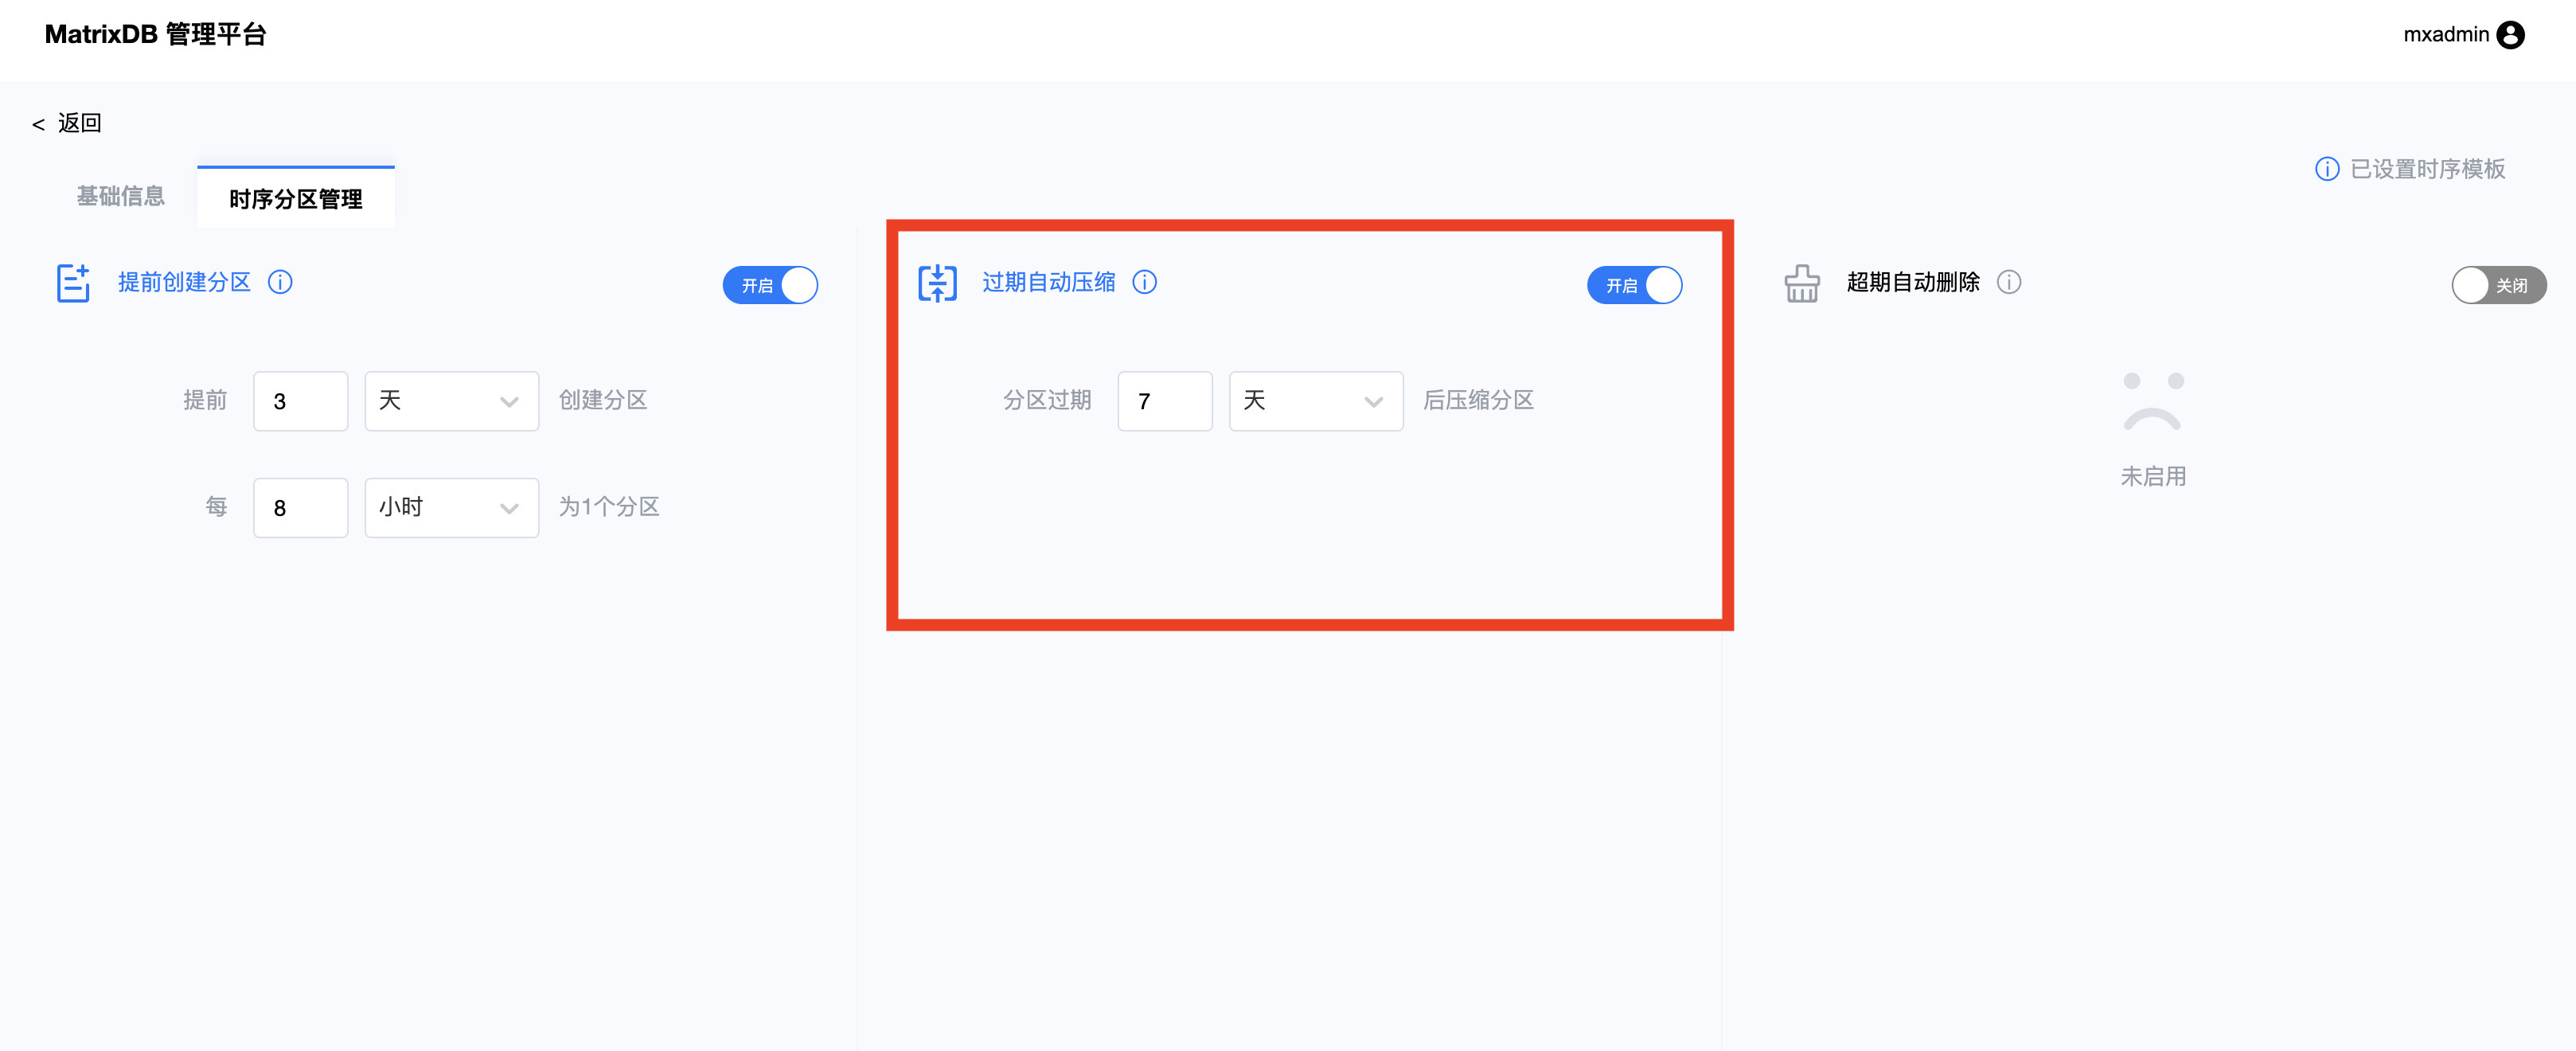
The "Expired Automatic Compression" section will be enabled by default. You can set how long after the expired partition is compressed:
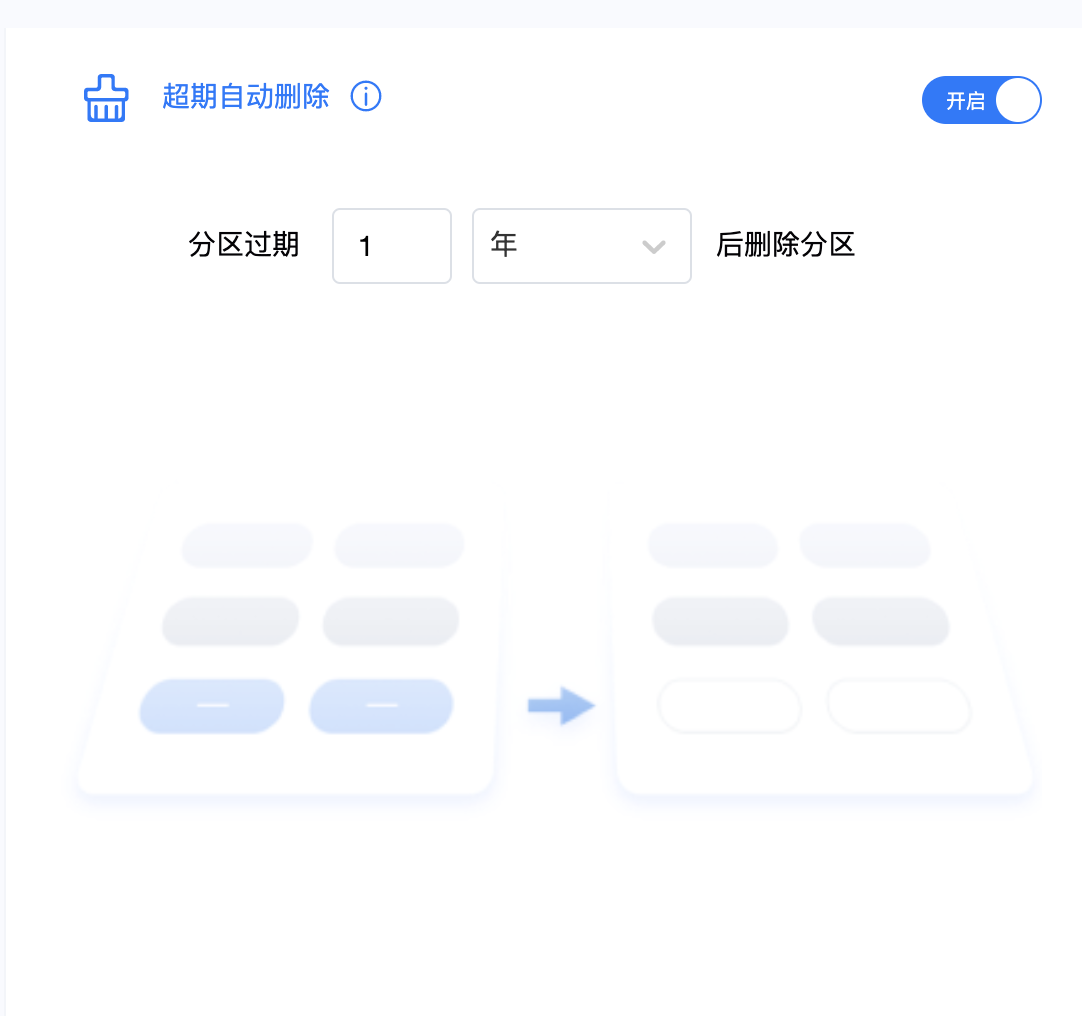
The "Automatic Delete Overdue" section is not enabled by default and needs to be enabled manually:
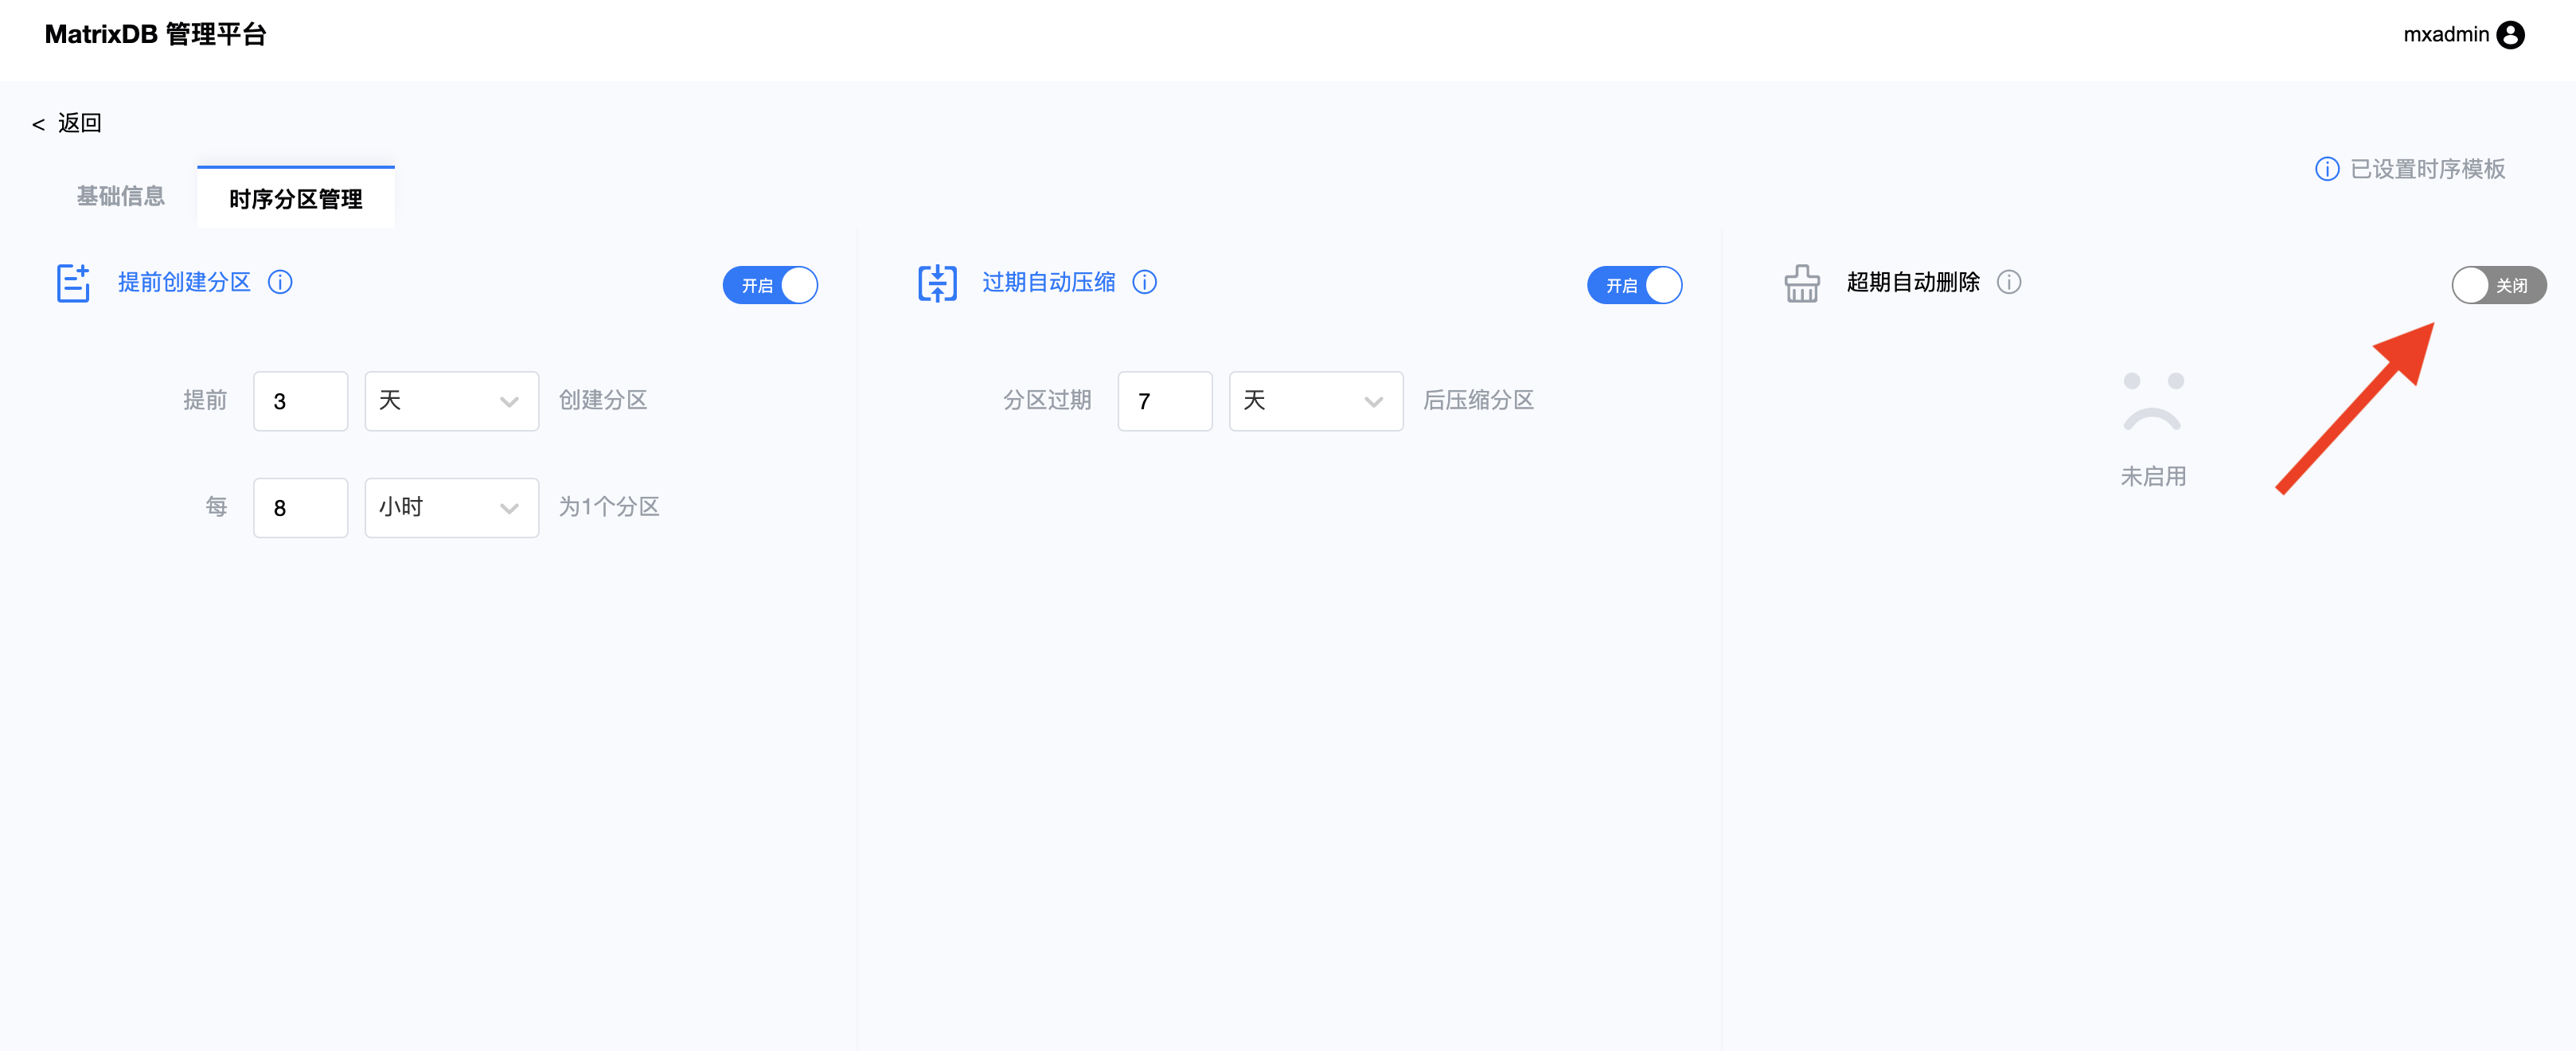
After turning on, you can set how long it takes to clean the partition before it is cleaned, and the cleaned data will not be retrieved: