This article contains the main steps to run MatrixDB through Docker Desktop and Hyper-V deployment in Windows 10, and the entire installation process may require a system restart twice.
Right-click the Start menu and run PowerShell as an administrator, and execute the command:
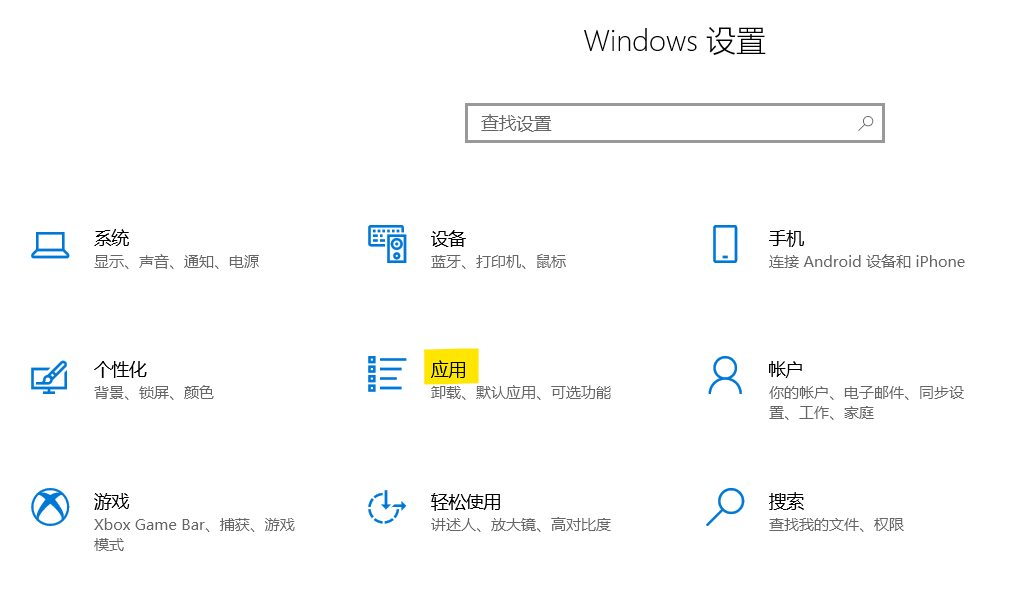
Enable-WindowsOptionalFeature -Online -FeatureName Microsoft-Hyper-V -AllOpen Windows settings and click to enter "Apps"
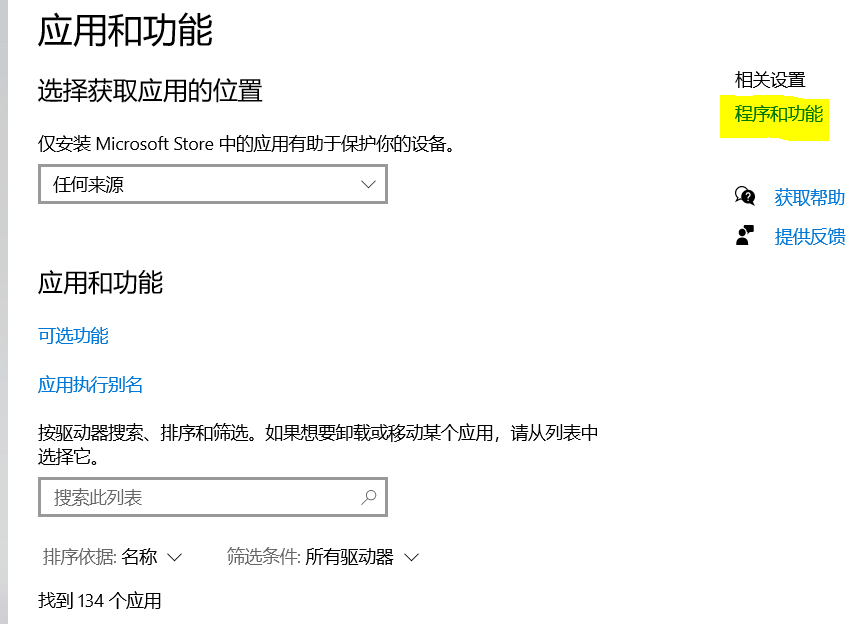
Click the relevant settings "Programs and Functions" on the right side of the "Applications and Functions" window to click on the relevant settings "Programs and Functions"
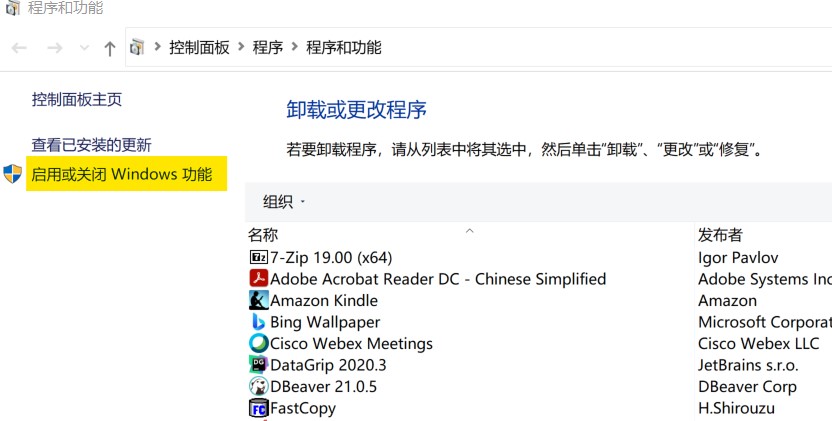
Click "Start or turn off Windows features"
Check to enable Hyper -V
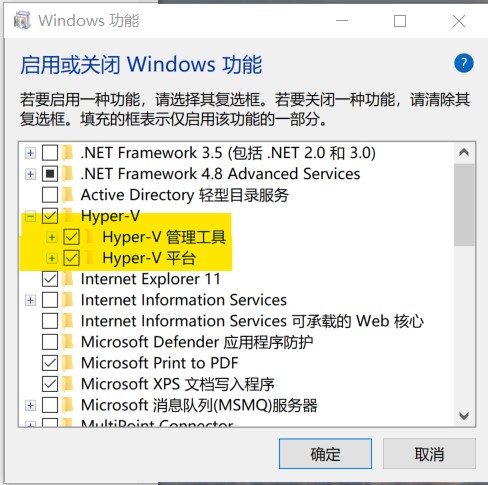
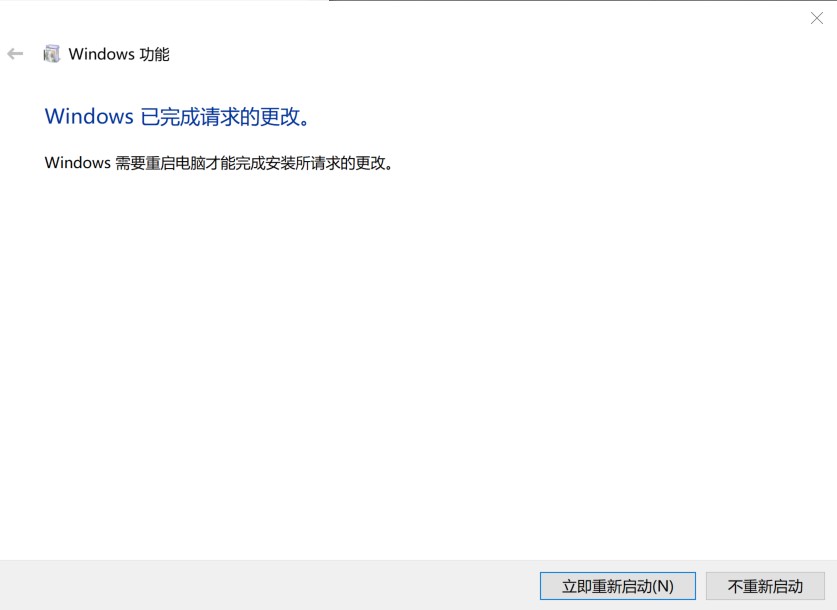
Click the OK button, wait for the Windows update to complete, and restart the computer
Docker Desktop official download address: https://hub.docker.com/editions/community/docker-ce-desktop-windows
(Note: This version is only available for Windows 10 operating system Professional, Enterprise, Education, and some home versions.)
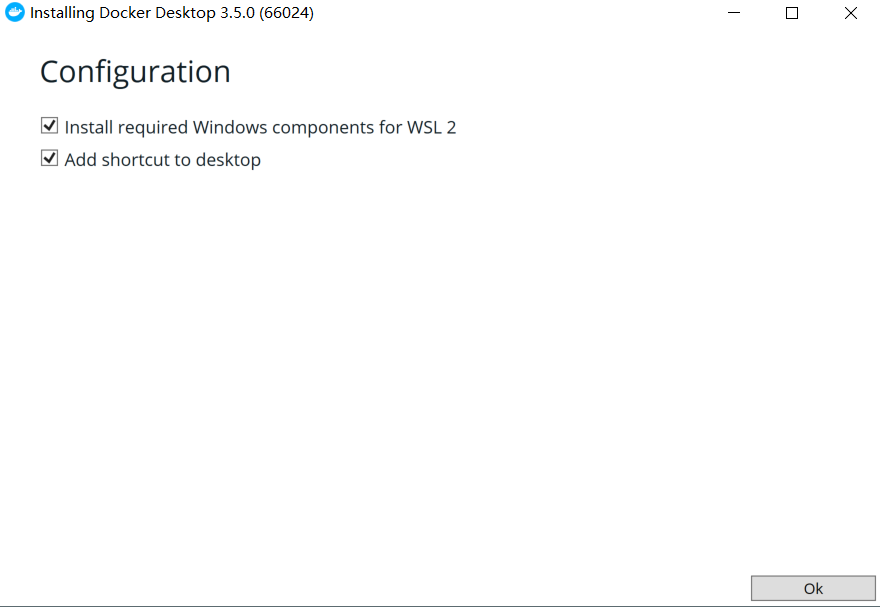
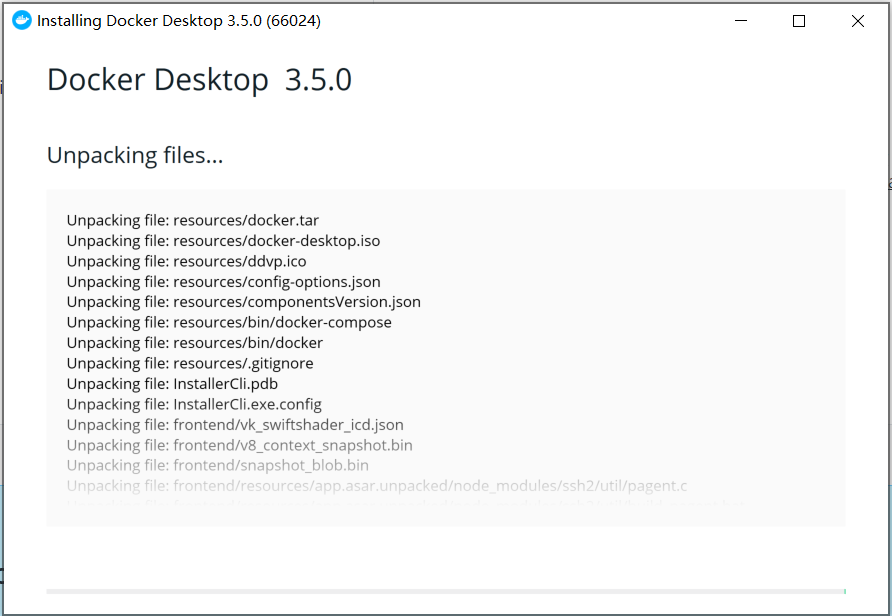
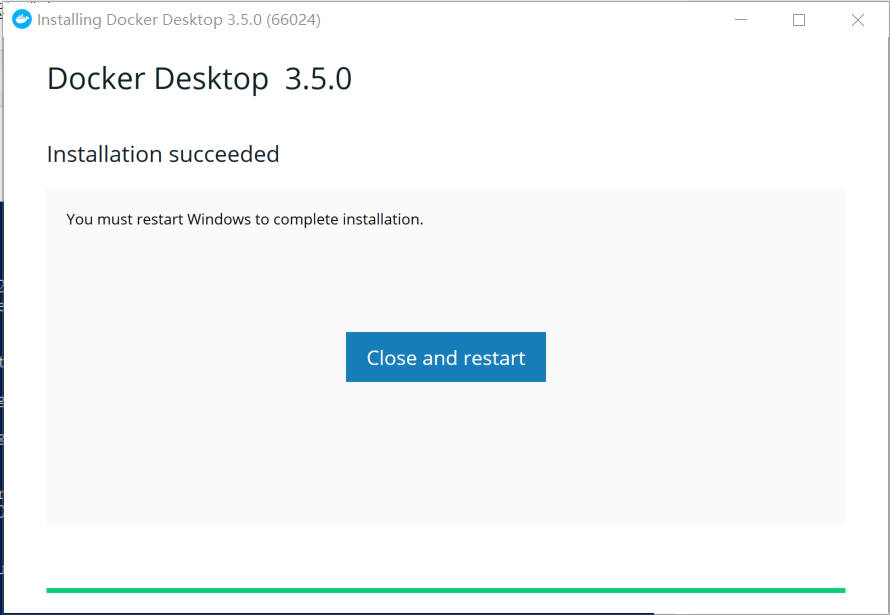
All the way Next, click Finish to complete the installation
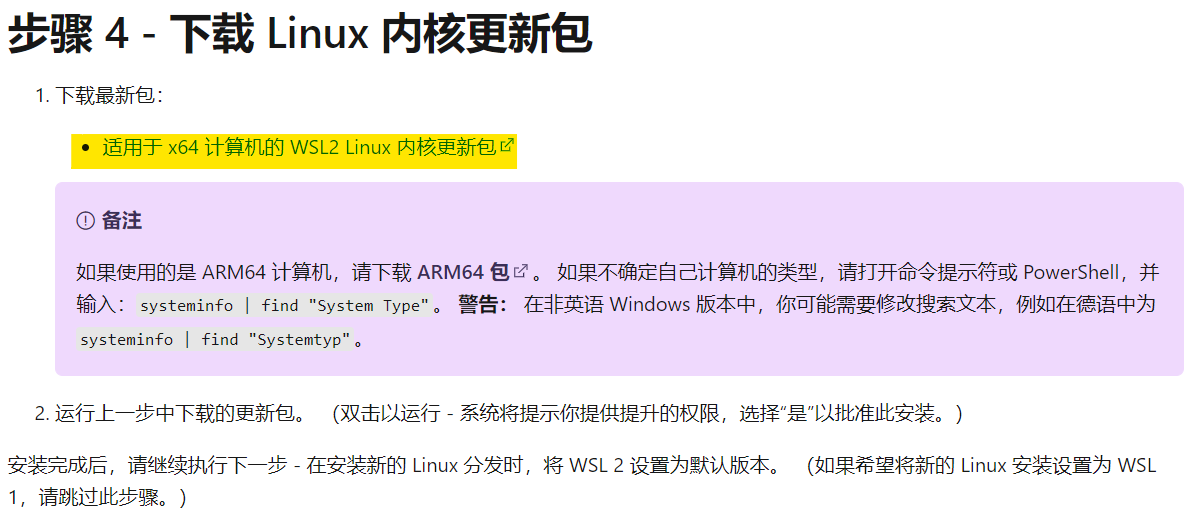
If you encounter the following problems during the process, please click the link in the prompt box
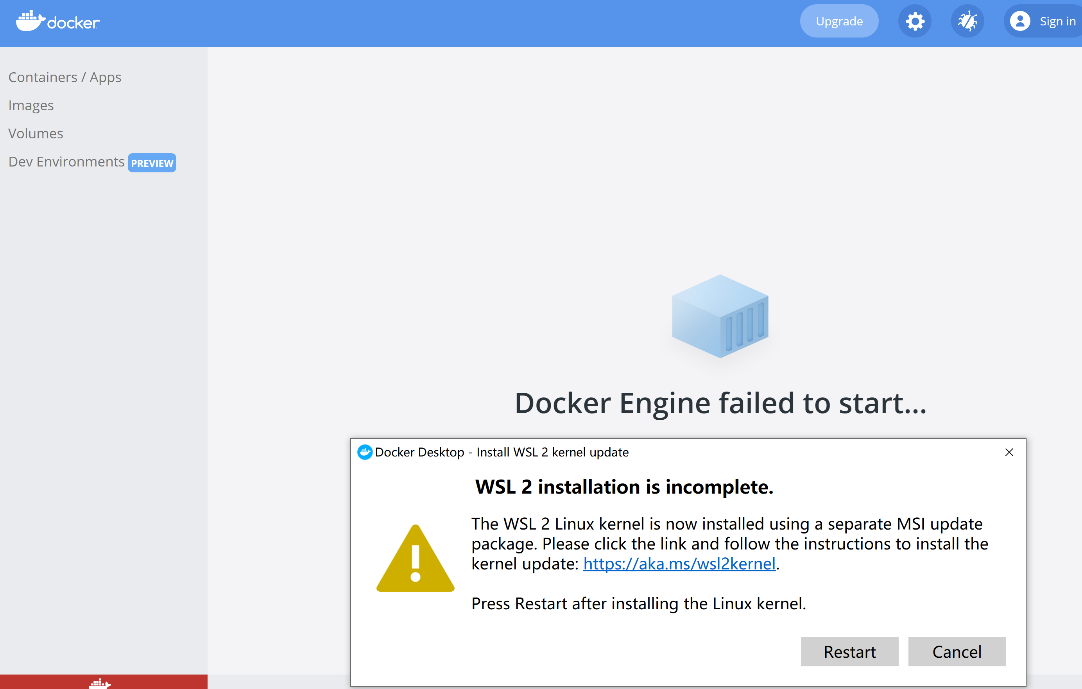
Follow the prompts on the page, click the link (yellow part) in the figure below to download and install the linux kernel update package for wsl2, and restart the computer as prompted.
If you see the following interface, the installation starts successfully.
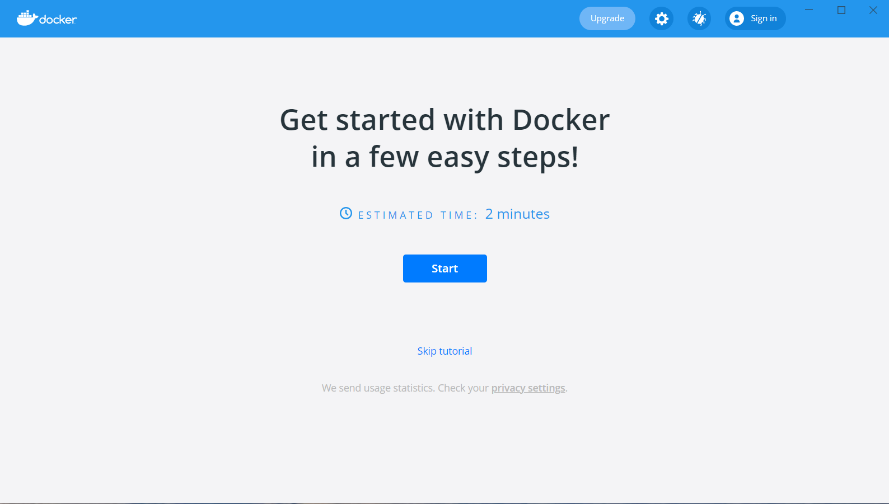
In addition, you can also see "Docker Desktop Service" in the Windows service list

Run PowerShell or CMD as an administrator in Windows, execute docker --version to confirm that the docker command can run normally.

Execute in PowerShell or CMD command line:
docker pull matrixdb/centos7_demo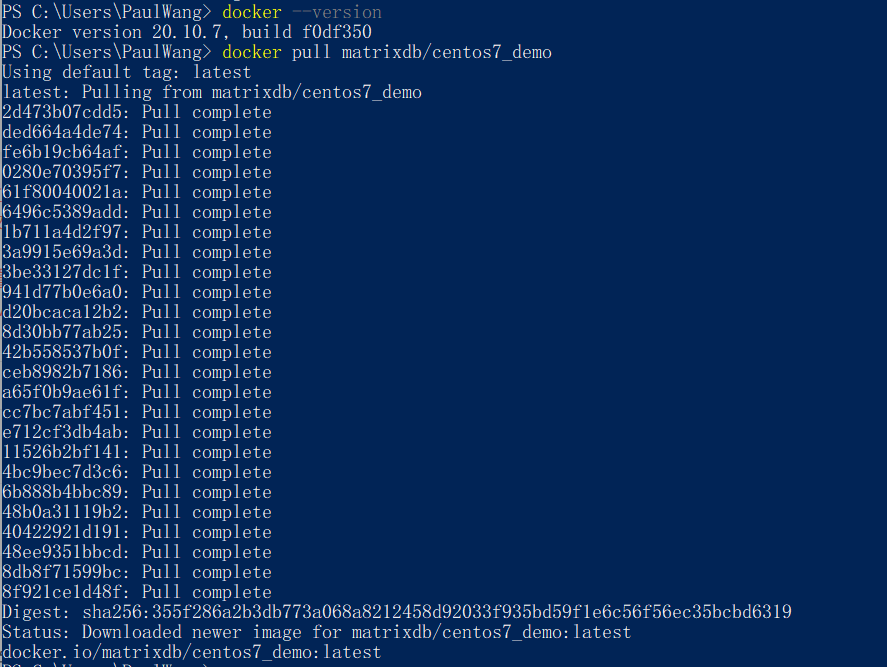
docker run -it -p 5432:5432 --name mxdemo matrixdb/centos7_demoMain parameters description:
Modify the pg_hba.conf configuration file to allow access to the database from outside through the username and password.
vi /home/mxadmin/data/master/gpseg-1/pg_hba.confAdd to the last line:
host all all 0.0.0.0/0 md5
Reload pg_hba.conf to make it effective.
gpstop -u[mxadmin@2e807ee654a2 ~]$ psql -d postgres
psql (12)
Type "help" for help.
postgres=# alter role mxadmin with password 'mxadmin';
ALTER ROLE
postgres=# create database testdb;
CREATE DATABASEBecause the current session is a session when creating a container, directly entering exit to exit the container command line will cause the running docker container to stop.
The correct way is to use the CTRL+D command to exit, or directly close the PowerShell window.
Use the docker start command to add CONTAINERID to start the container. Note that CONTAINERID only writes the first 4 characters.
Use the docker ps command to view CONTAINERID and start:
PS C:\Users\PaulWang> docker ps -a
CONTAINER ID   IMAGE                   COMMAND                  CREATED          STATUS                     PORTS     NAMES
2e807ee654a2   matrixdb/centos7_demo   "/home/mxadmin/entry…"   33 minutes ago   Exited (0) 2 minutes ago             mxdemo
PS C:\Users\PaulWang> docker start 2e80
2e80
You can also click the start button in the Docker Desktop graphical interface to start the container.

Log in with root account:
docker exec -it 2e87 /bin/bashLog in with mxadmin account:
docker exec -it -u mxadmin 2e87 /bin/bashThe following management commands are used to manage the database (note: use the mxadmin account):
psql to access the database in the container[mxadmin@2e807ee654a2 /]$ psql -d testdb
psql (12)
Type "help" for help.
testdb=# create table tb1(id int,name varchar(20)) distributed by(id);
CREATE TABLEUse the docker stop plus the CONTAINERID command to stop the running container:
PS C:\Users\PaulWang> docker stop 2e80
2e80
You can also click the stop button to stop the docker container in the graphical interface of docker desktop.

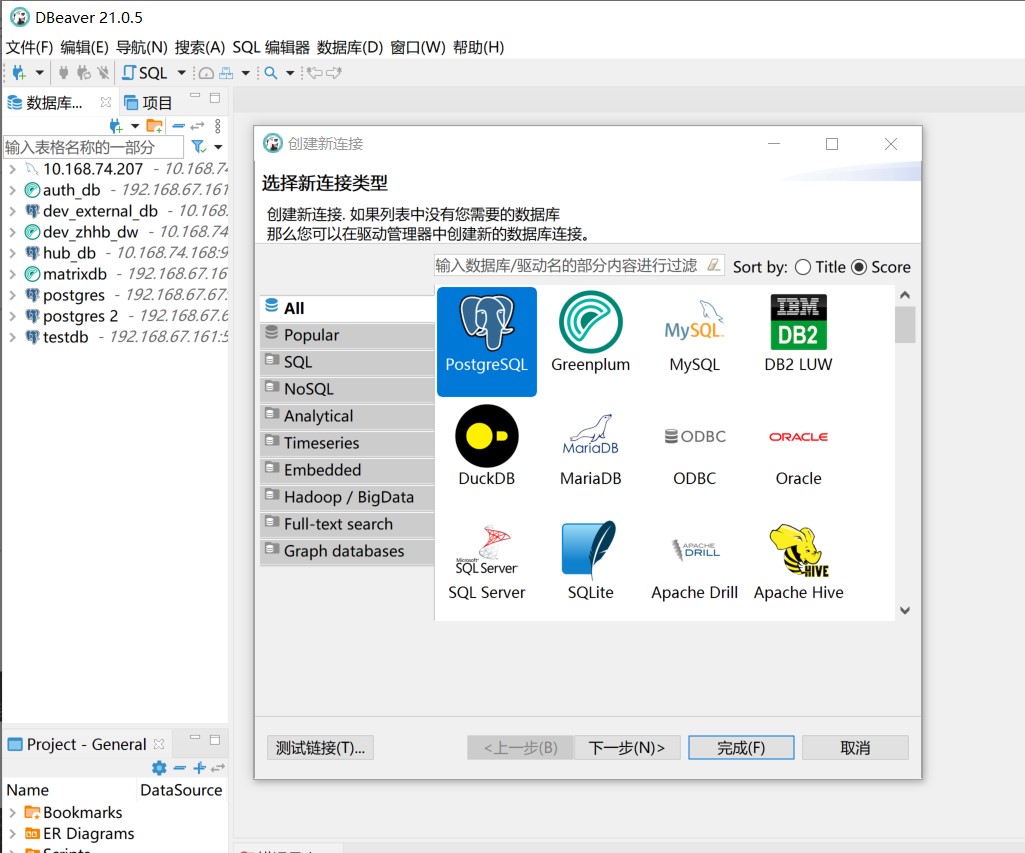
This article demonstrates how to access MatrixDB using DBeaver. First download the community version from [official website] (https://dbeaver.io/).
Select "PostgreSQL" for connection type:
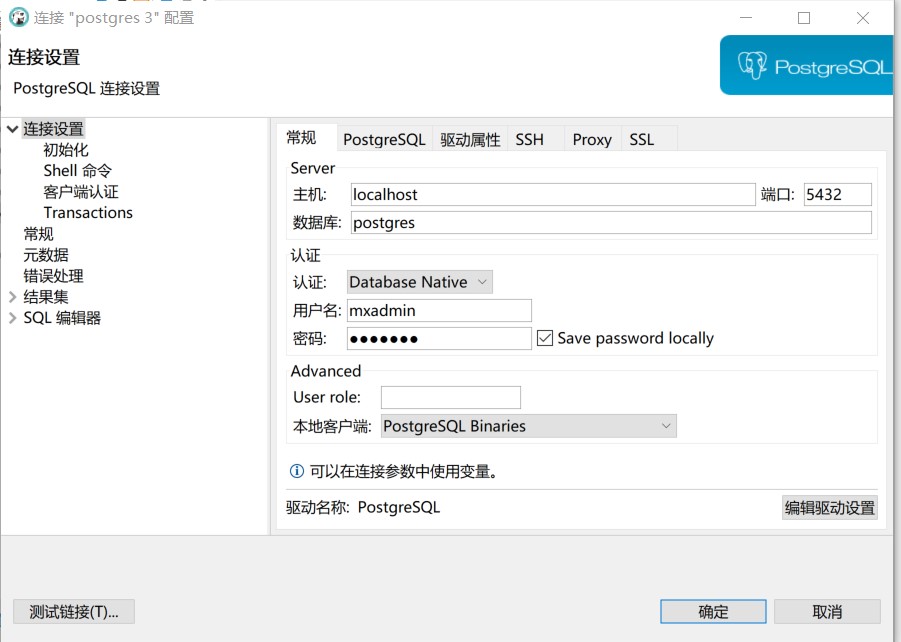
Fill in the database connection information, including username and password.
(Note that in this case, the port of the Docker container has been mapped to the Windows server, so the IP address here can be directly filled in localhost)
On the PostgreSQL tab, check "Show non-default databases".
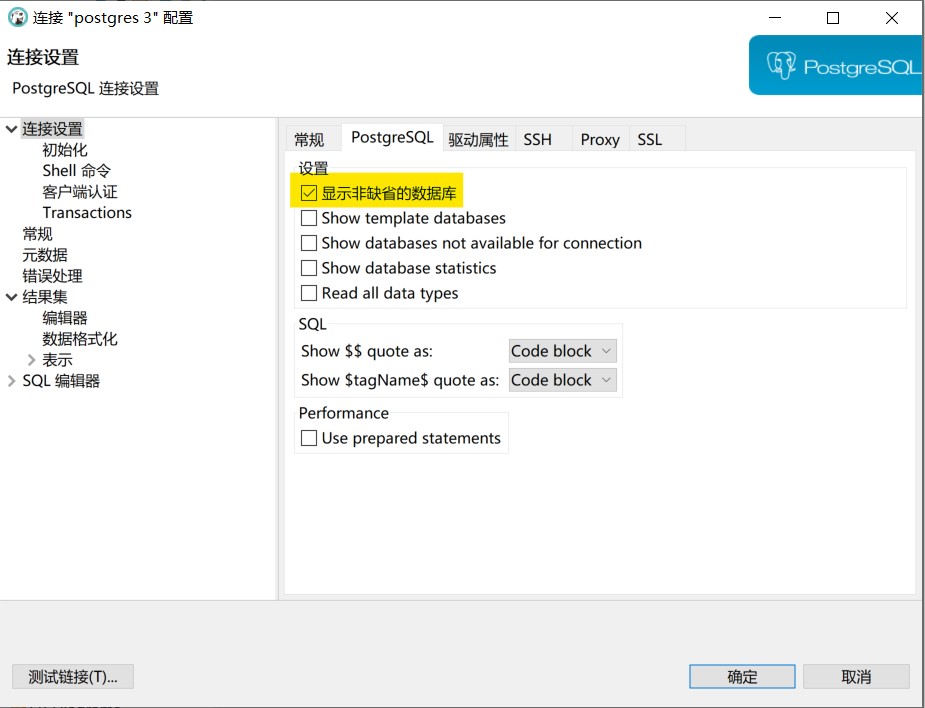
Click "Test Connection", or "OK" to complete the connection configuration.